We’re making good progress with my oldest son’s bedroom makeover.
Planks are up and painted, new closet doors have been ordered and I’m off to pick up some vintage school pieces I won at a school surplus auction tomorrow to decorate the room.
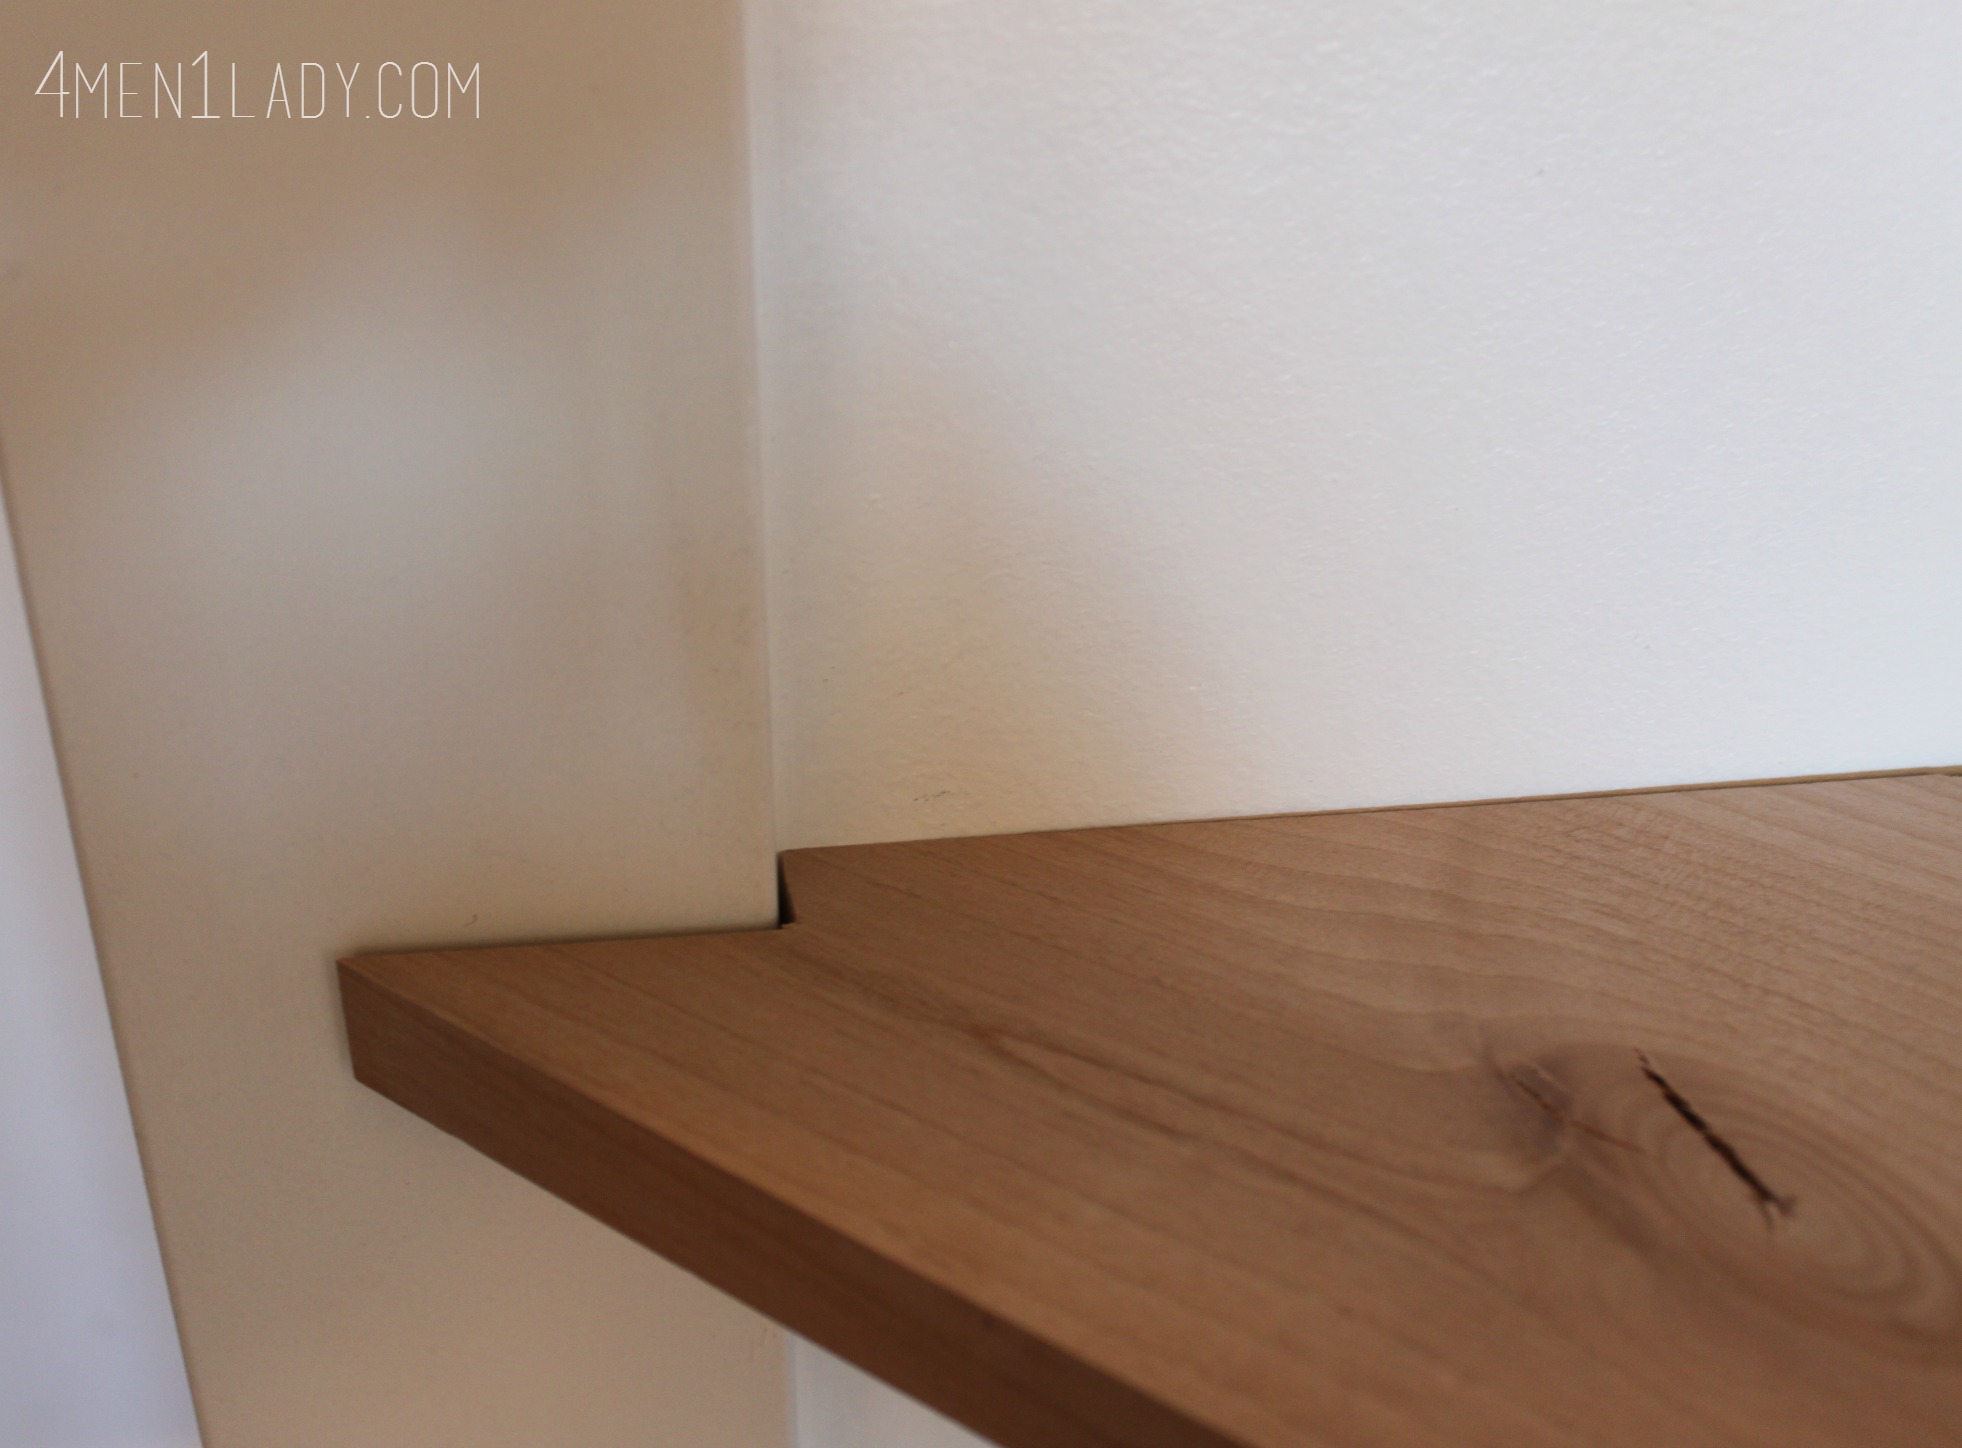
A linen closet on the other side of this wall is the reason there is this little jog of a space.
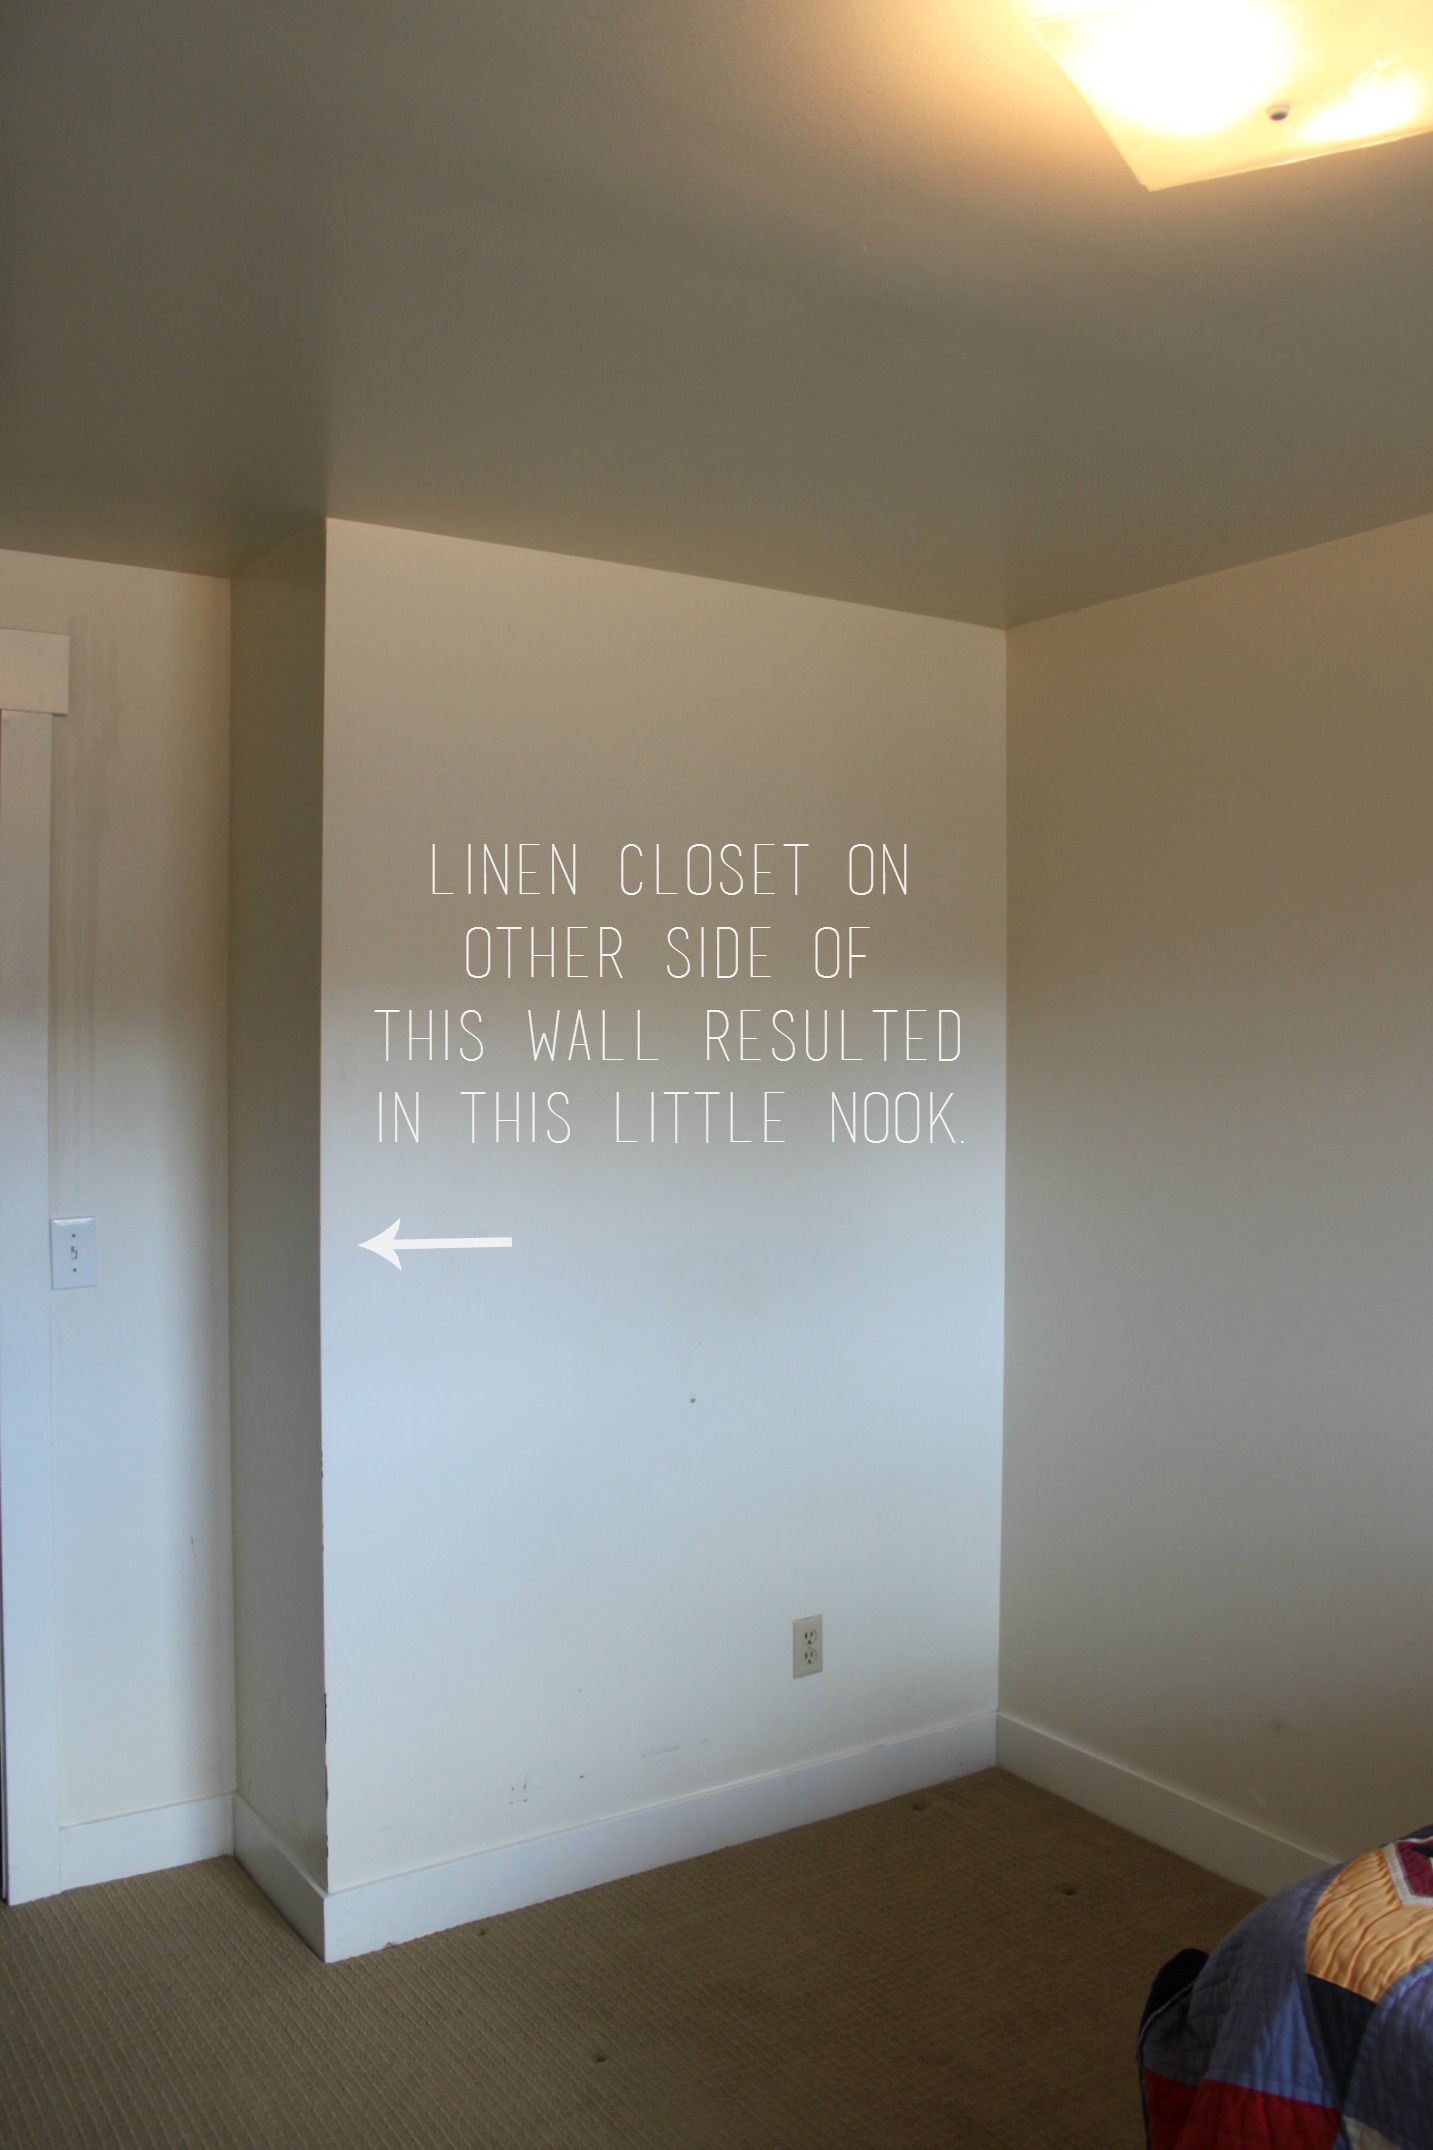
It’s a really annoying pop-out. I almost wish they would have just made the linen closet bigger on the other side of the wall in order to keep the whole wall flush. There’s just barely enough room for a twin sized bed. If I wanted to put a night stand next to the bed it would be floating in the middle of the room in front of that nook. Not exactly ideal.
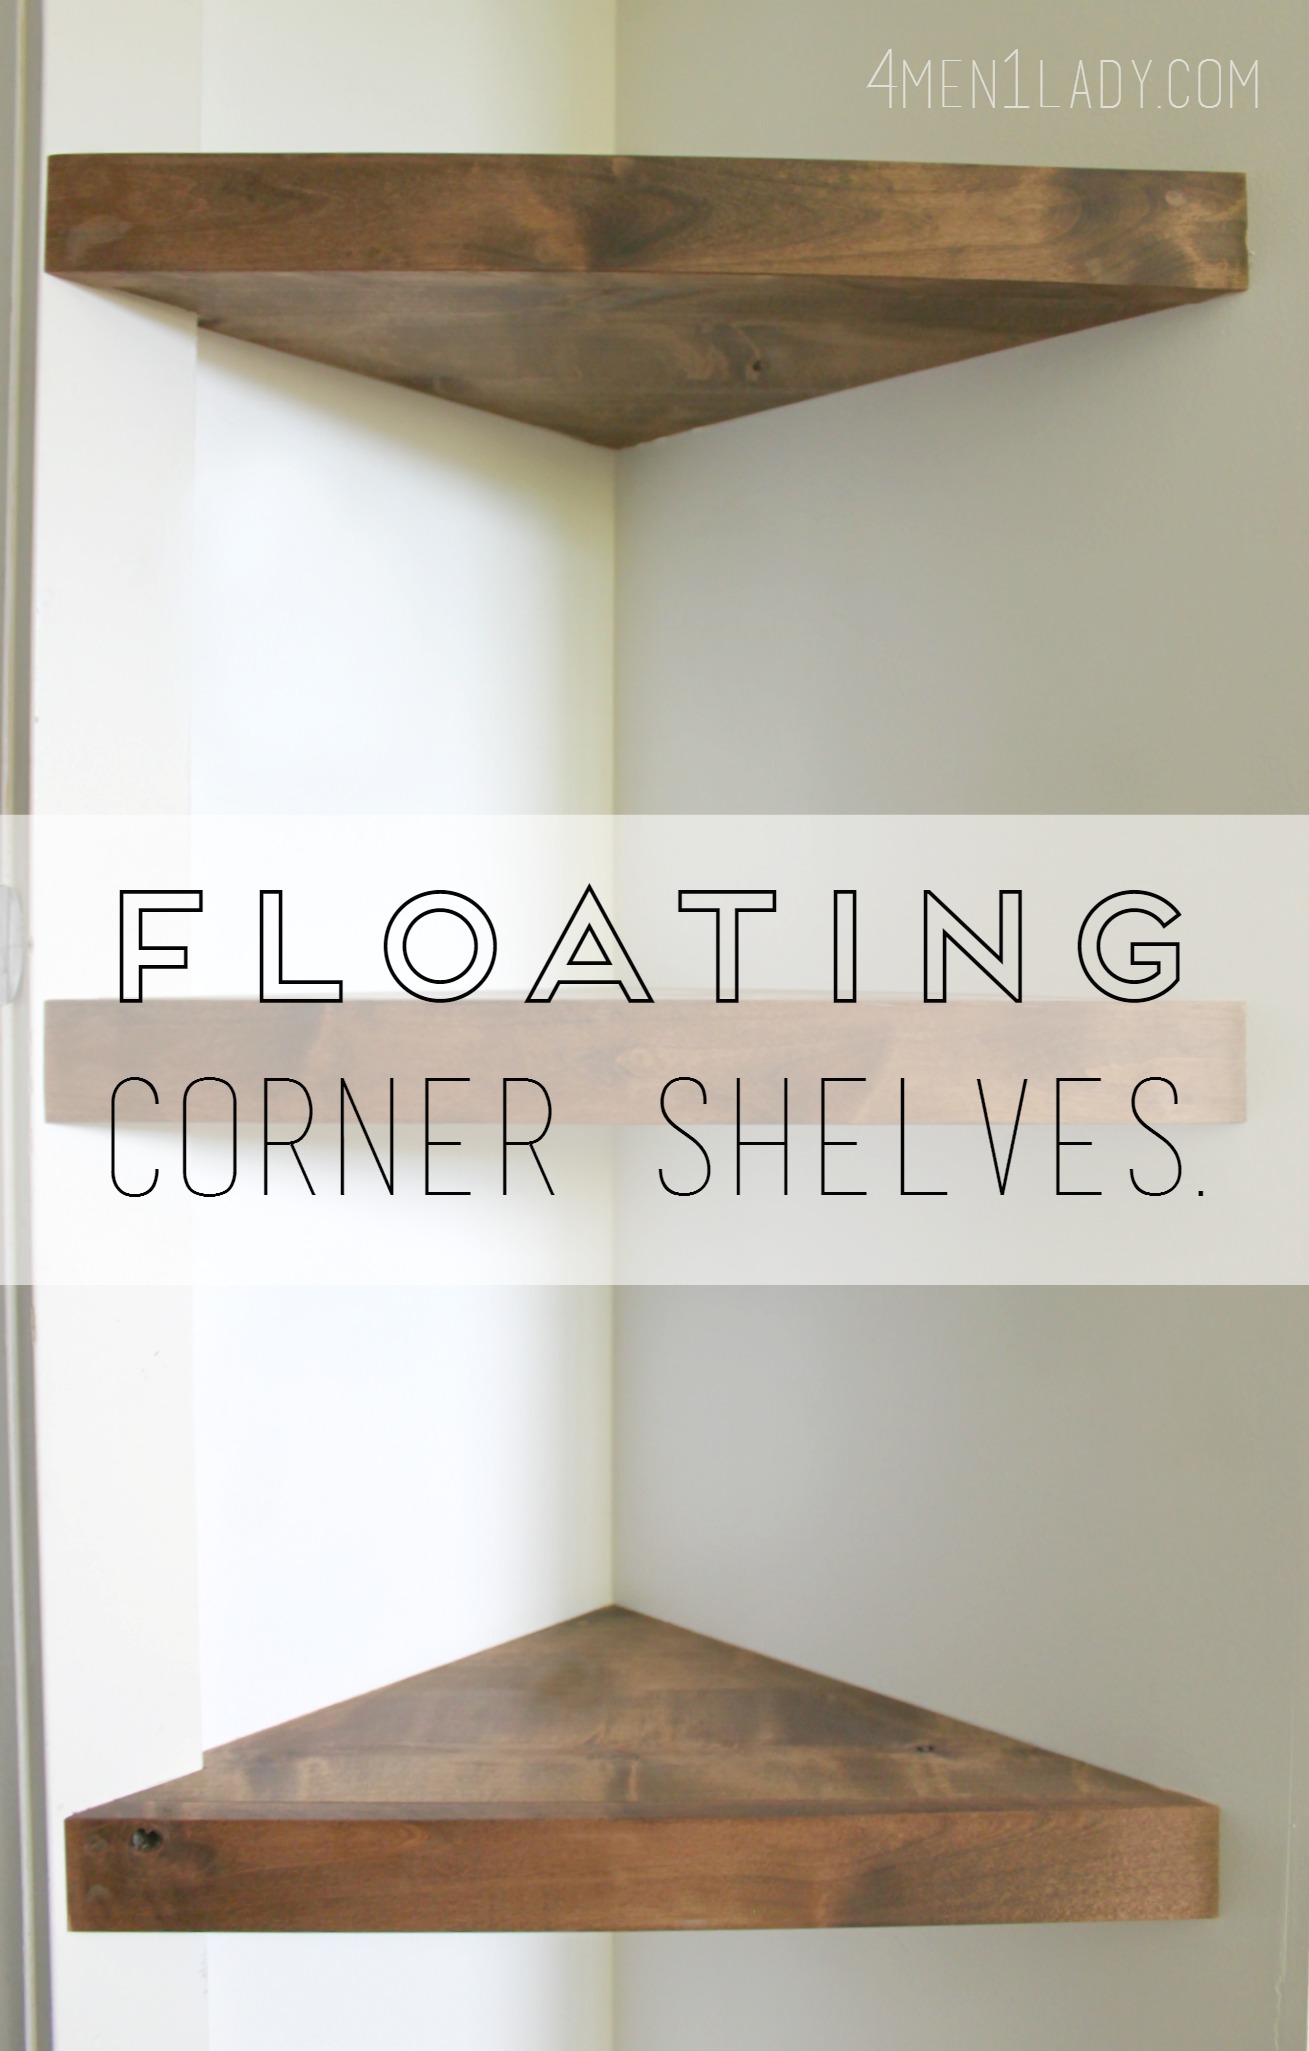
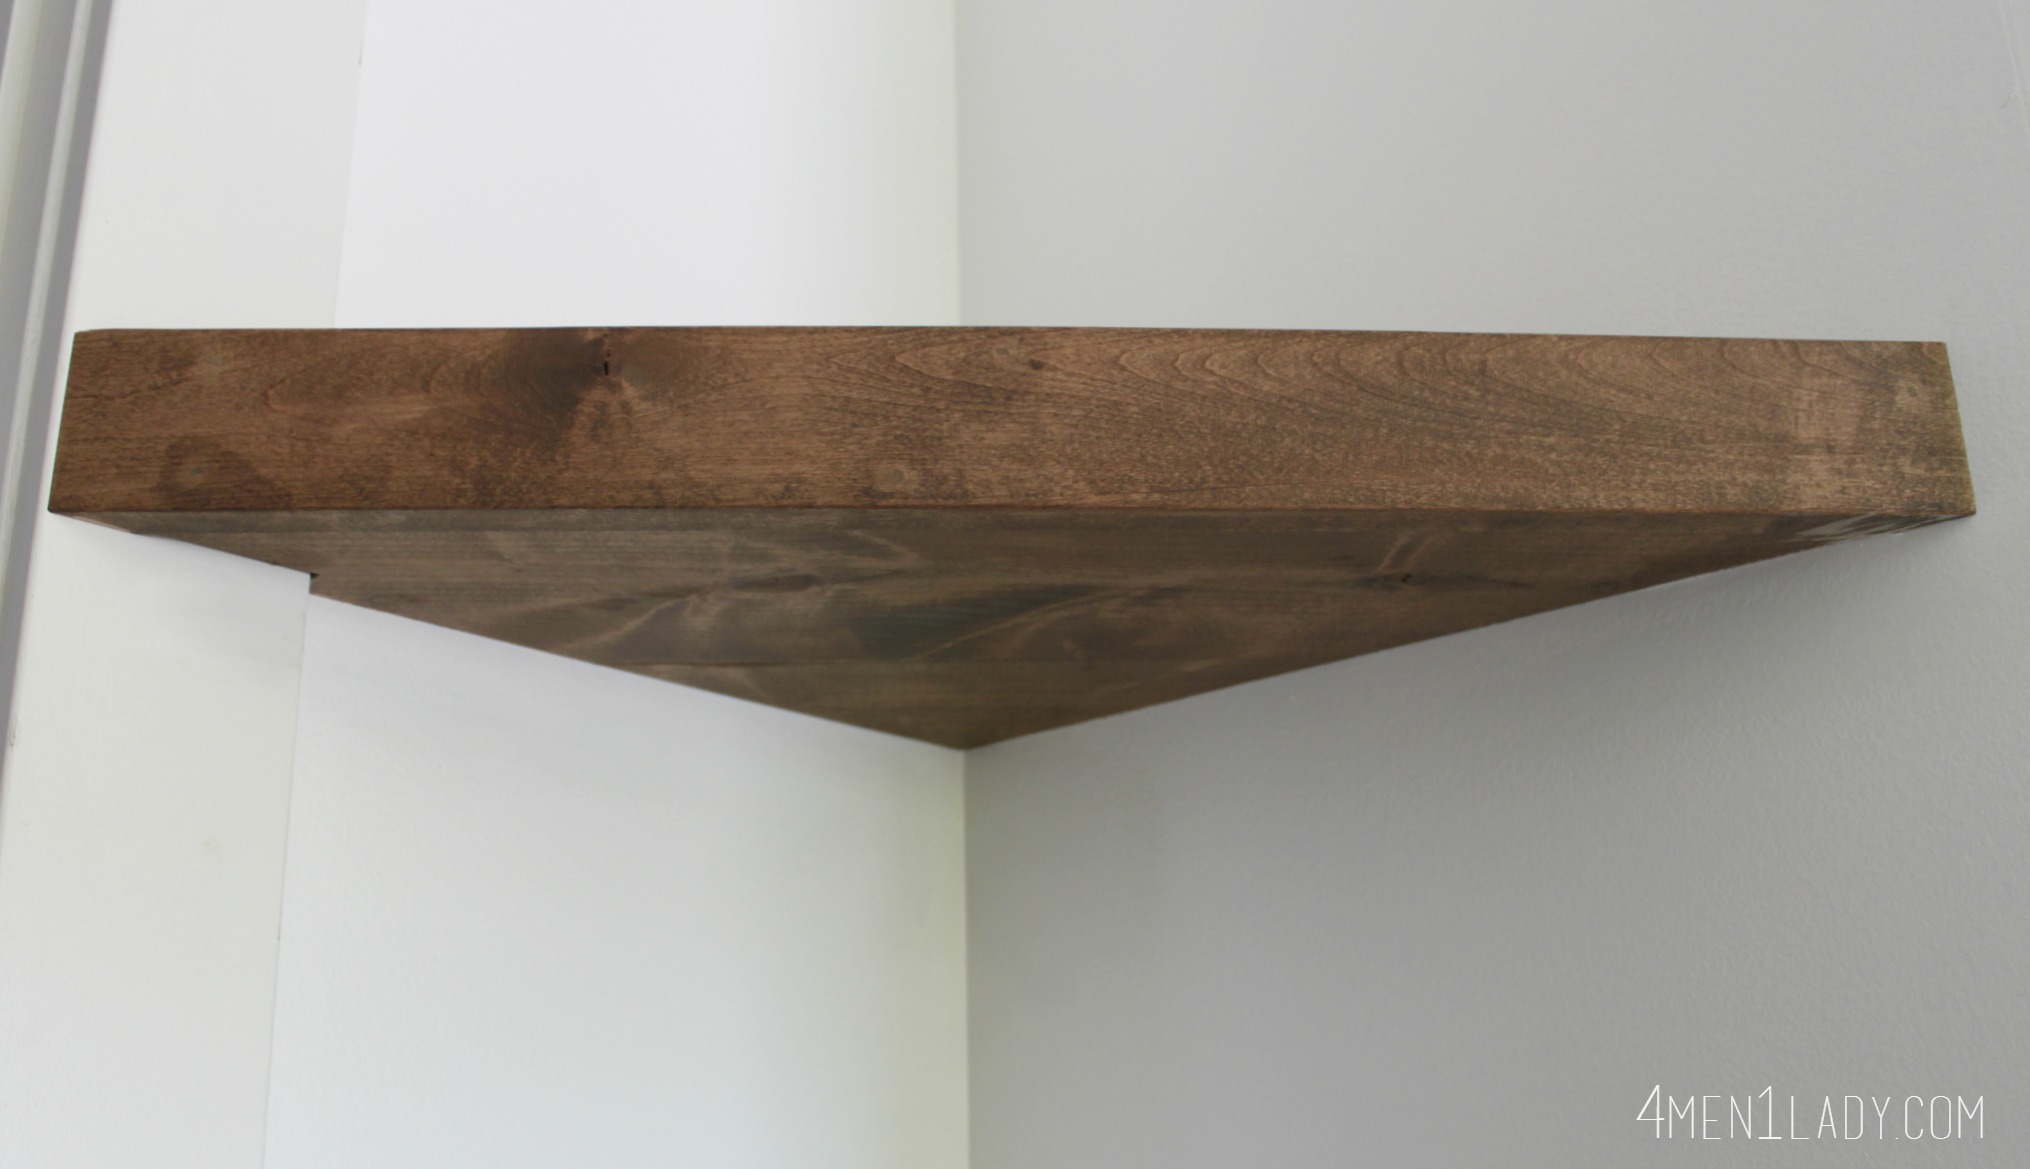
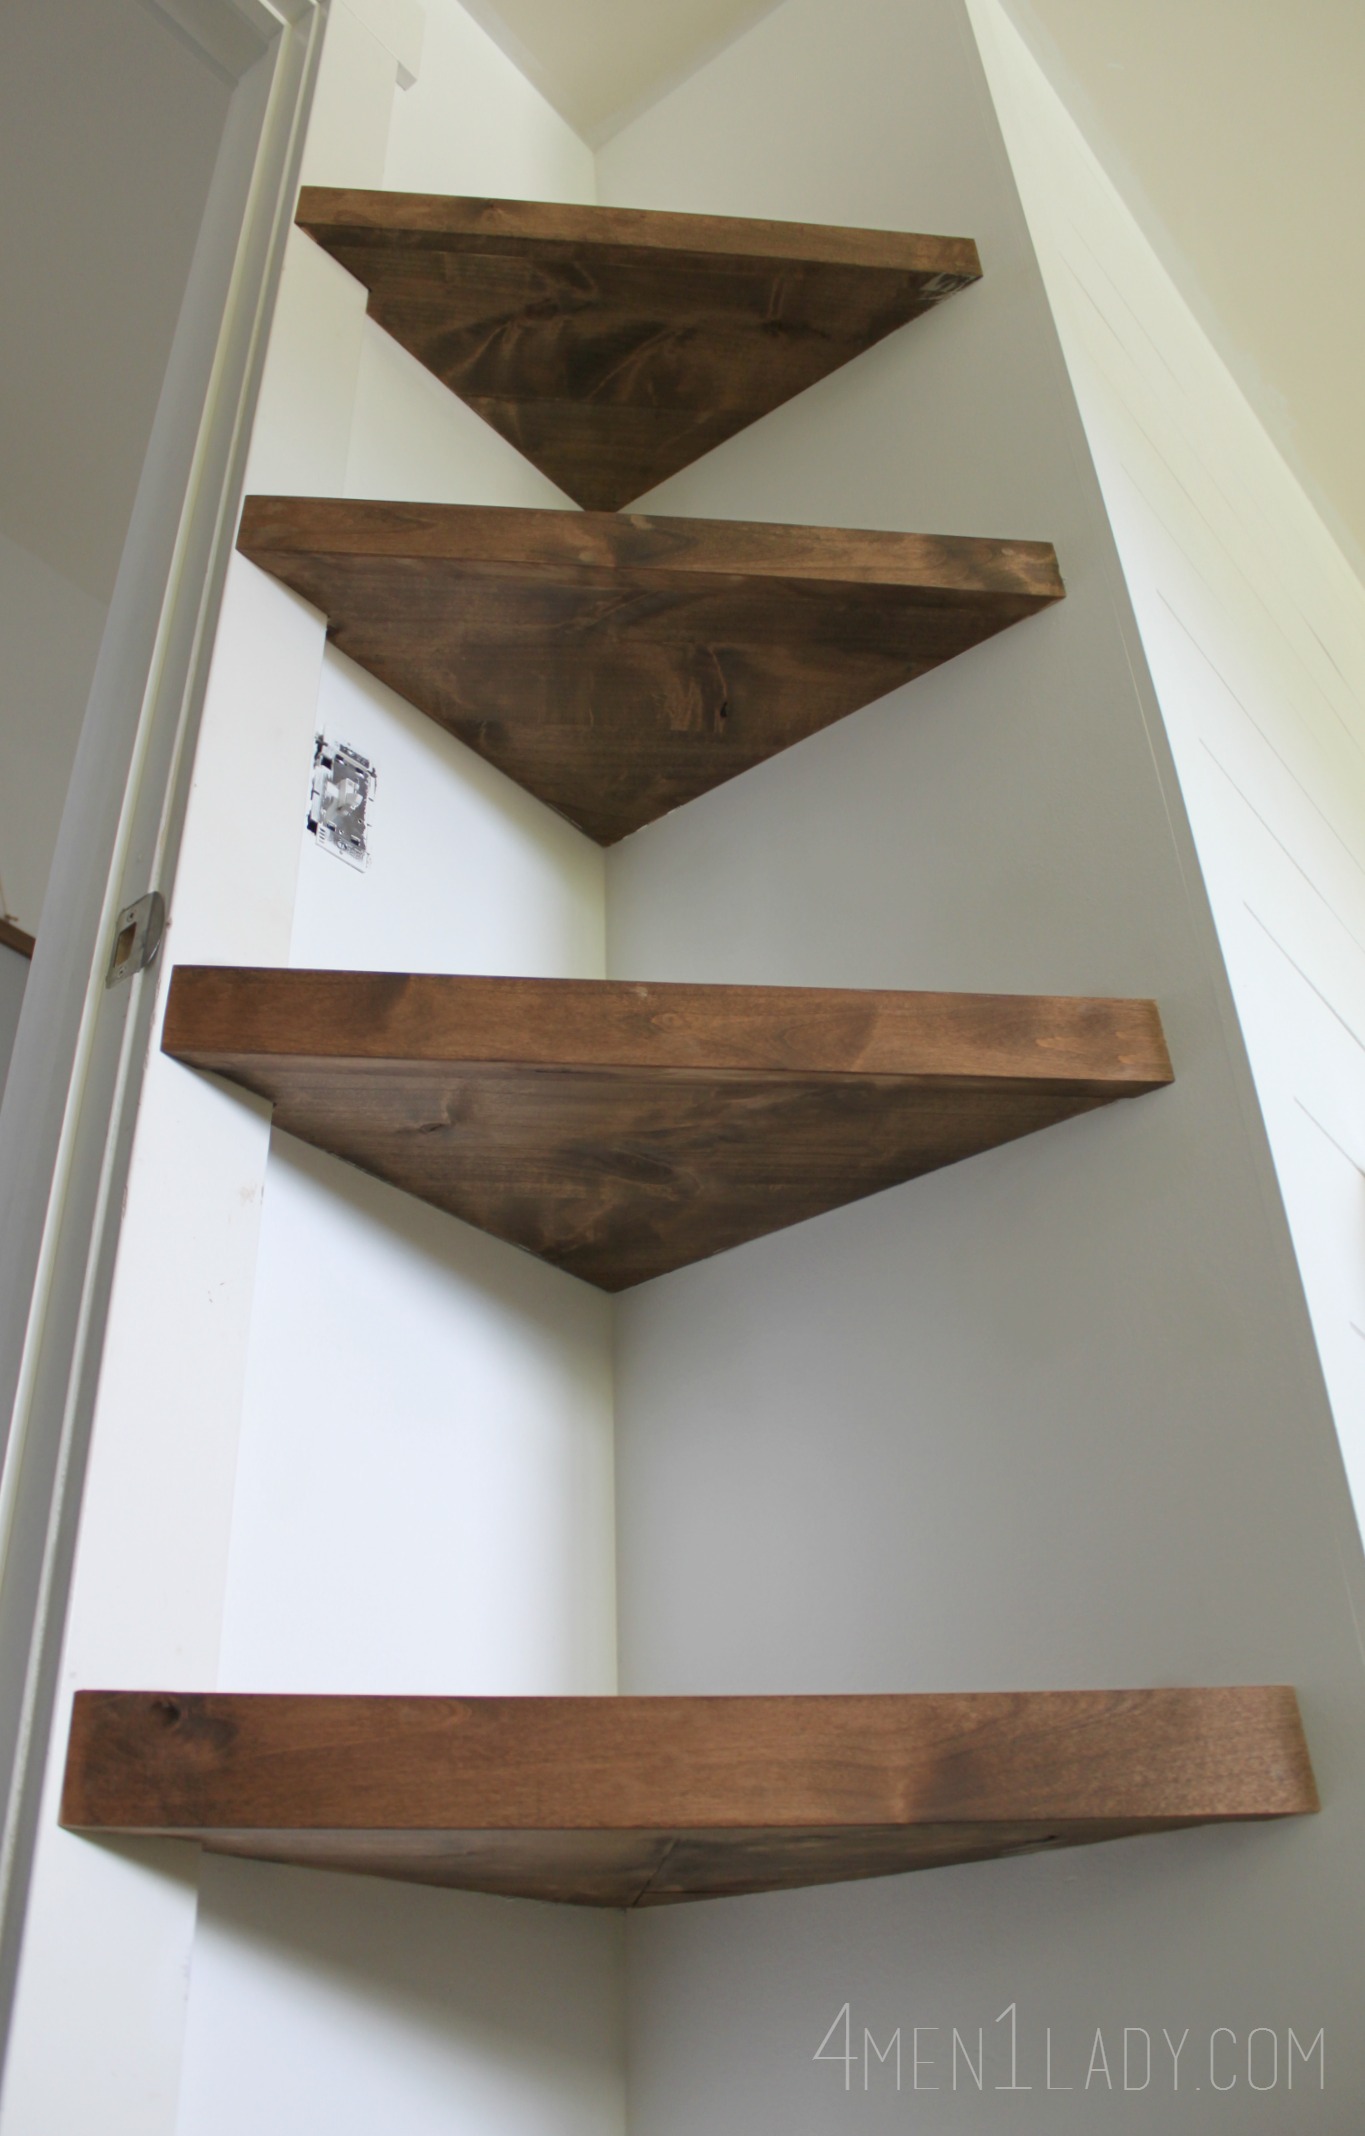
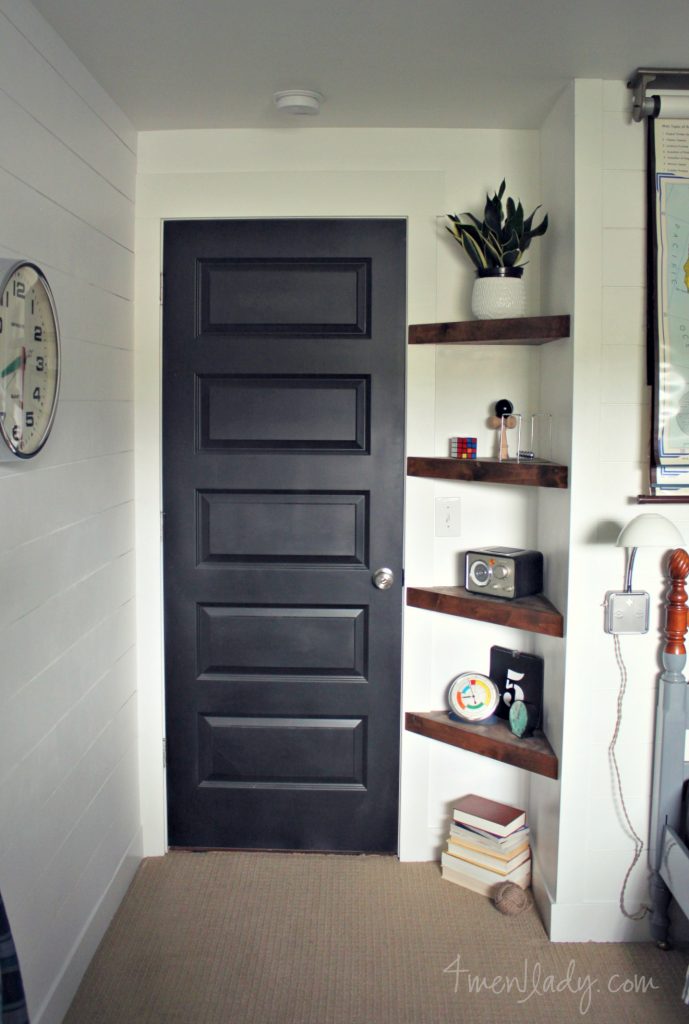
My solution…when life gives you lemons make floating shelves.
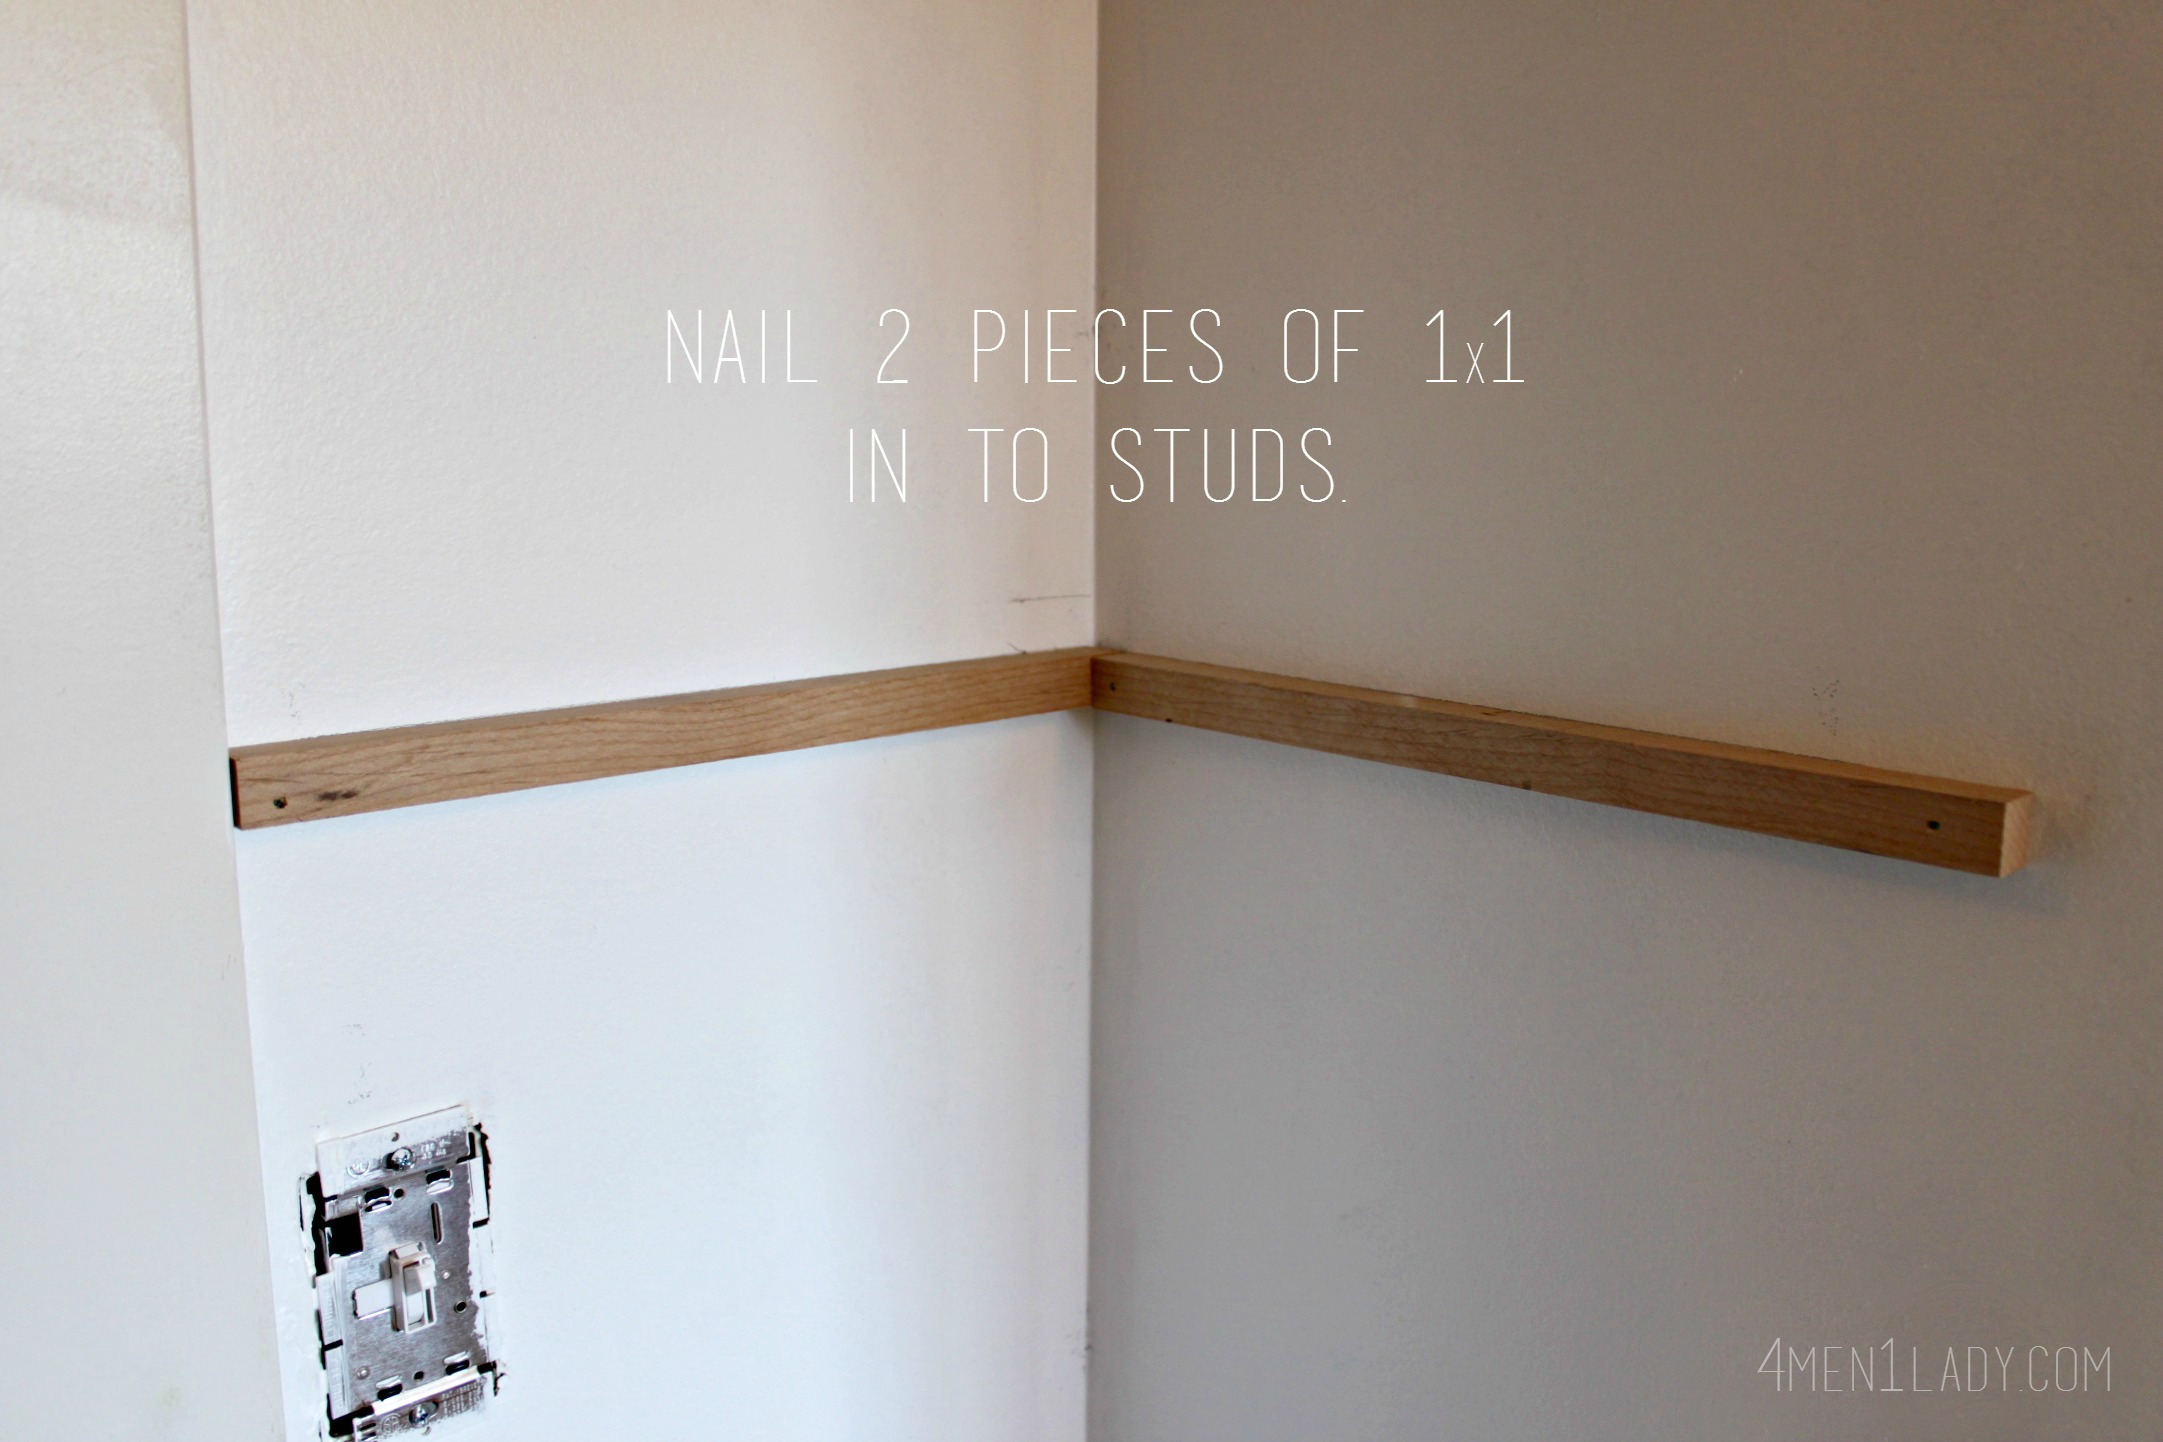
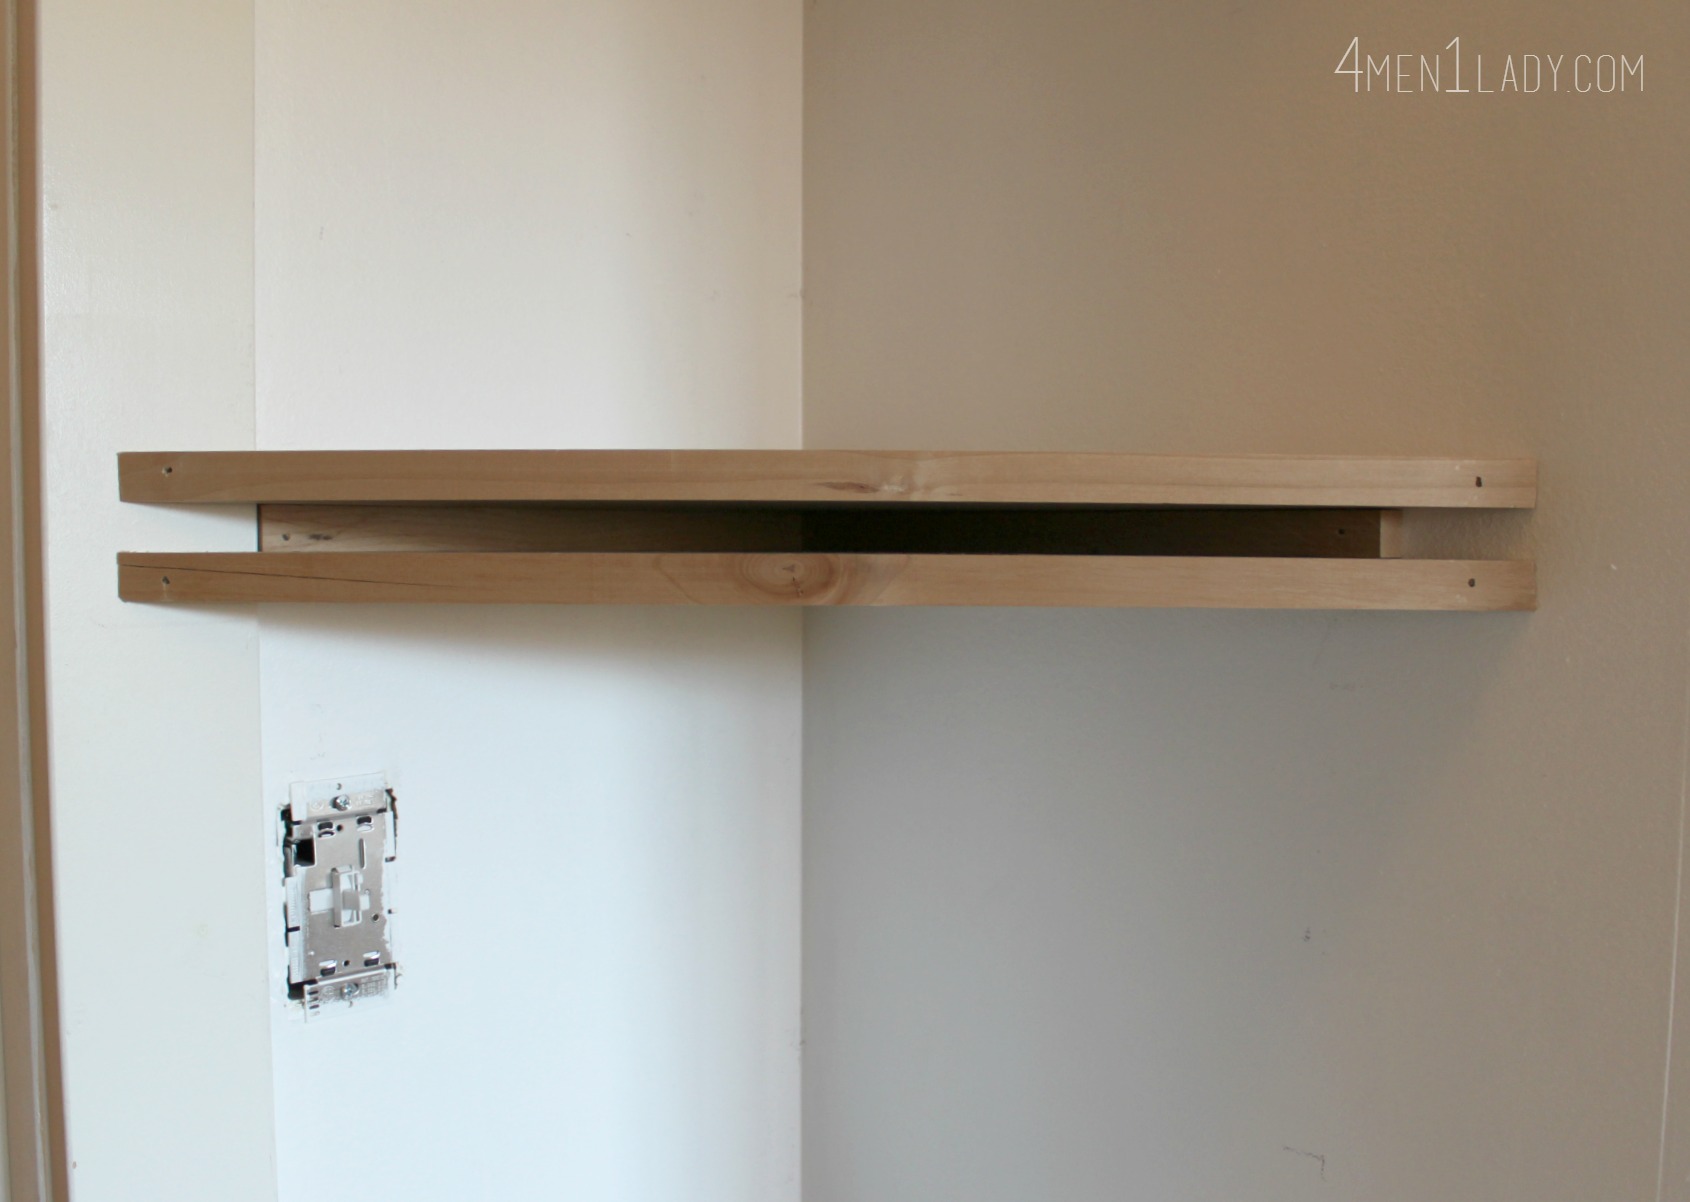
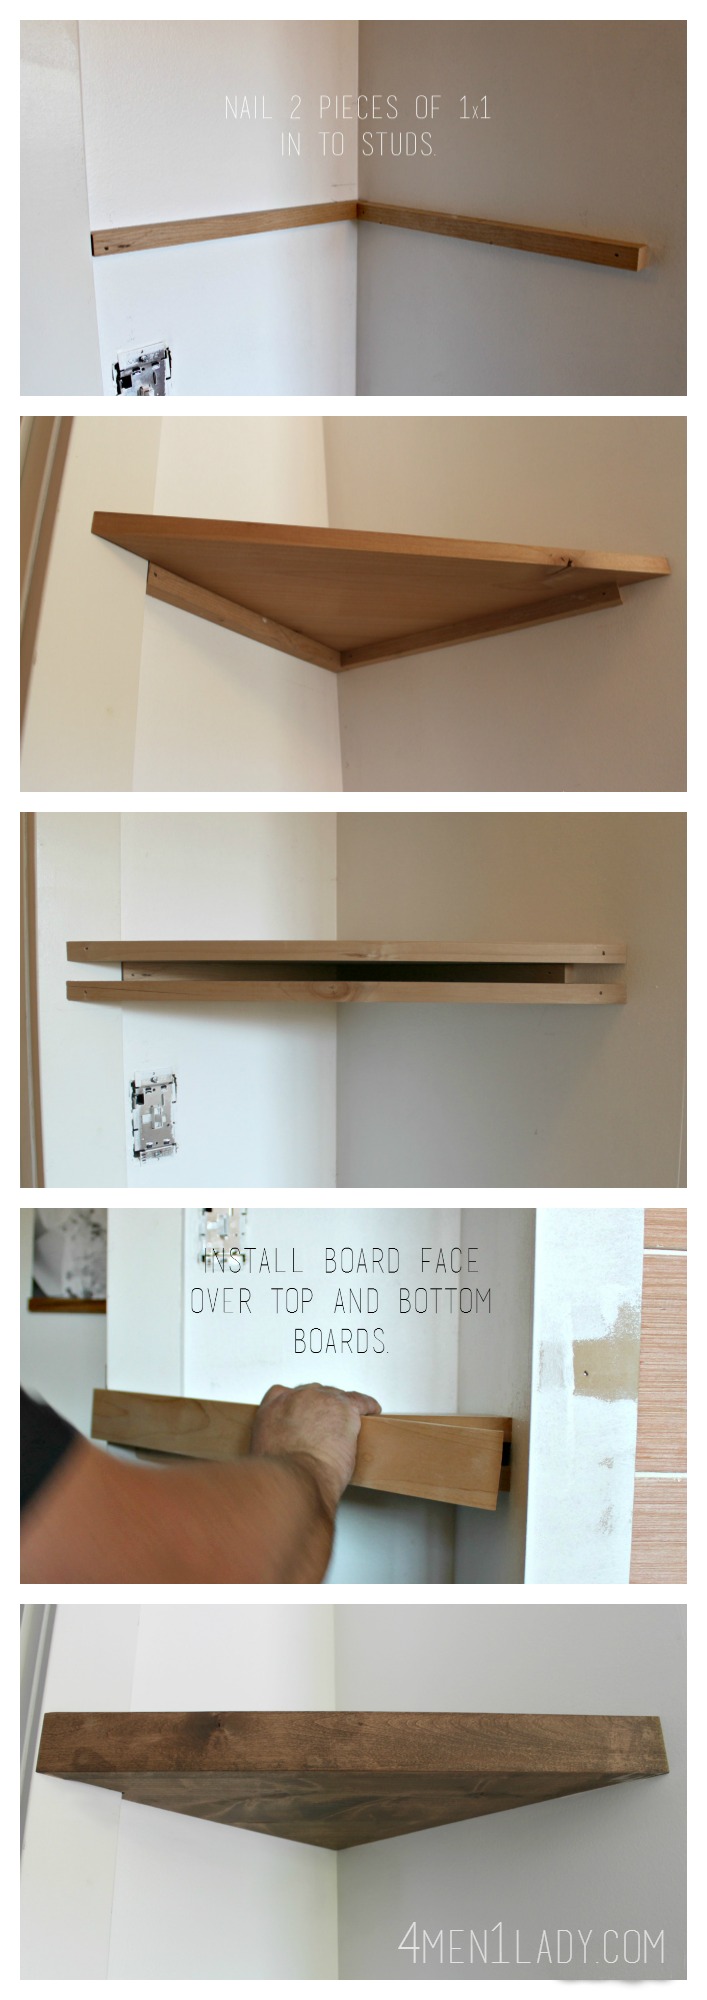
Making them is not as difficult as one might think. The wonderful carpenter I found on HomeAdvisor (who also installed the wall planks) whipped these up in no time. First, put up two pieces of 1×1 (which will be the main support for the shelves). Make sure to nail directly in to the studs behind the wall.
Next, cut a board so it aligns with your two walls. Nail directly in to the top of the board so it hits the 1×1 support underneath.
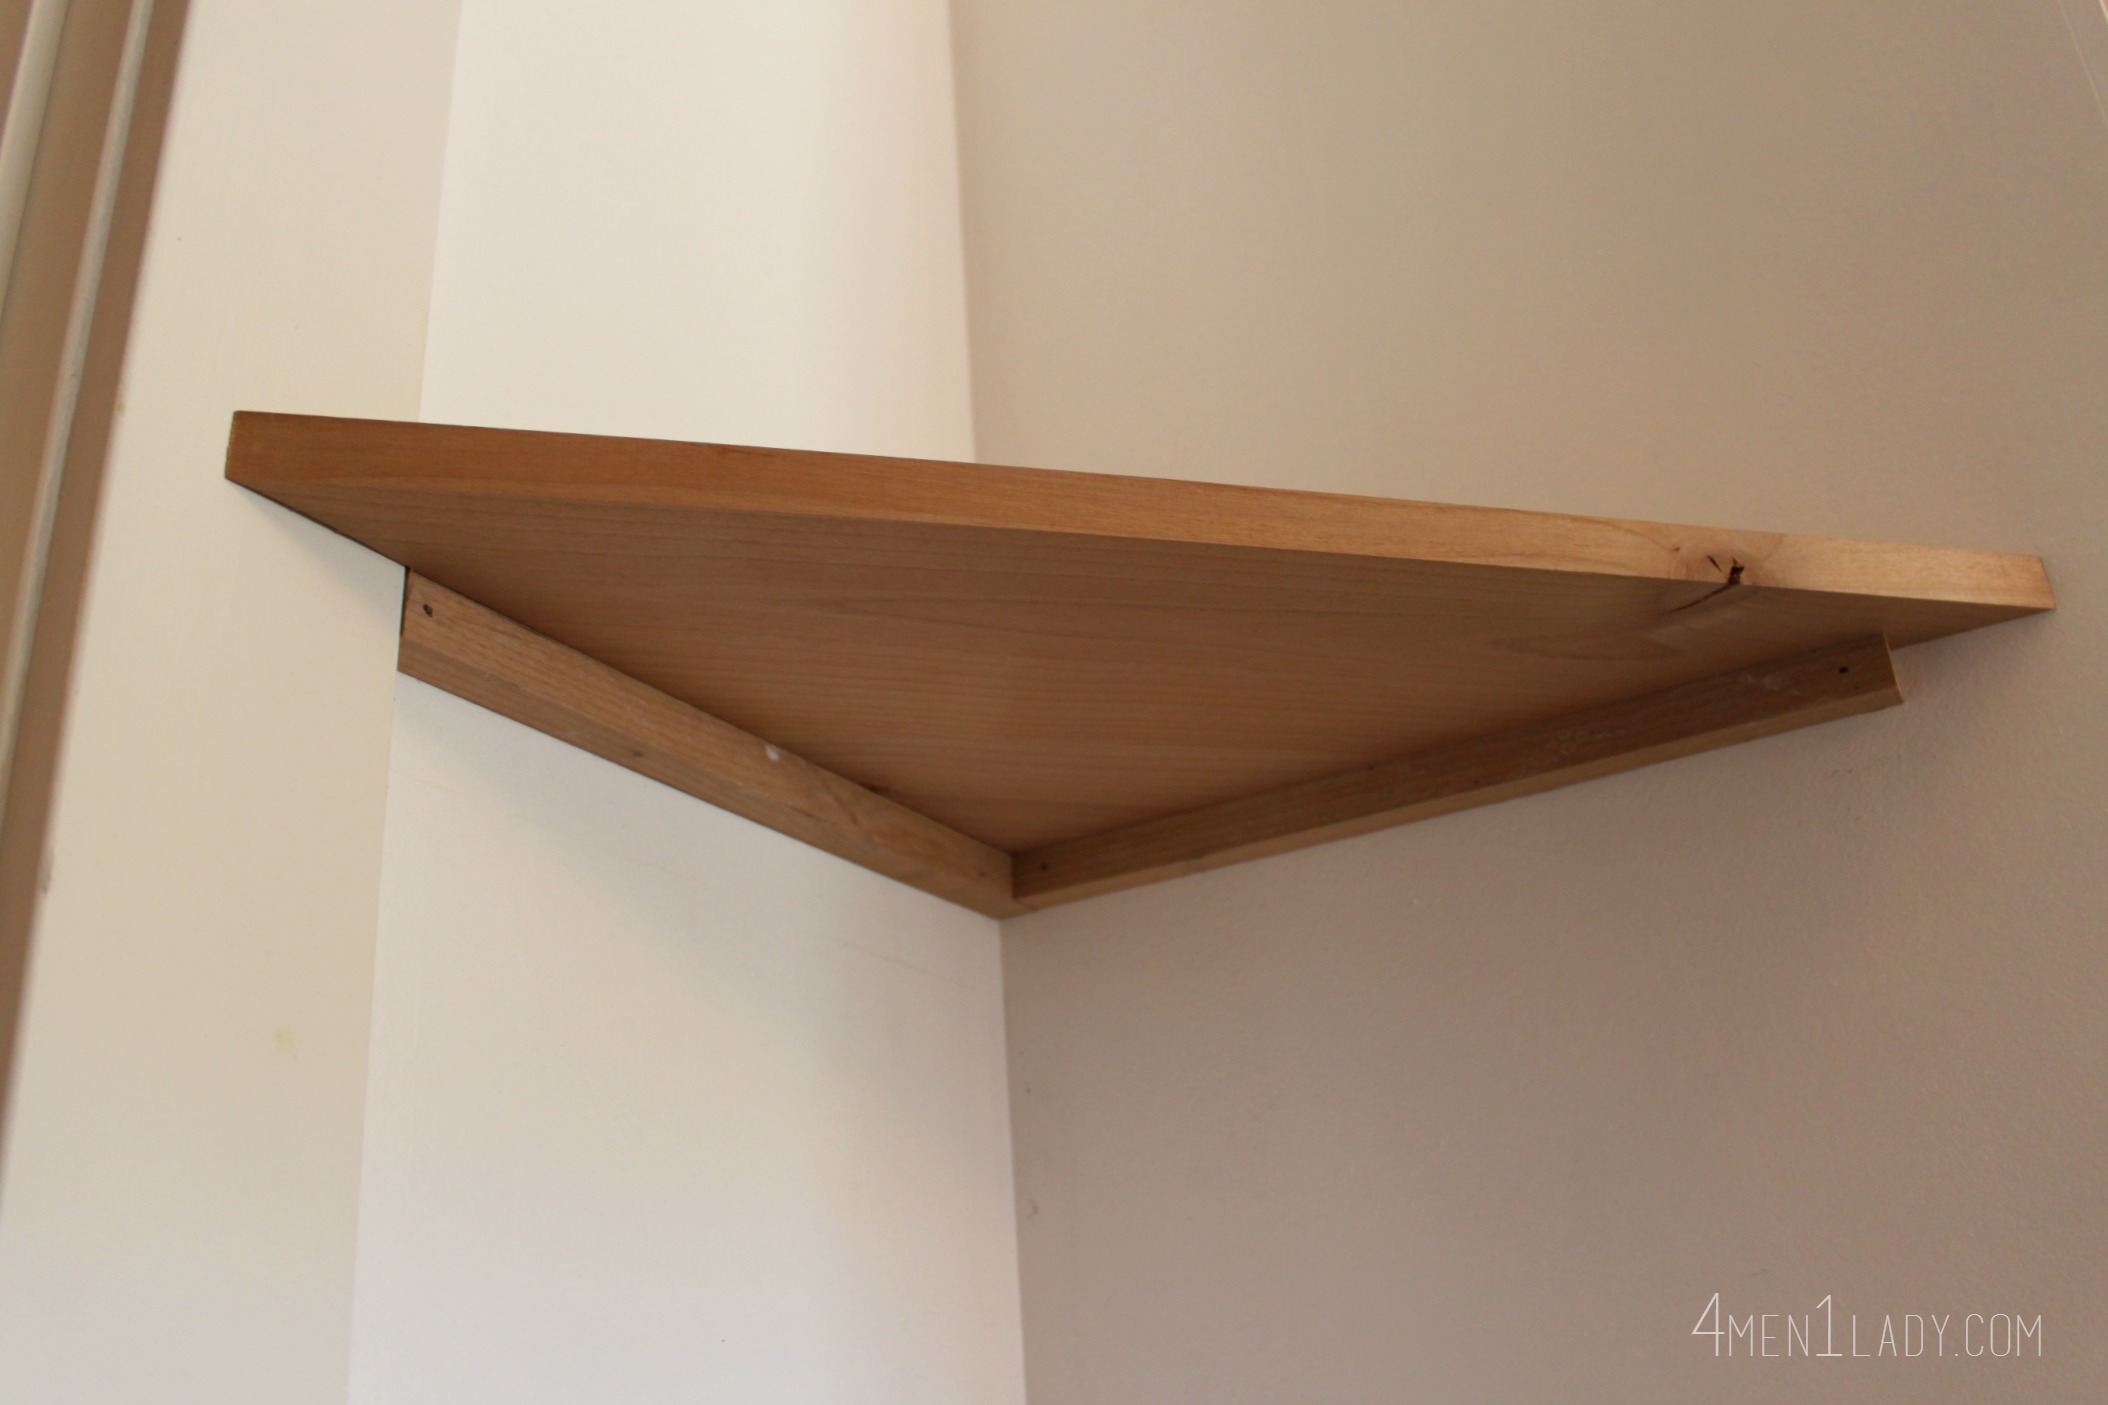
For the bottom of the shelf, cut an identical board as the top one and attach it under the 1×1.

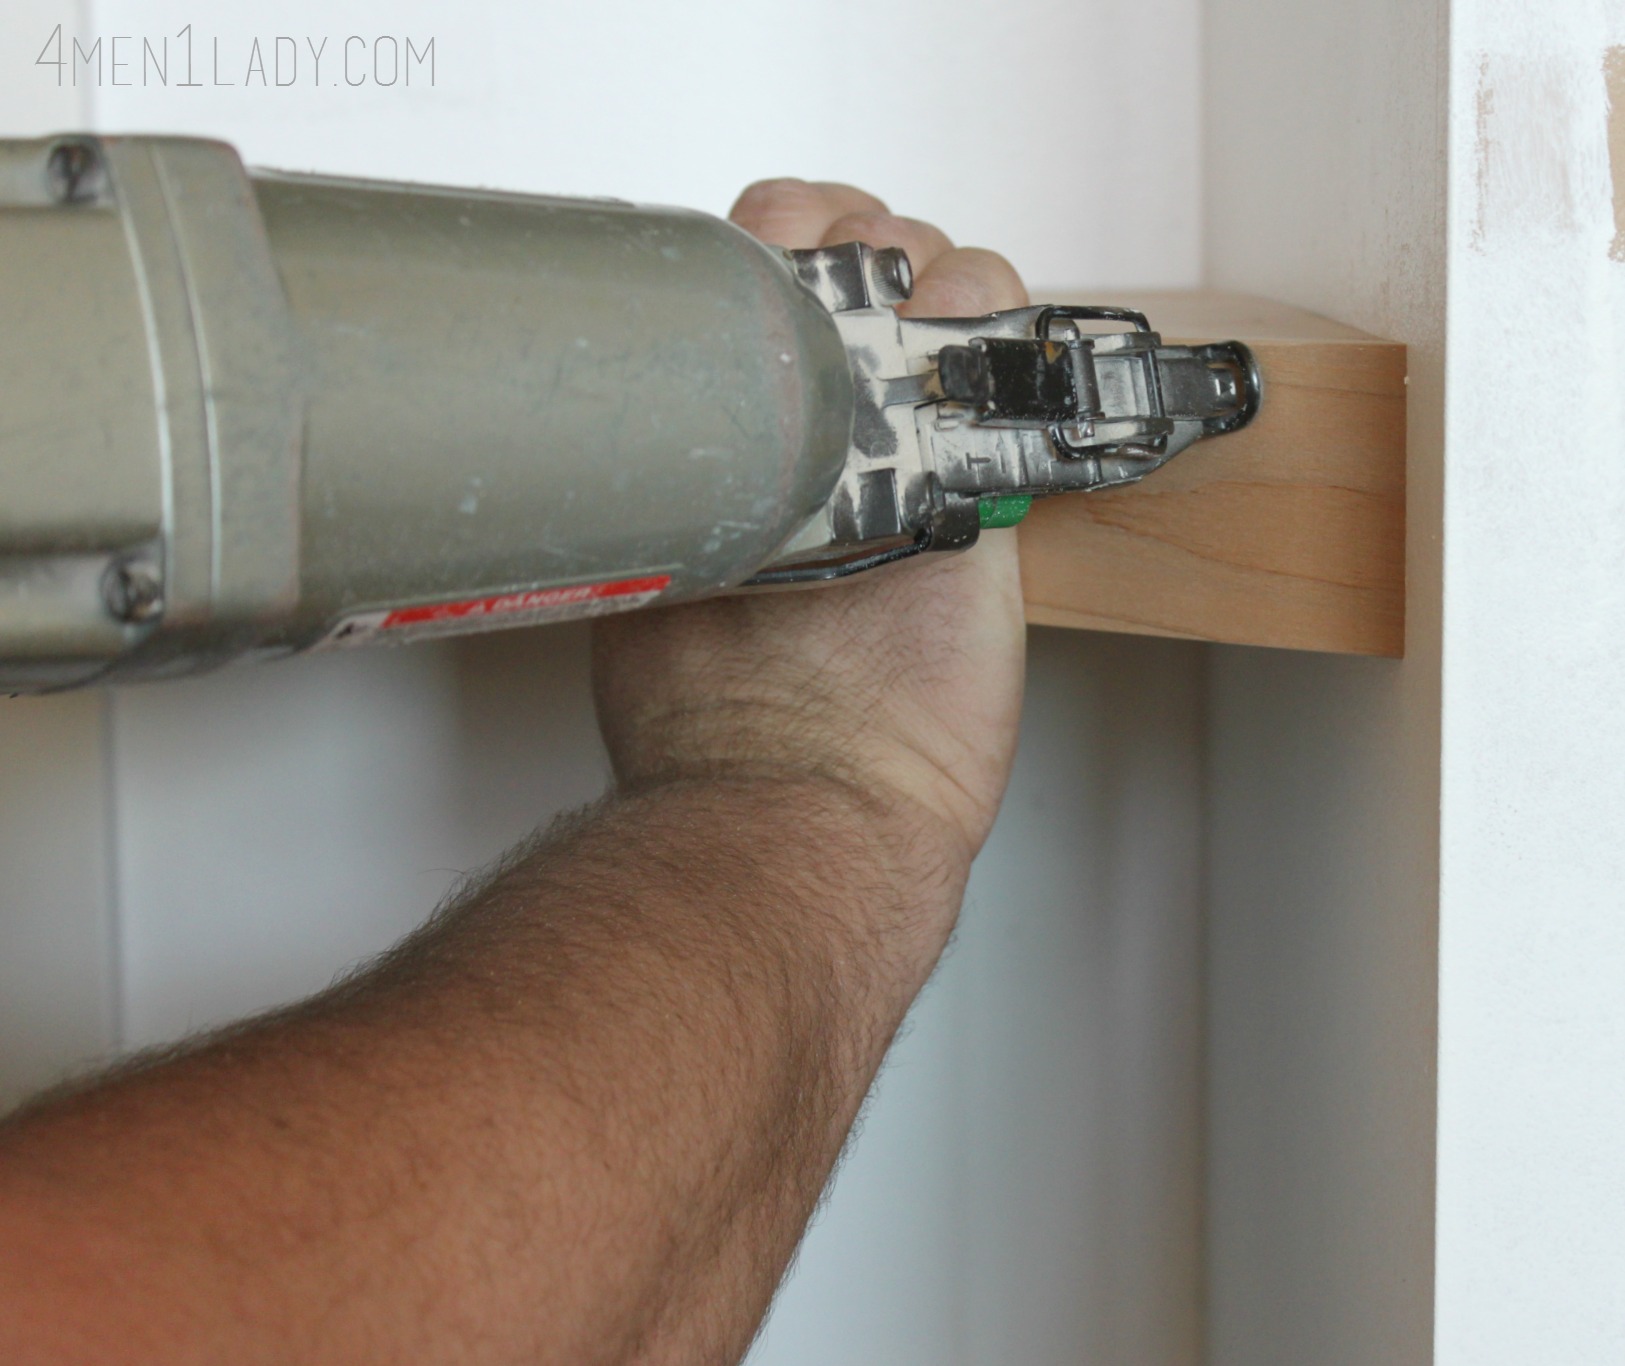
Measure a face board that will cover the gap, the top and the bottom boards.

As before, make sure you are nailing the face board in to the top and bottom boards.
I filled all the nails holes with stainable wood filler. It you look closely you can probably see where the wood filler is. Because the wood filler wasn’t the same color as the boards it also stained up differently. In hindsight I wish I would have not filled the nail holes and just left the holes undone for a more rustic look.
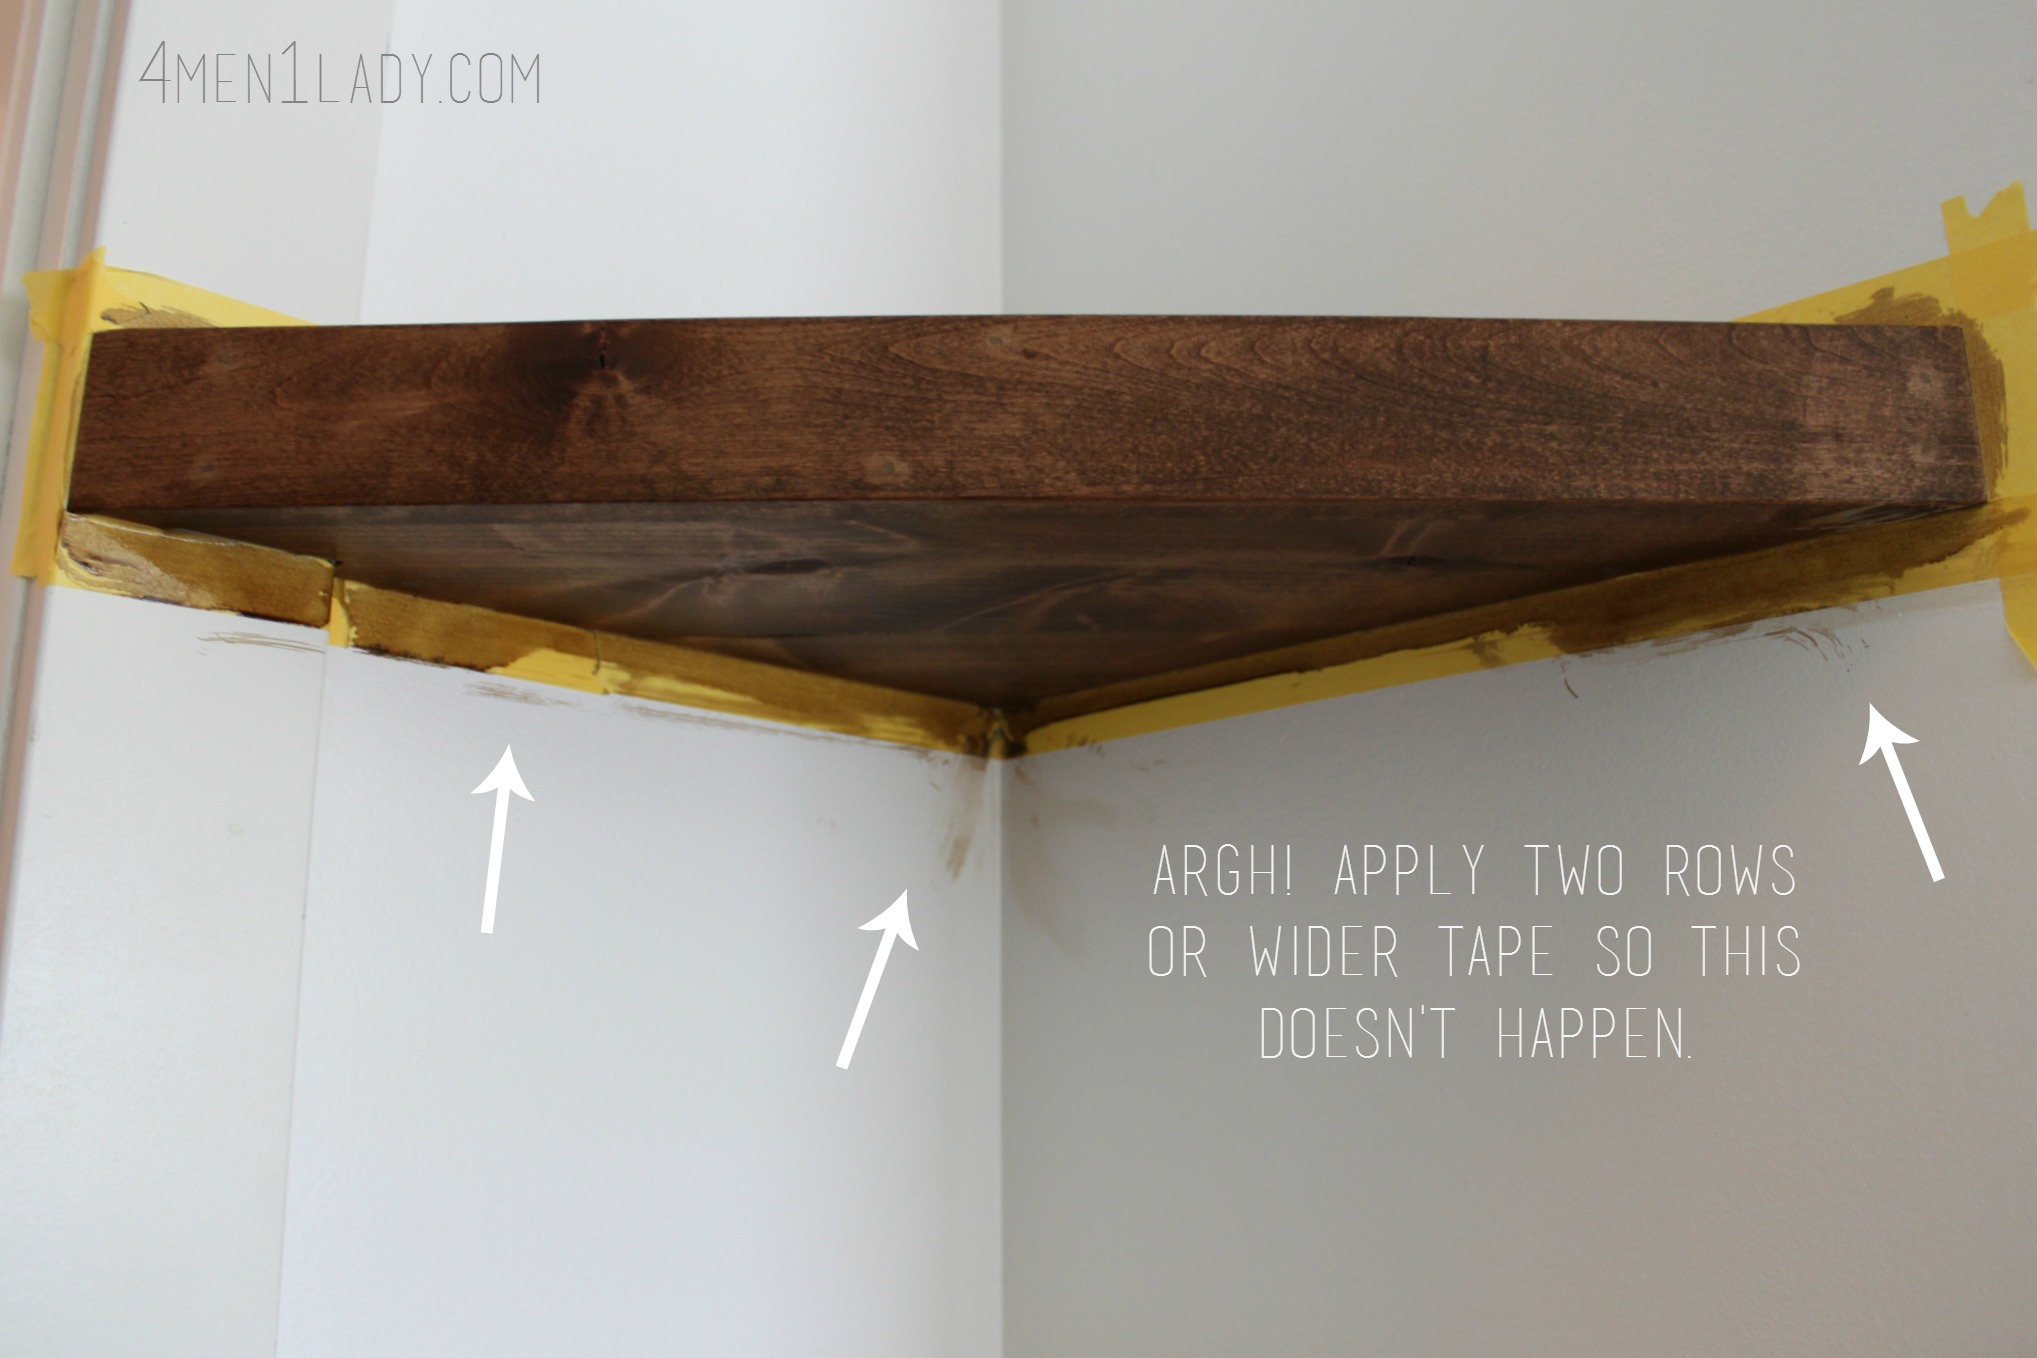
I used Frog tape to protect the wall which worked great on top but staining the underneath was a different story. Applying the stain without having it drip was really tricky. Save yourself from having to do paint touch up and use two rows of tape or wider tape when staining the underneath.
Now that the shelves are up I really love the odd little nook.
And that, my friends, is how we turn lemons in to lemonade (or rather floating corner shelves).
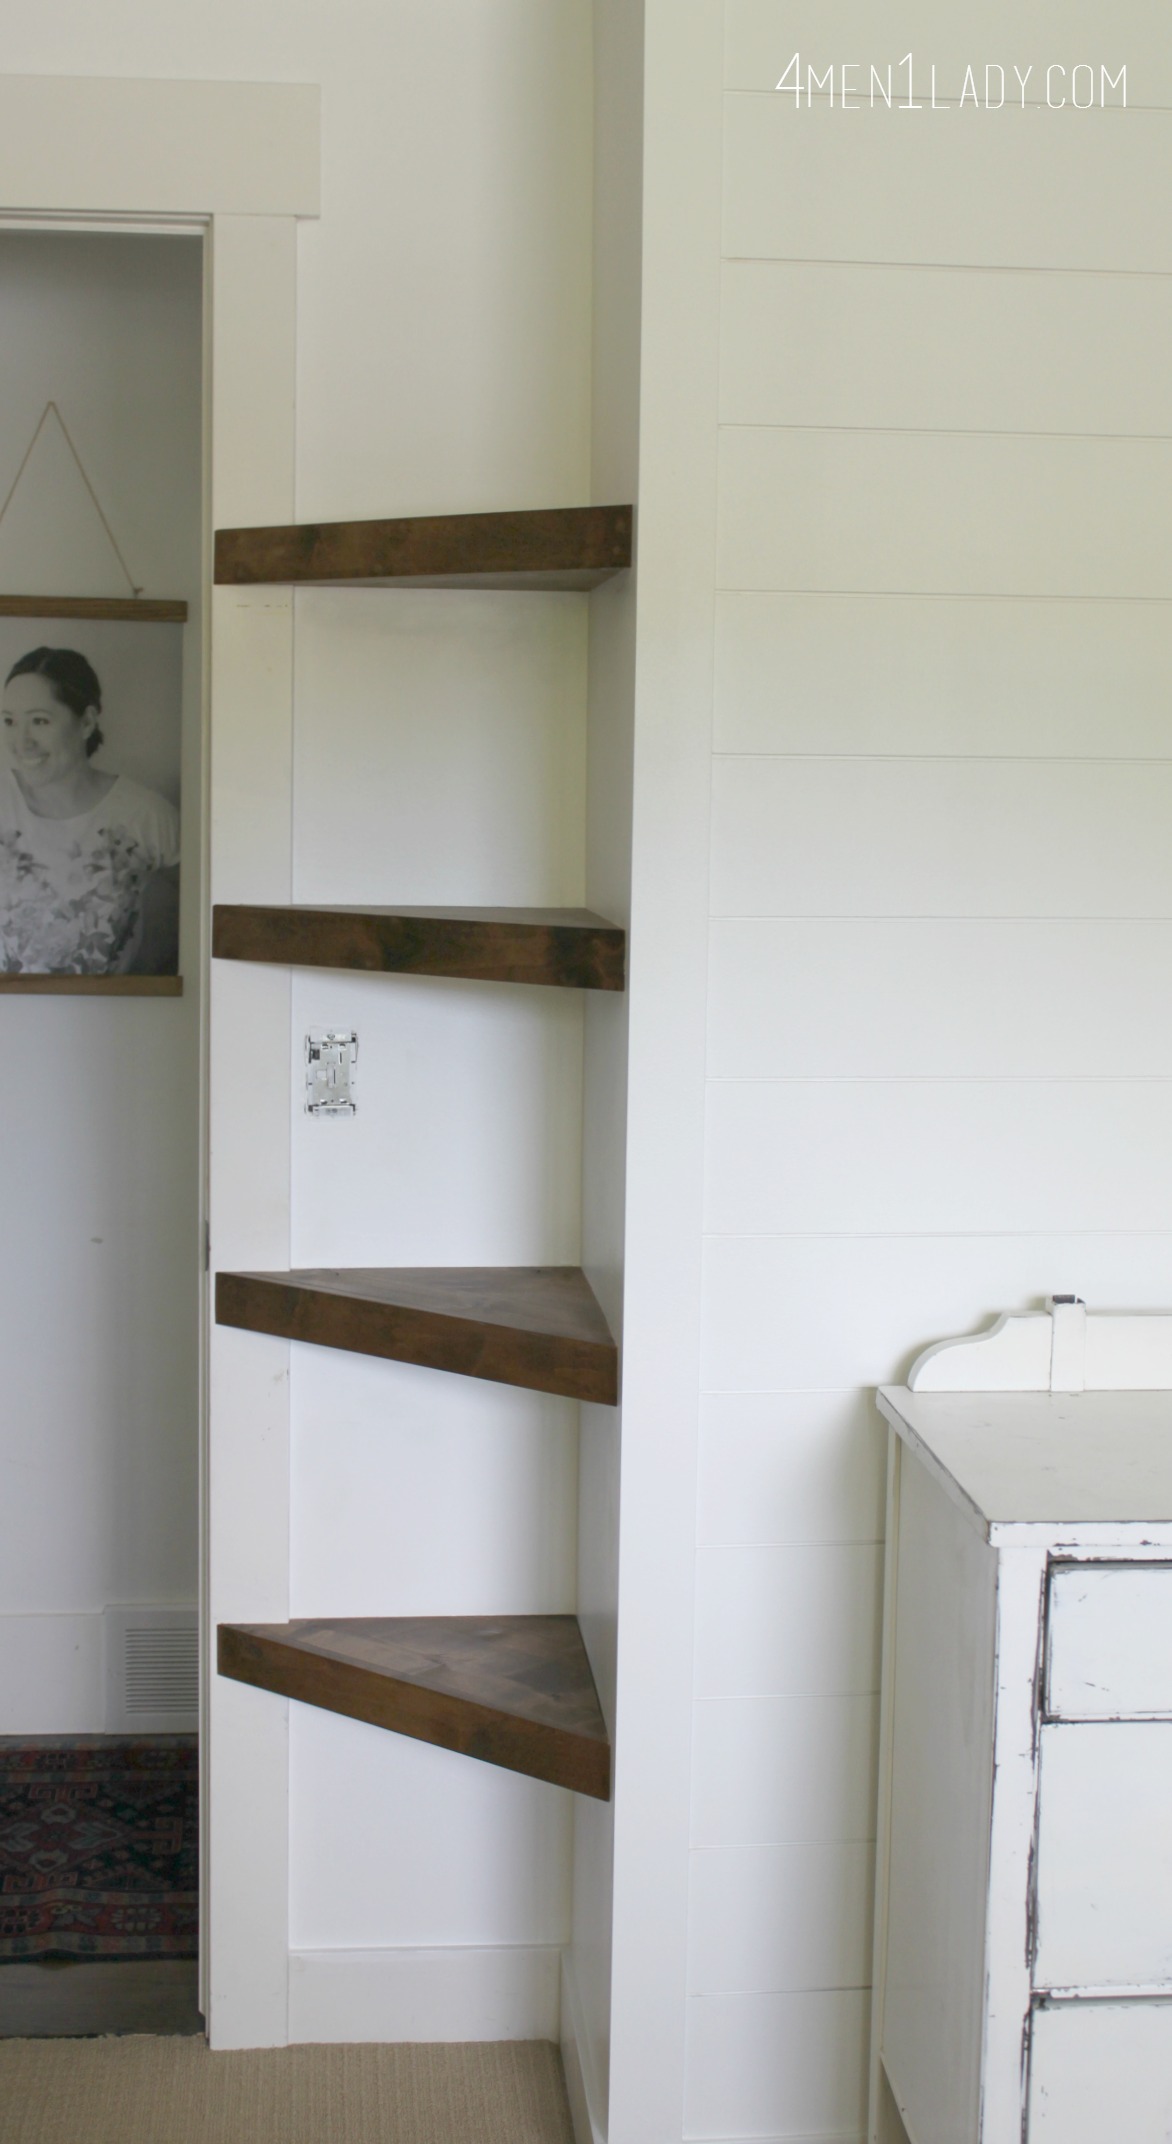
The shelves are going to provide some much needed storage for that little bedroom.

Next up, a very blue wall…stay tuned!
Don’t forget to enter our giveaway for a Deep Clean Lift-Off machine and BISSELL Professional Deep Cleaning with Febreze® Formula.
Click here to enter.


 Hey there! I’m Michelle; I’m an Passionate DIY’er and in constant pursuit of how to bring beauty to my house full of men (3 boys + 1 hubby). Stick around and see what I’ve got up my hard-working sleaves!
I have this EXACT same annoying cutout in our tiny nursery!! THANK YOU!!!
Yay! Isn’t that cutout so annoying? It messes up the whole room layout. Share pics if you end up doing something similar! -Michelle
How do you find out about the school auctions? Would love to find one in my area!
Check out publicsurplus.com. You can search by your state or even school district to see if schools are selling in your area on there. 🙂 Michelle
Michelle,
Can the same frame and design for the shelves be used on a flat wall? I’m referring to the 1×1 and using the two identical boards top & bottom.
Would you recommend a 2×2 for, say a 10 inch wide shelf?
Love your blog. Thanks.
Eric
How much weight do you think this can hold?
Great idea! Thanks. I have flat walls on both sides so it will be much easier. Staining the wood before nailing it up would simplify things too. I read somewhere that a small amount of stain can be mixed in with the putty to help with the color if I do fill in the nail holes.
That’s a great tip. Going to keep this in my back pocket for next time. Thanks Diana! 🙂
What did you do to the wall. It looks completely different and much nicer. What did you put on it to make it look like that. Wood slats?
What a great solution for a problem area. I love the colour of the stain.
Thanks Sandy! xoxo, Michelle
How thick is the wooden board on the top and the bottom of the 1×1?
Great use of space.
Thanks Tammy! 🙂
Why didn’t’ you stain the wood before fitting the shelving onto the wall?
Because I’m an idiot. 🙂 Good thinking. Woulda, shoulda, coulda.
Soooo adorable! I want to do this so bad, but
I don’t want holes in the walls of my apartment. Also, to save yourself the pain of having to tape, it helps to stain and clear coat before you hang! (I learned that the hard way:)