I’m pleased to announce that I have joined a fabulously creative group of bloggers to be a part of ACE Hardware Blogger Panel!

As a part of this panel we will be bringing you monthly home improvement and decorating projects.
I’m really excited about my first project which involves our little men’s bunk room.
It’s been layered with white on top of white on top of white. Now it has touches of yellow, yellow and more yellow…the perfect color for their personalities.
I wanted to share a sneak peek of one of the projects I completed to spice things up in there.
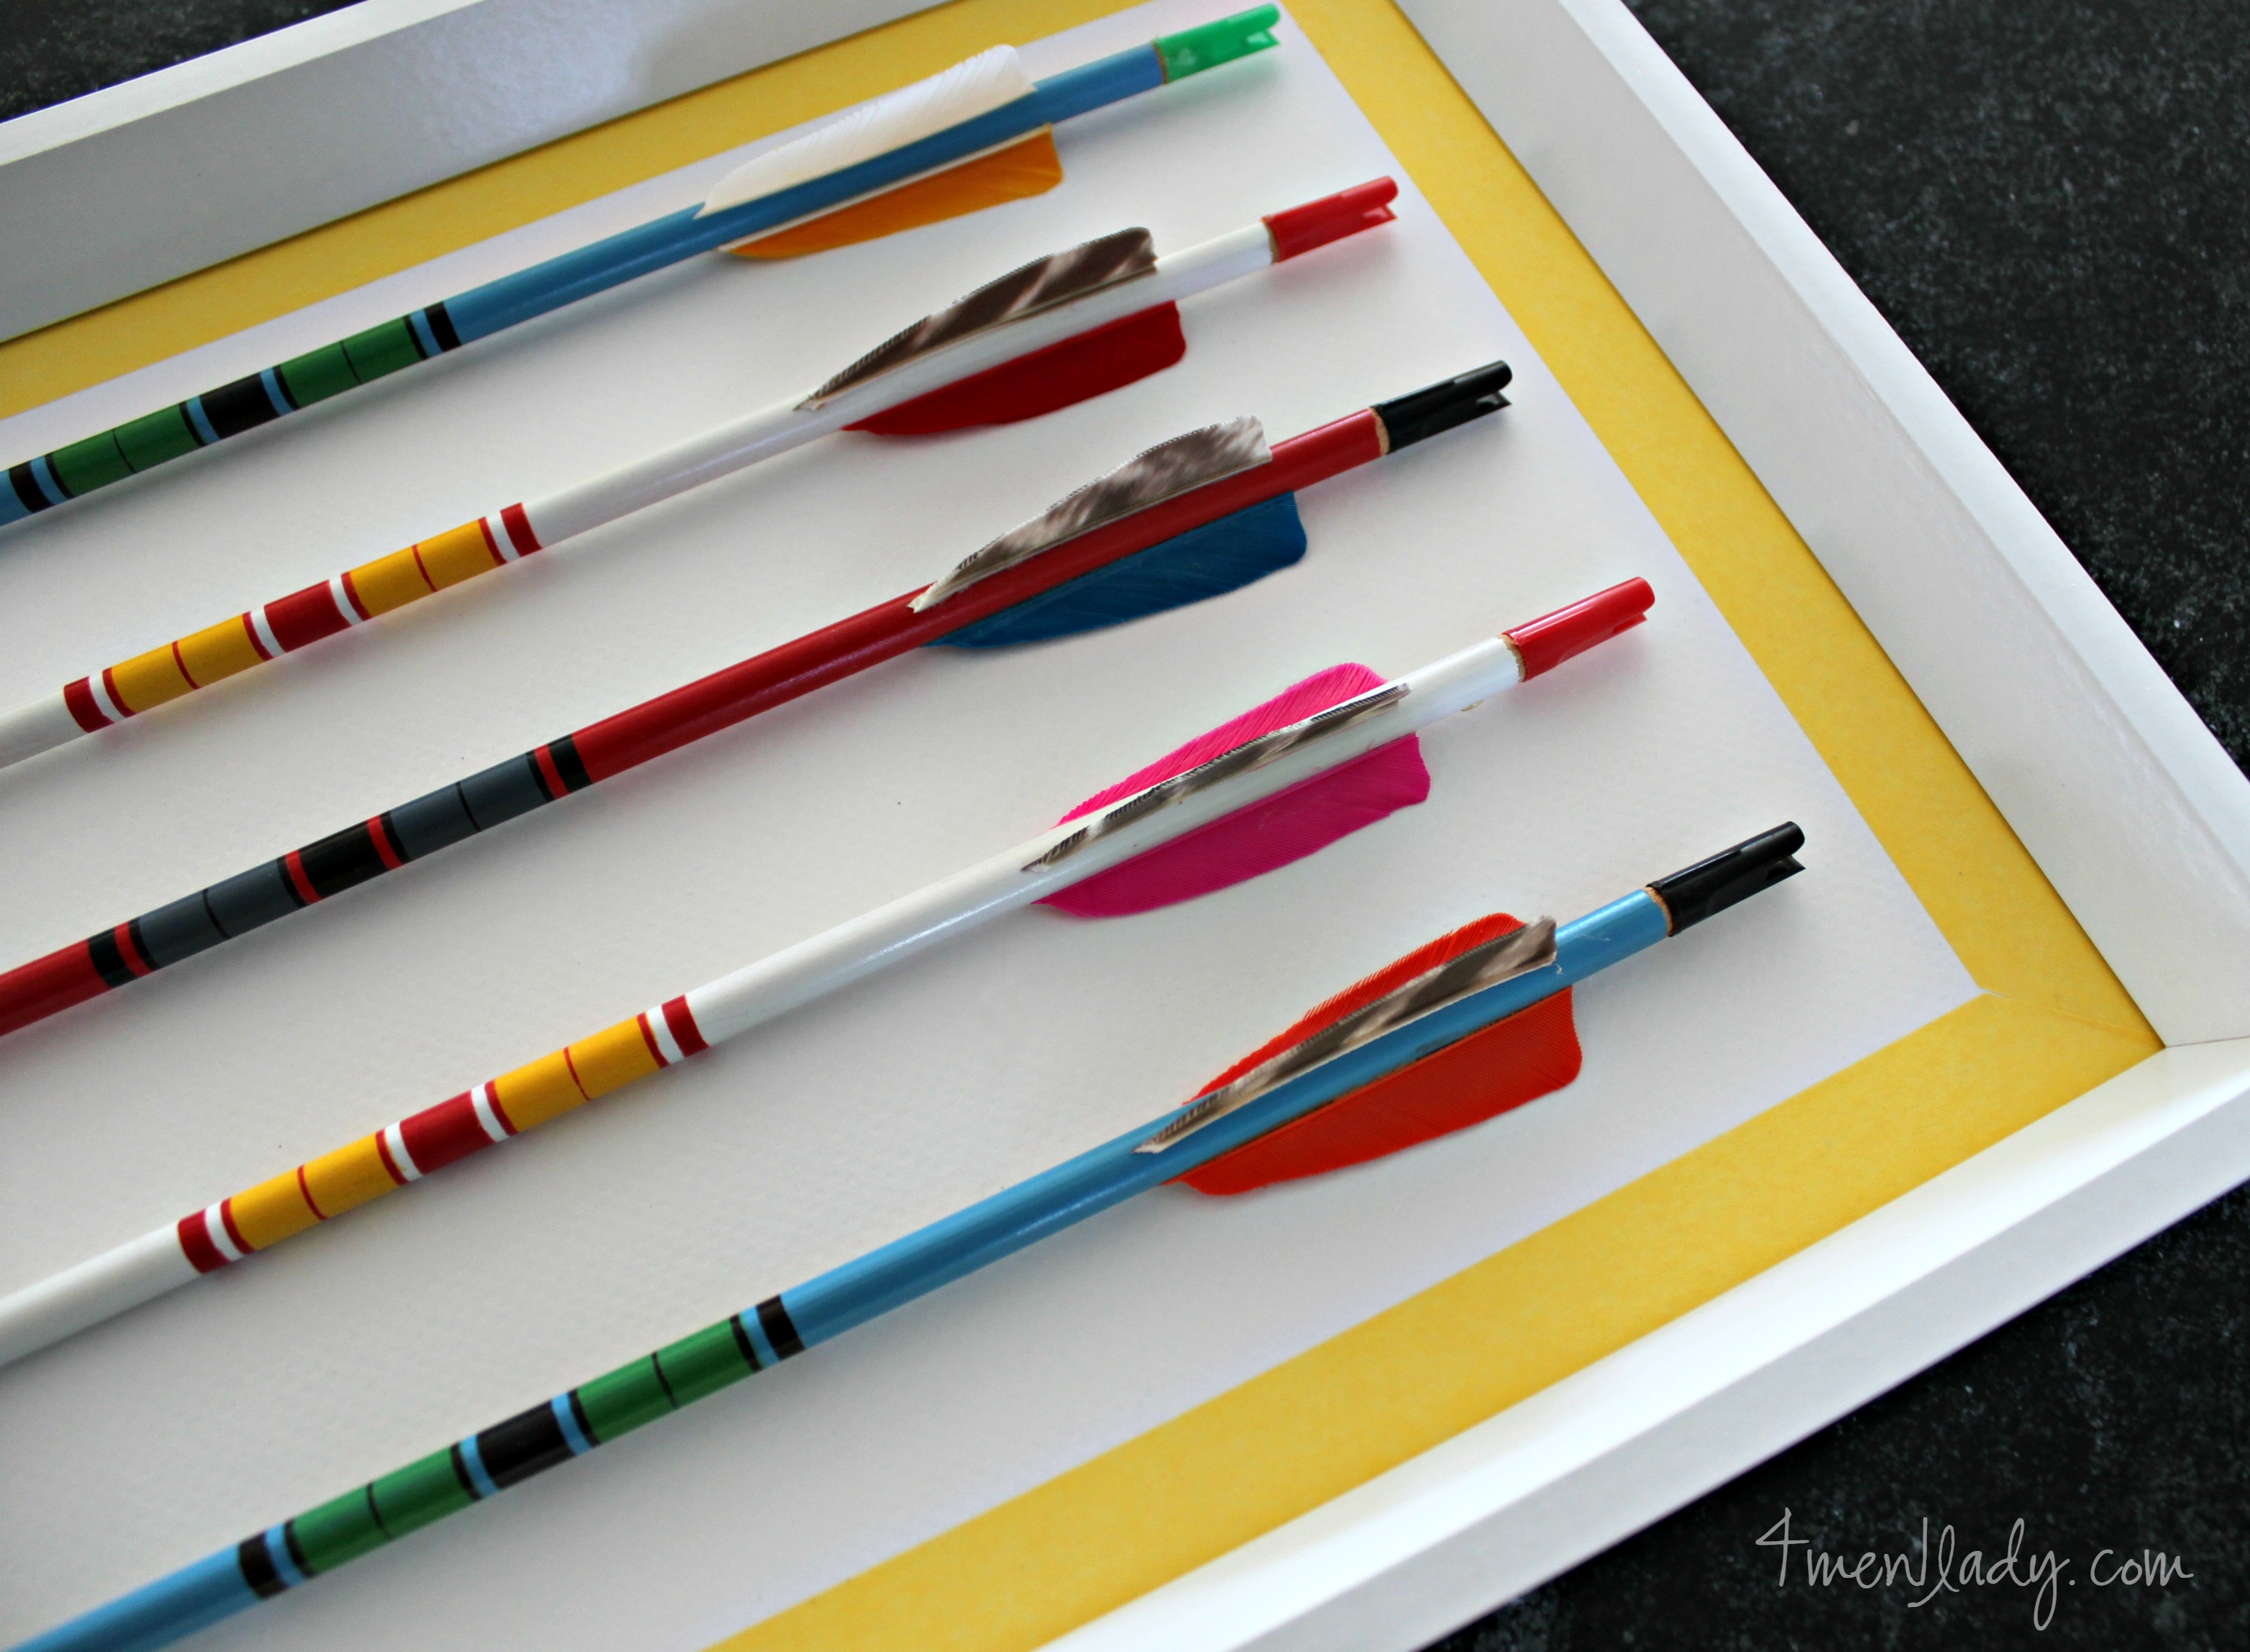
Last March, during a sleepless night I found myself perusing Etsy. I came across the coolest vintage arrows. At the time I didn’t know what I was going to do with them but a week later they were shipped to my doorstep.
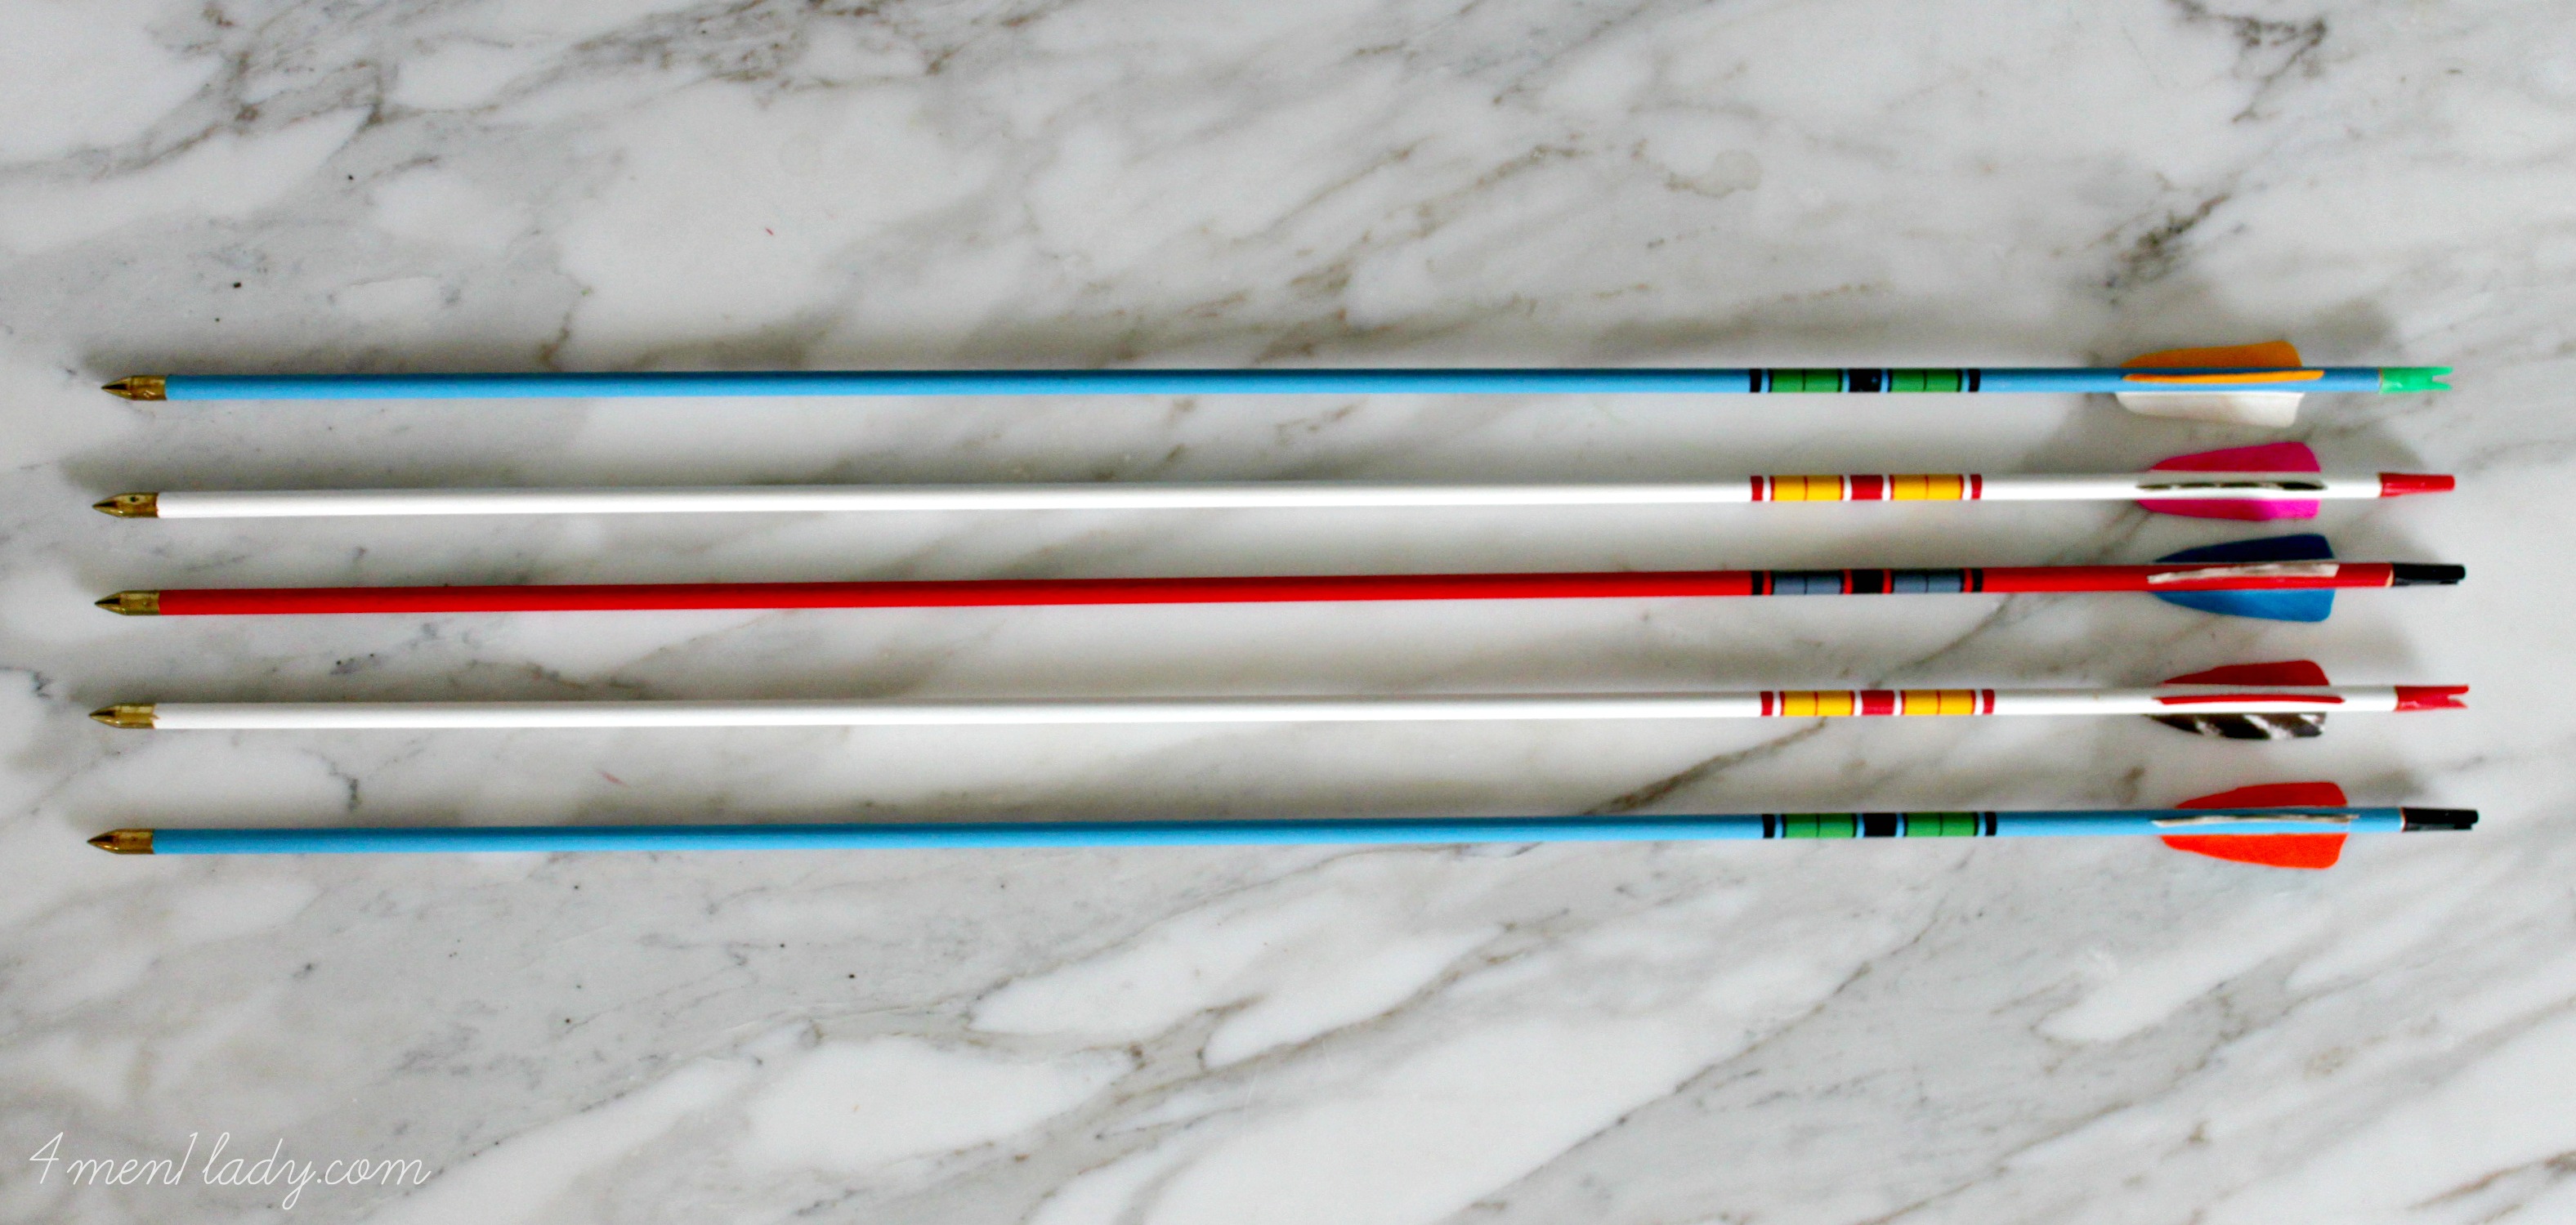
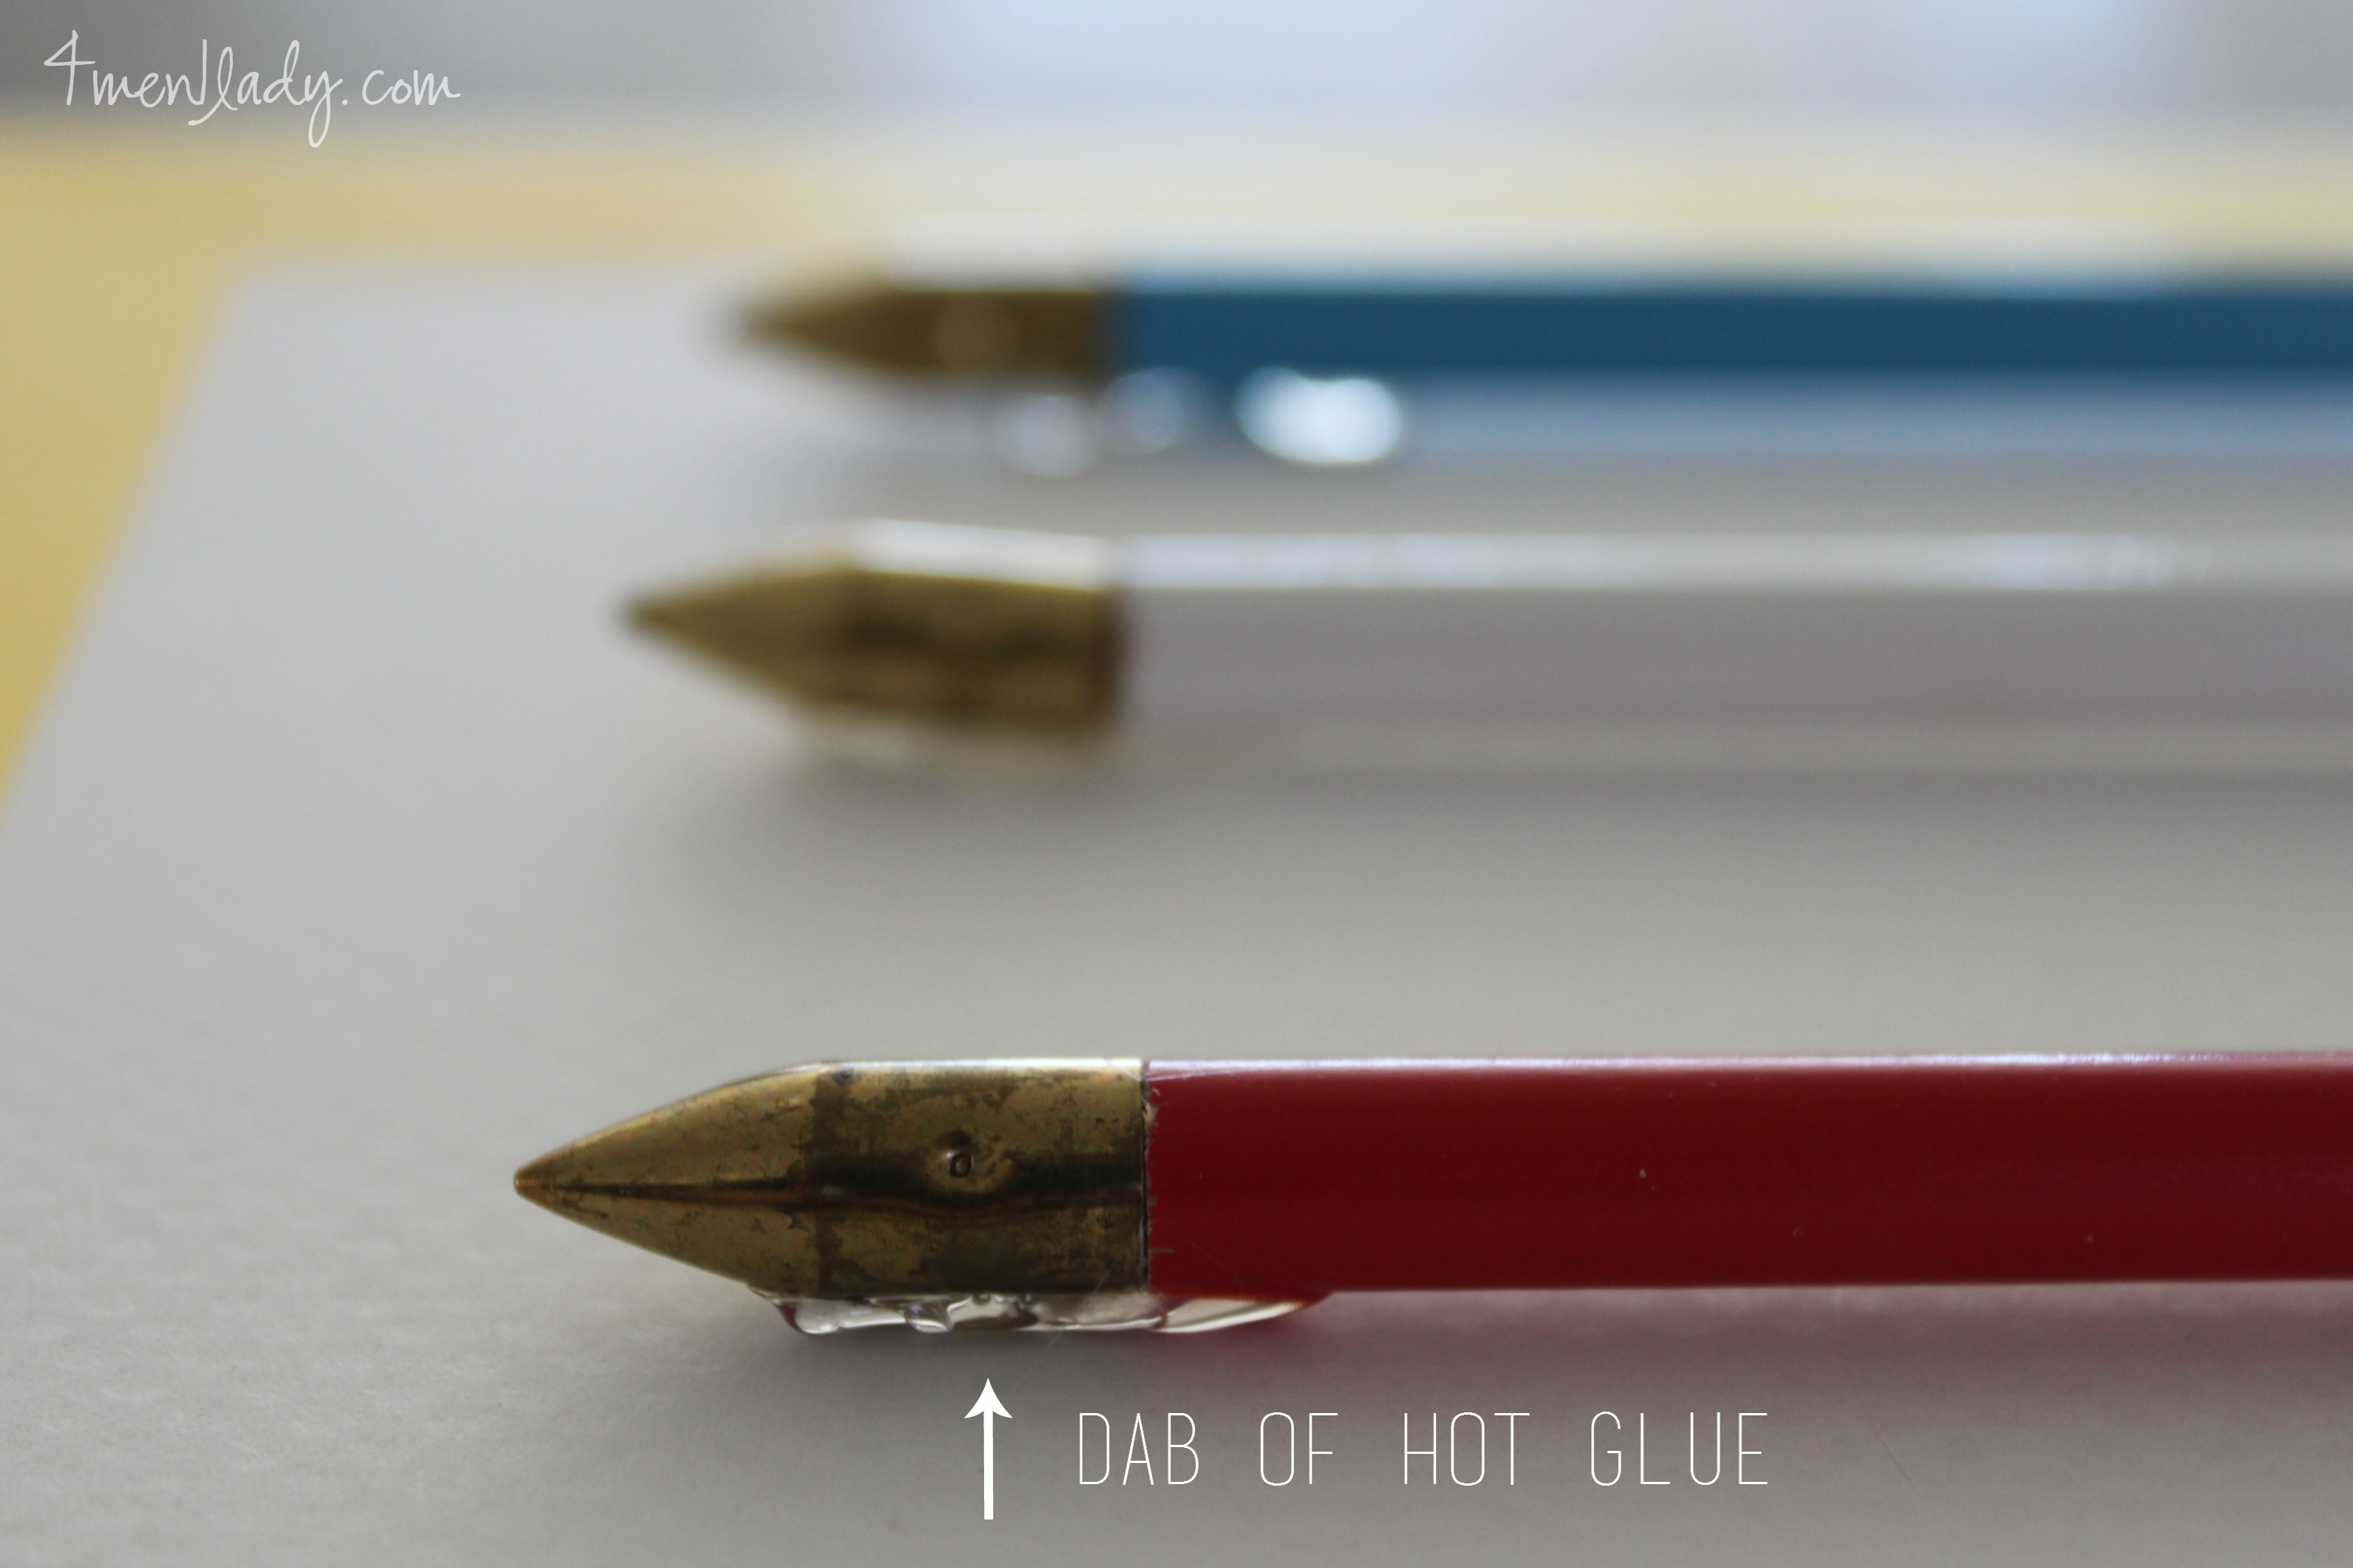
They sat in my closet all this time but finally I knew they would be perfect for my little men’s room re-fresh. The question was how to display them? After some brainstorming I decided to frame them. Luckily Ikea sells a white frame called the Norrlida for $9.99 that was (almost) long enough to fit the arrows (I had to cut the arrows down a few inches and re-attach the tips).
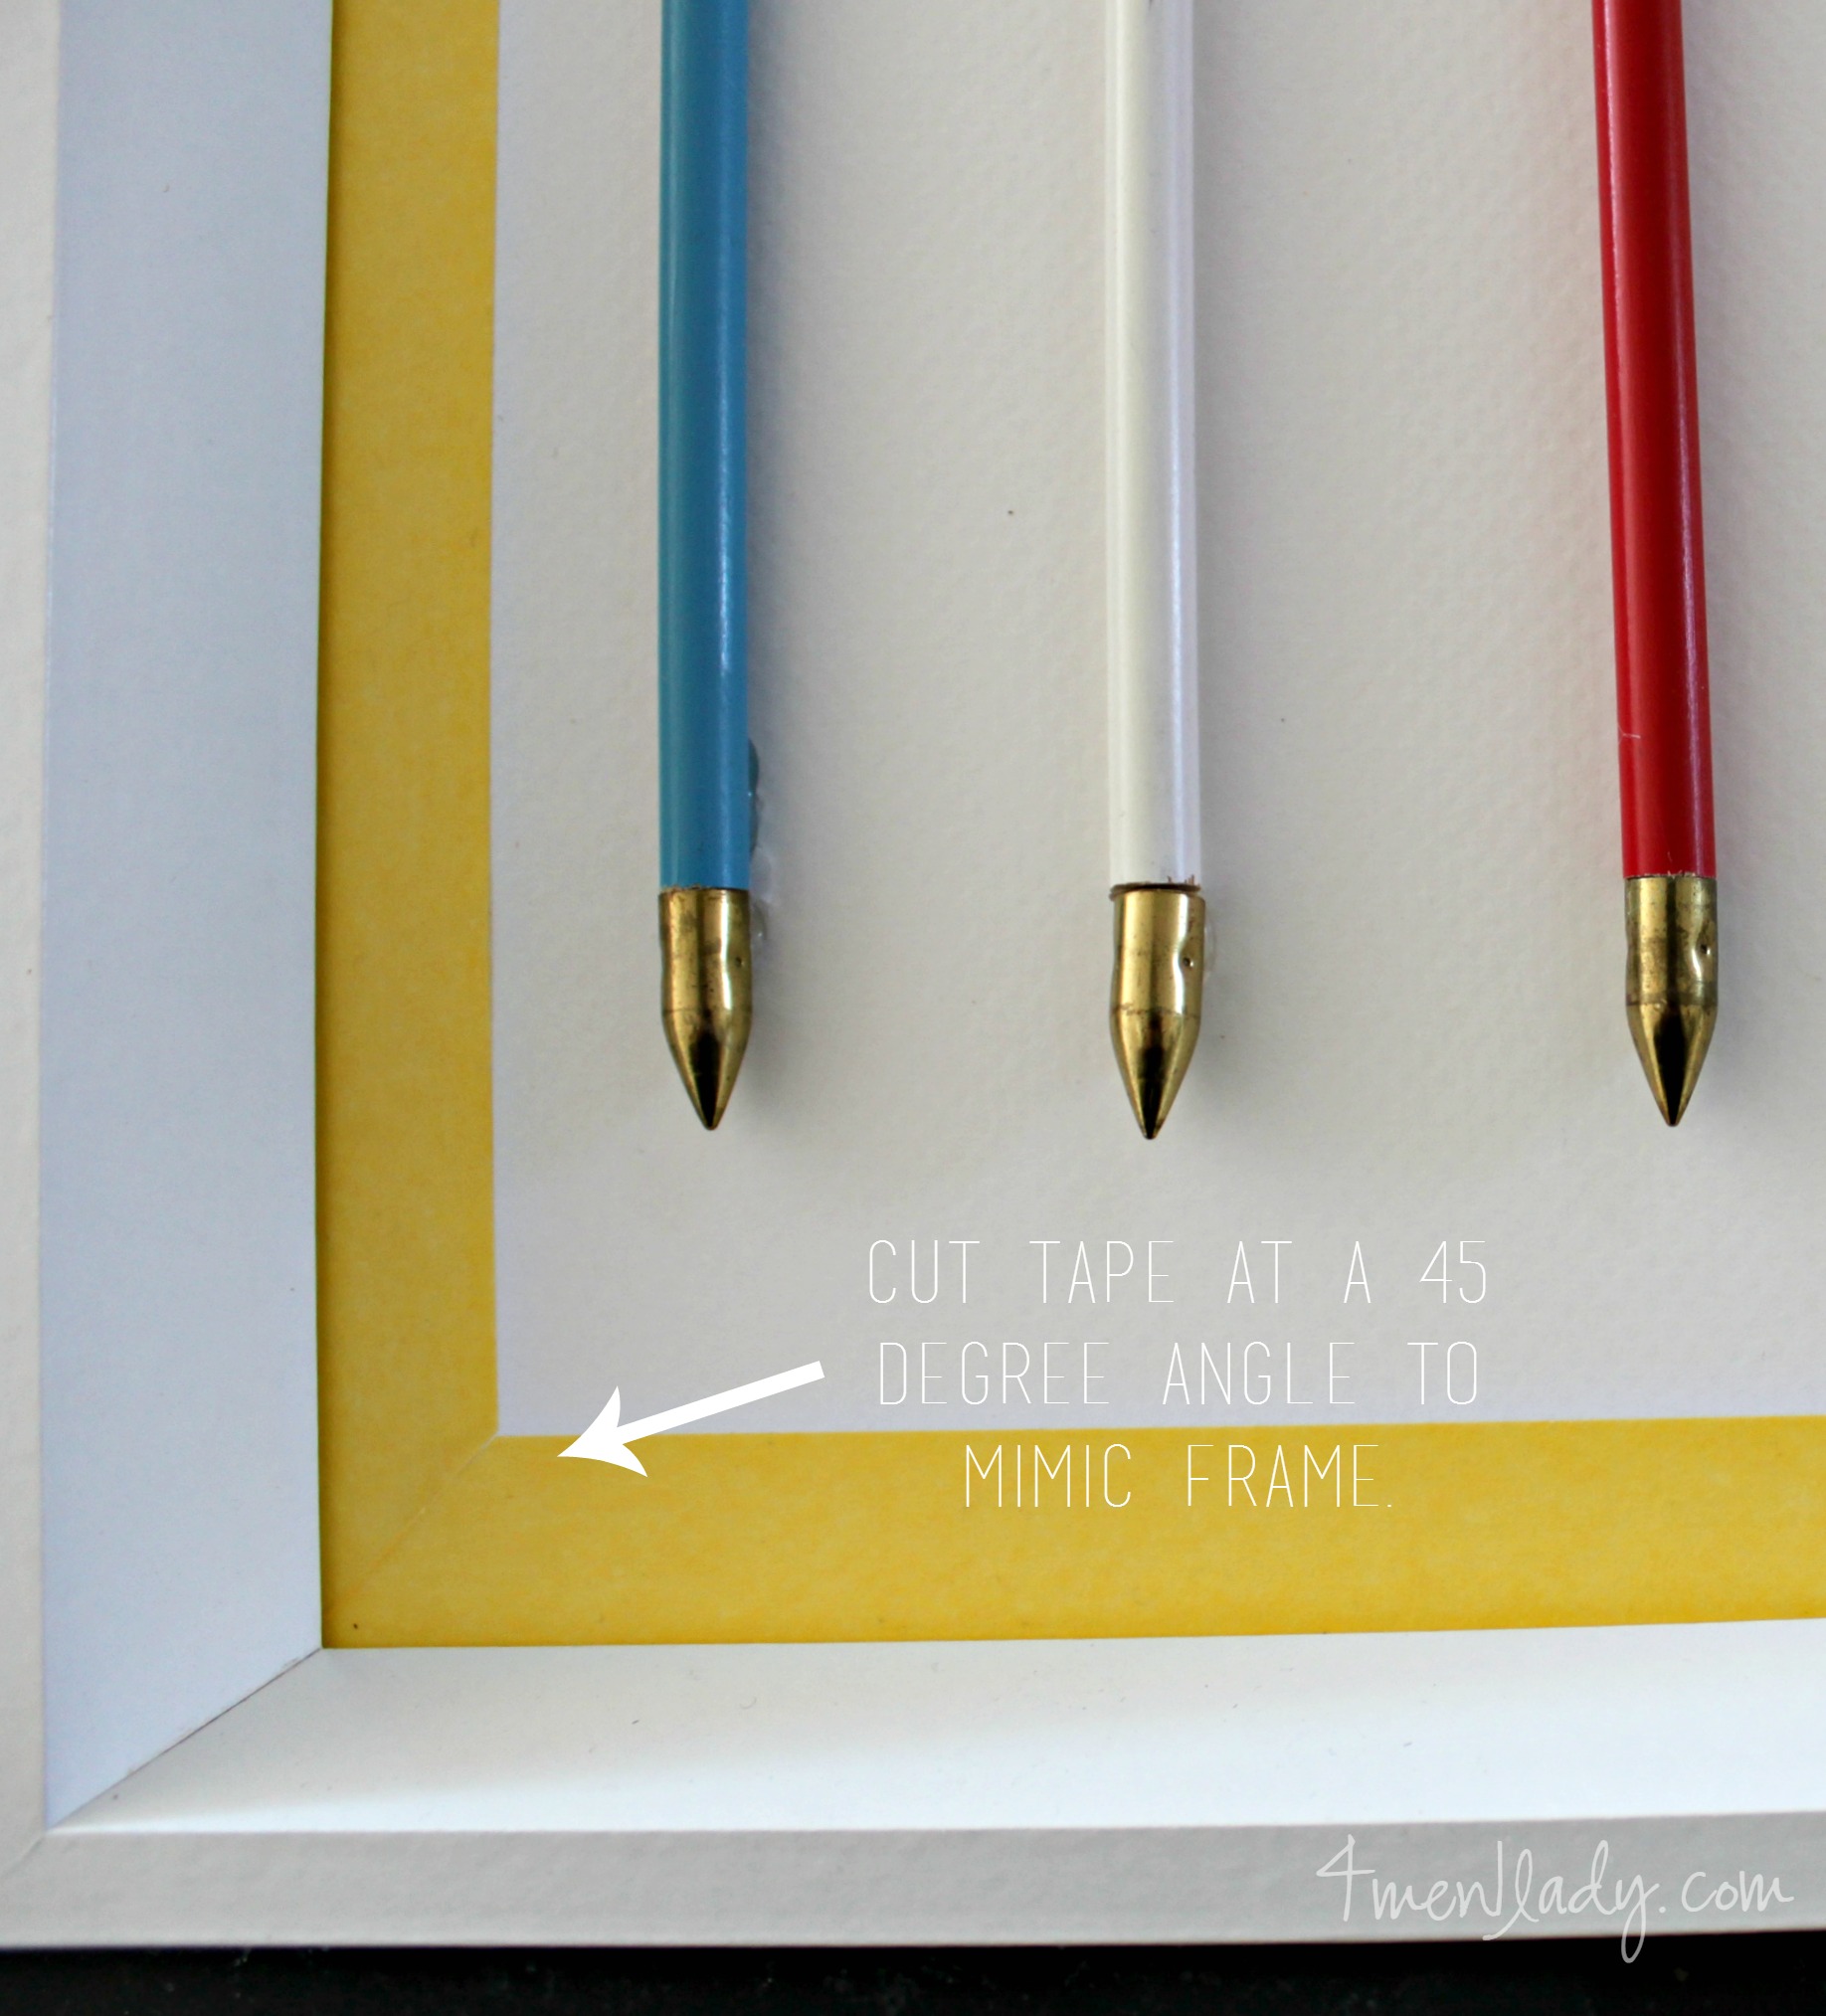
The question was…how was I going to incorporate some yellow to tie it together with the rest of the decor I had planned? My first thought was to have a custom yellow photo mat cut but custom-anything is expensive. Instead I used some Delicate Frog Tape I picked up from ACE to simply tape off a yellow border.
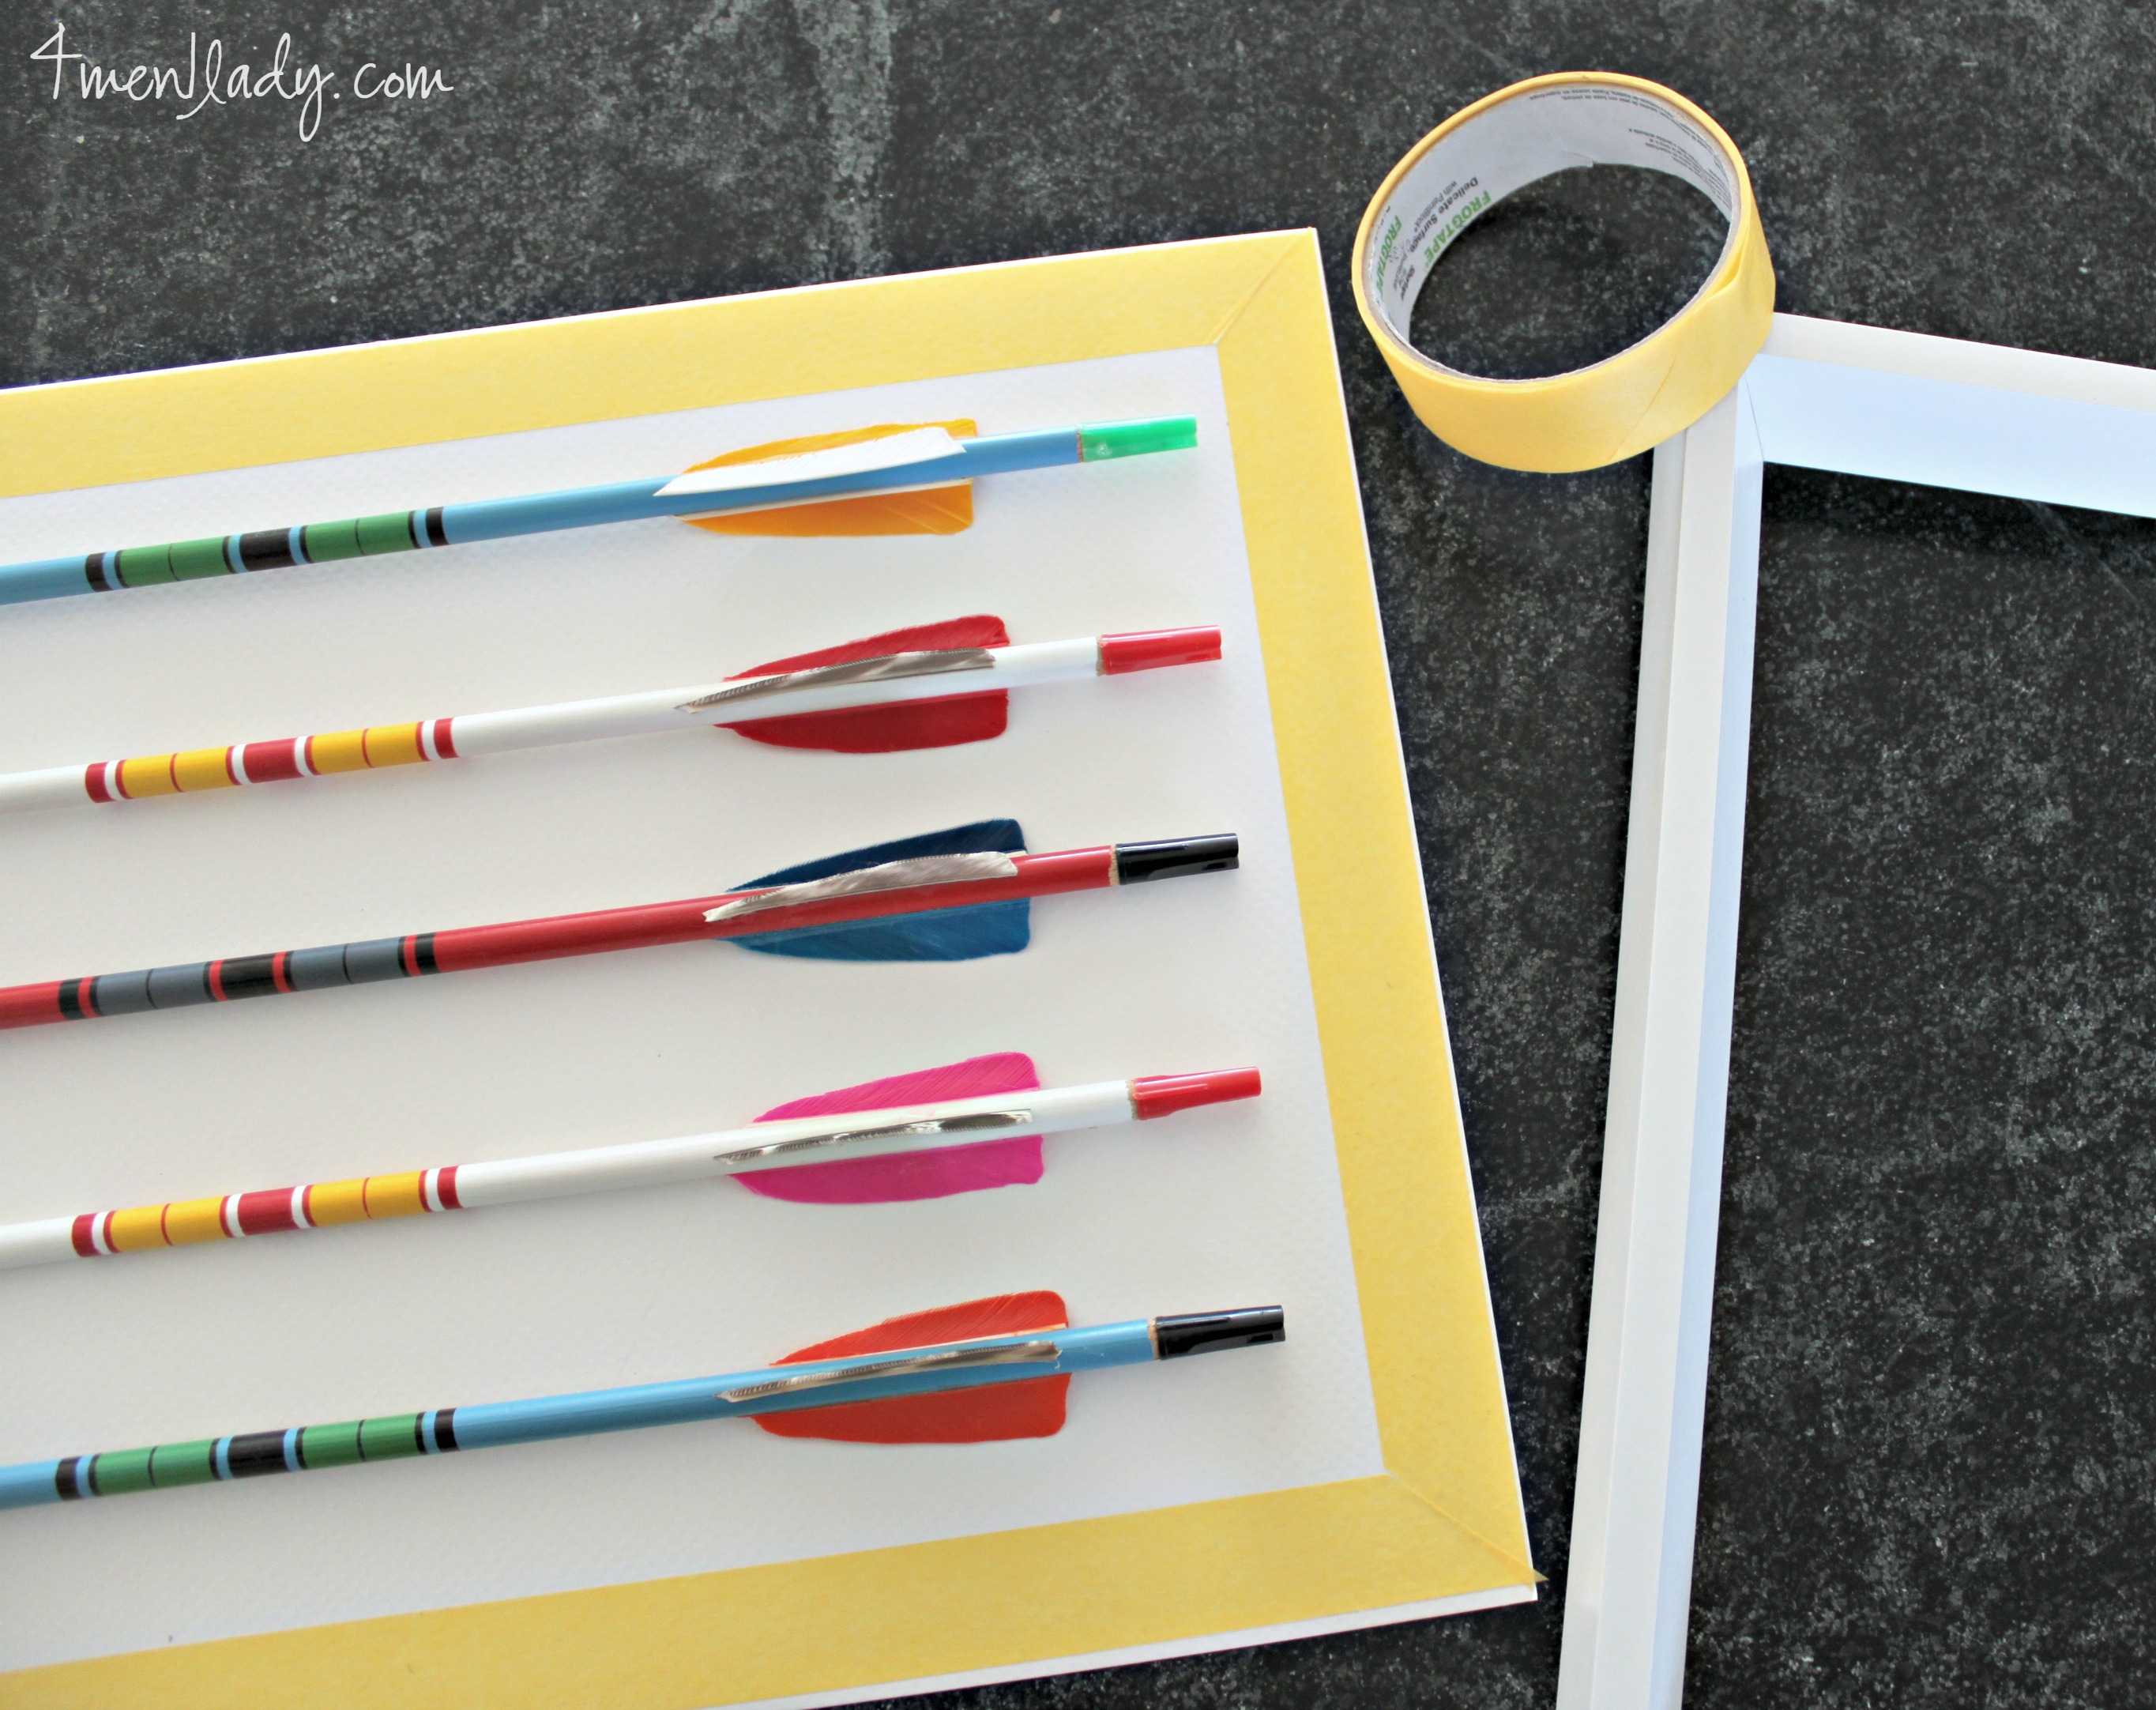
First, I arranged my arrows on the mat that came with the frame and added a bead of hot glue to secure them.
Next, I took my Frog Tape and taped off a border directly on the mat.
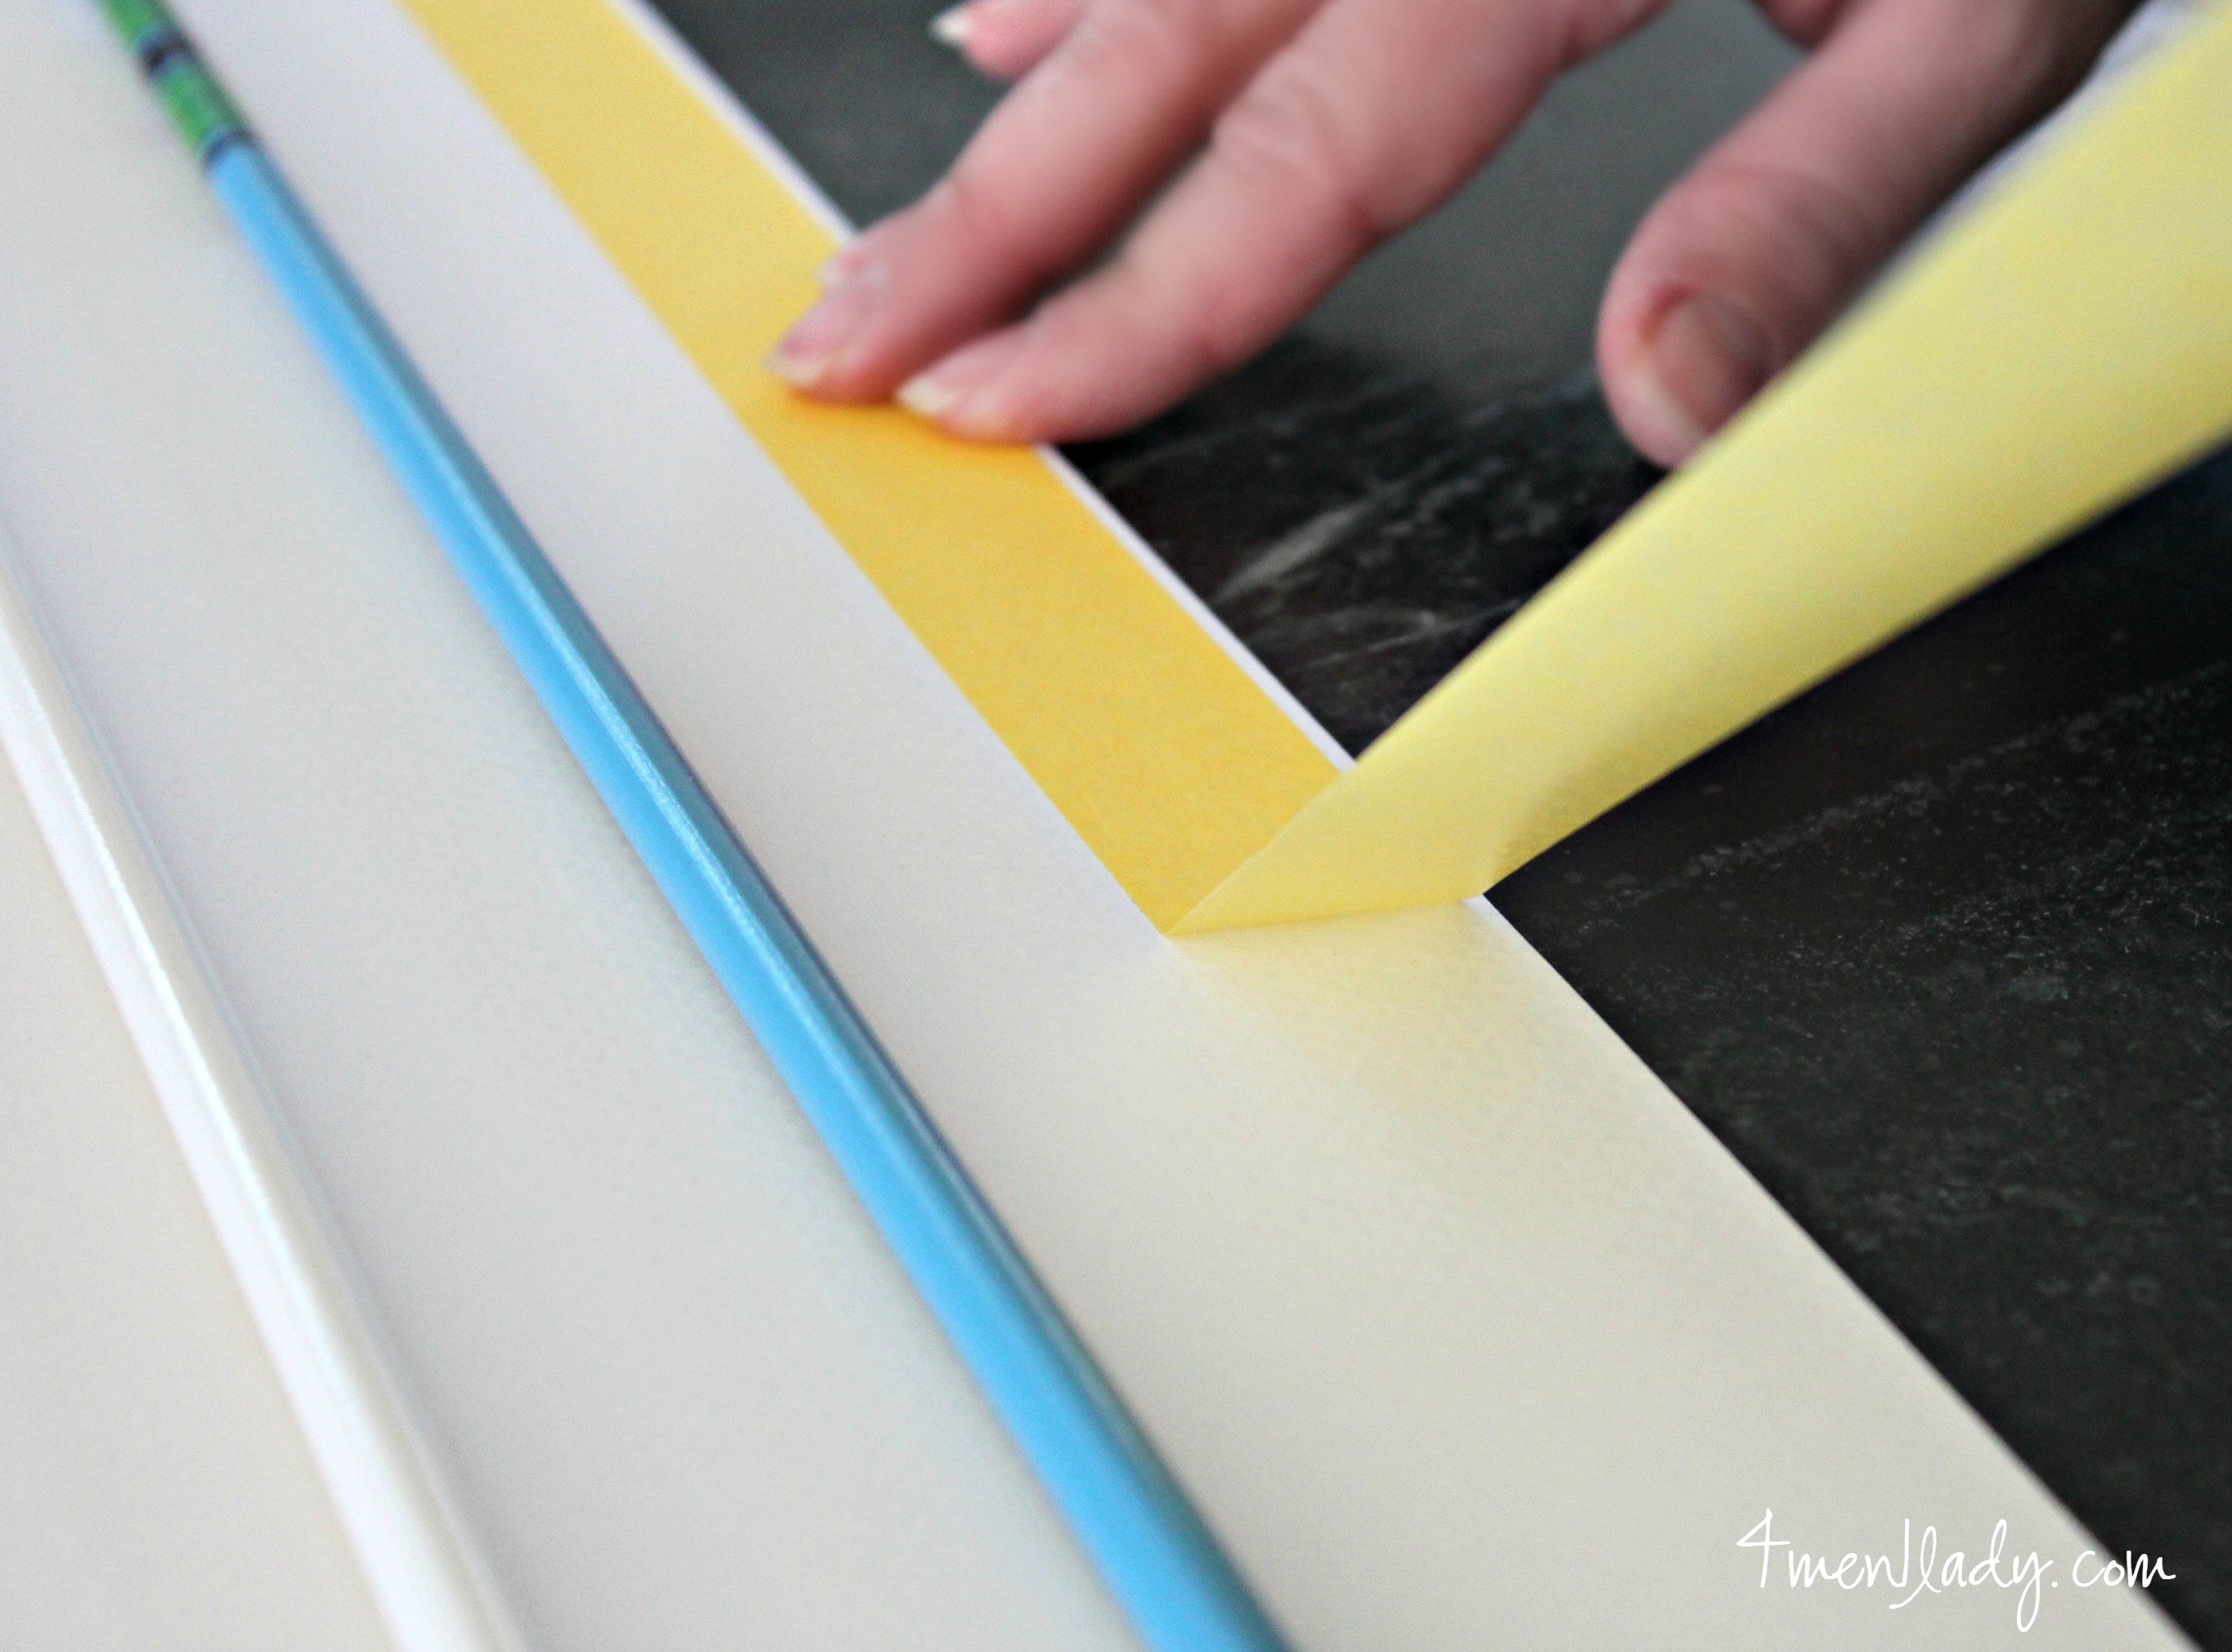
I cut the edges of the tape at a 45 degree angle with a razor blade to make it look similar to the frame corners.
I would have liked to find a frame / shadow box deep enough to accommodate the arrows and have the glass over the top but I felt lucky enough to find an affordable frame long enough to fit the arrows. After all said and done they looked great as-is.
Who said picture frames were just for pictures?
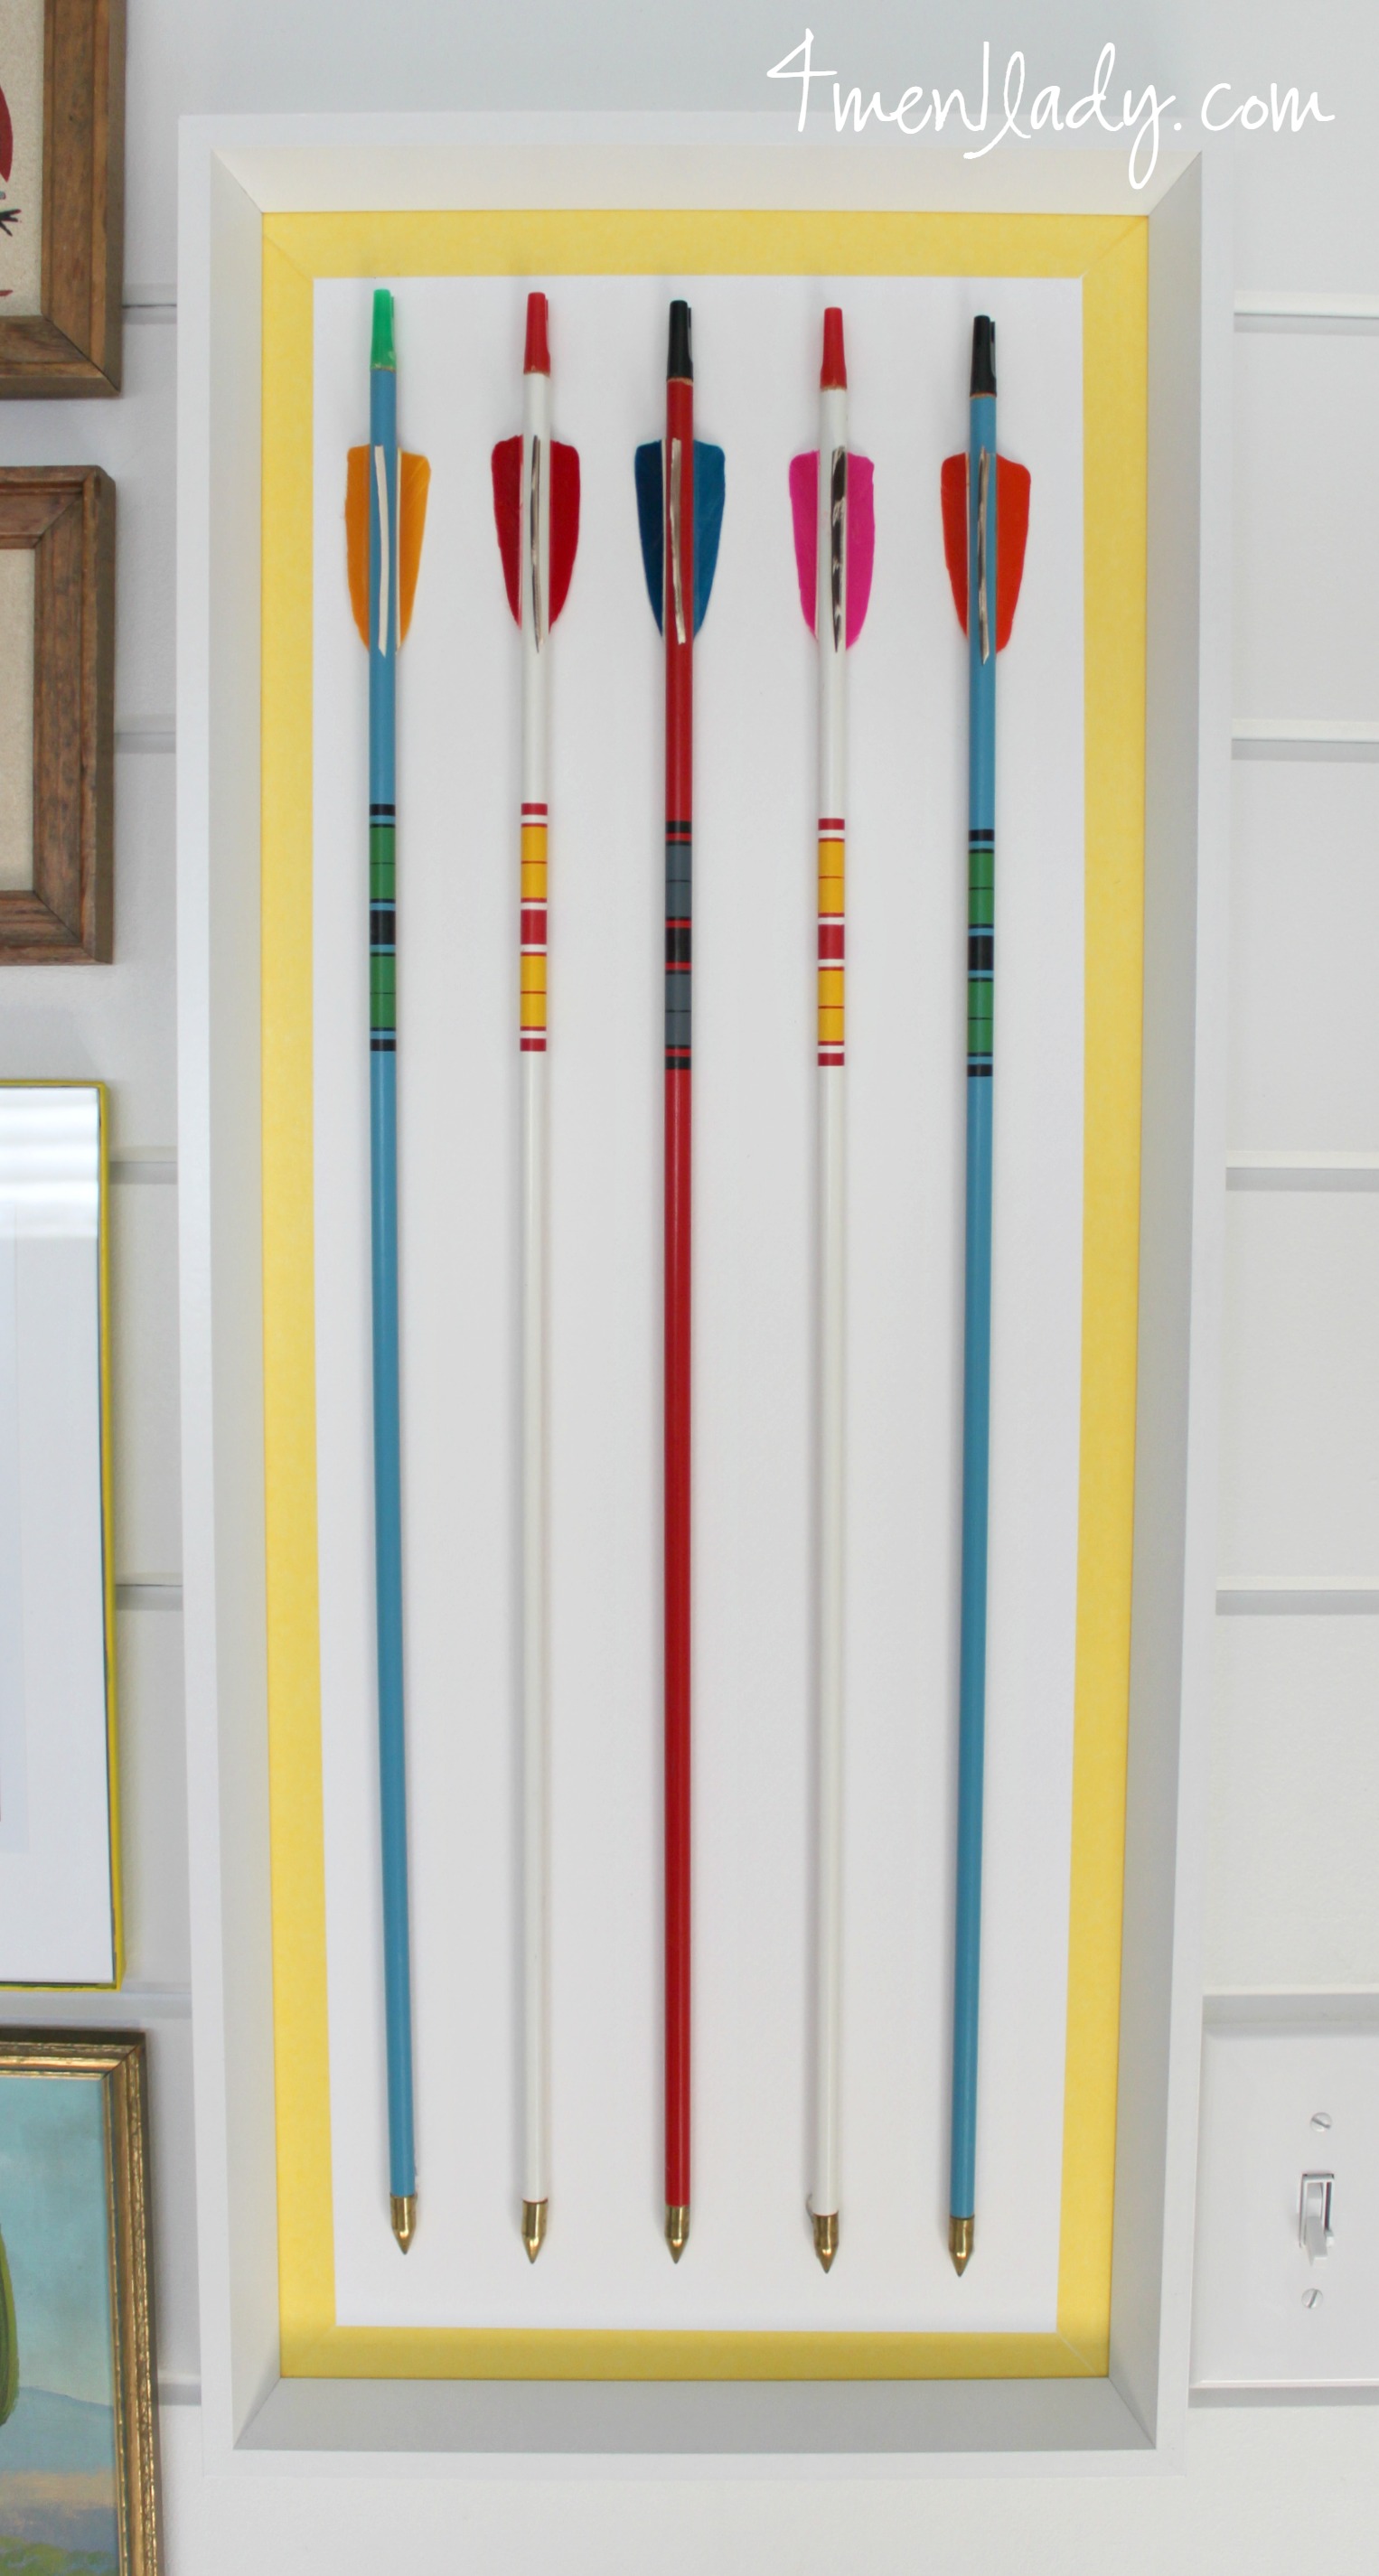
Vintage framed arrows.
Stay tuned for the rest of the reveal coming soon!
In the meantime, follow myself and my fellow ACE bloggers on social media:
Pinterest, Facebook, Instagram, Twitter.


 Hey there! I’m Michelle; I’m an Passionate DIY’er and in constant pursuit of how to bring beauty to my house full of men (3 boys + 1 hubby). Stick around and see what I’ve got up my hard-working sleaves!
so cool! always love your out-of-the box thinking.
These are beautiful! I love the colors used, they are so nice and bright.
Thanks Emily! The room is bright and alive now!
Michelle, I have been following your blog for many years now. I always love the ideas you come up with! 🙂
You are too kind. Thank you for following me. I can’t tell you how much I appreciate it! Thank you for reaching out and leaving a sweet comment! Best to you! Michelle 🙂
I have loved looking at your blog for a long time now. I have enjoyed all your great ideas with DIYing and also your reviews on products in your home. I have a brand new baby and I remember you reviewing a pack n play that was really easy to put up and down. I have searched your site and I can’t find it. I think you talked about it a couple of years ago. I know you are super busy, but I was wondering if you could tell me the name of it? Thanks so much!
Thanks Memorie! Yes, it’s hands down one of the best baby accessory inventions ever. Easiest thing to operate. It’s called the “Breeze” by 4Moms. Here’s a link: http://www.4moms.com/breeze
Thank you so much!!! It was really kind of you to take time out and reply to me…thank you again!