I have this awkward, dead space between my kitchen counter top and sliding door that leads to the patio.
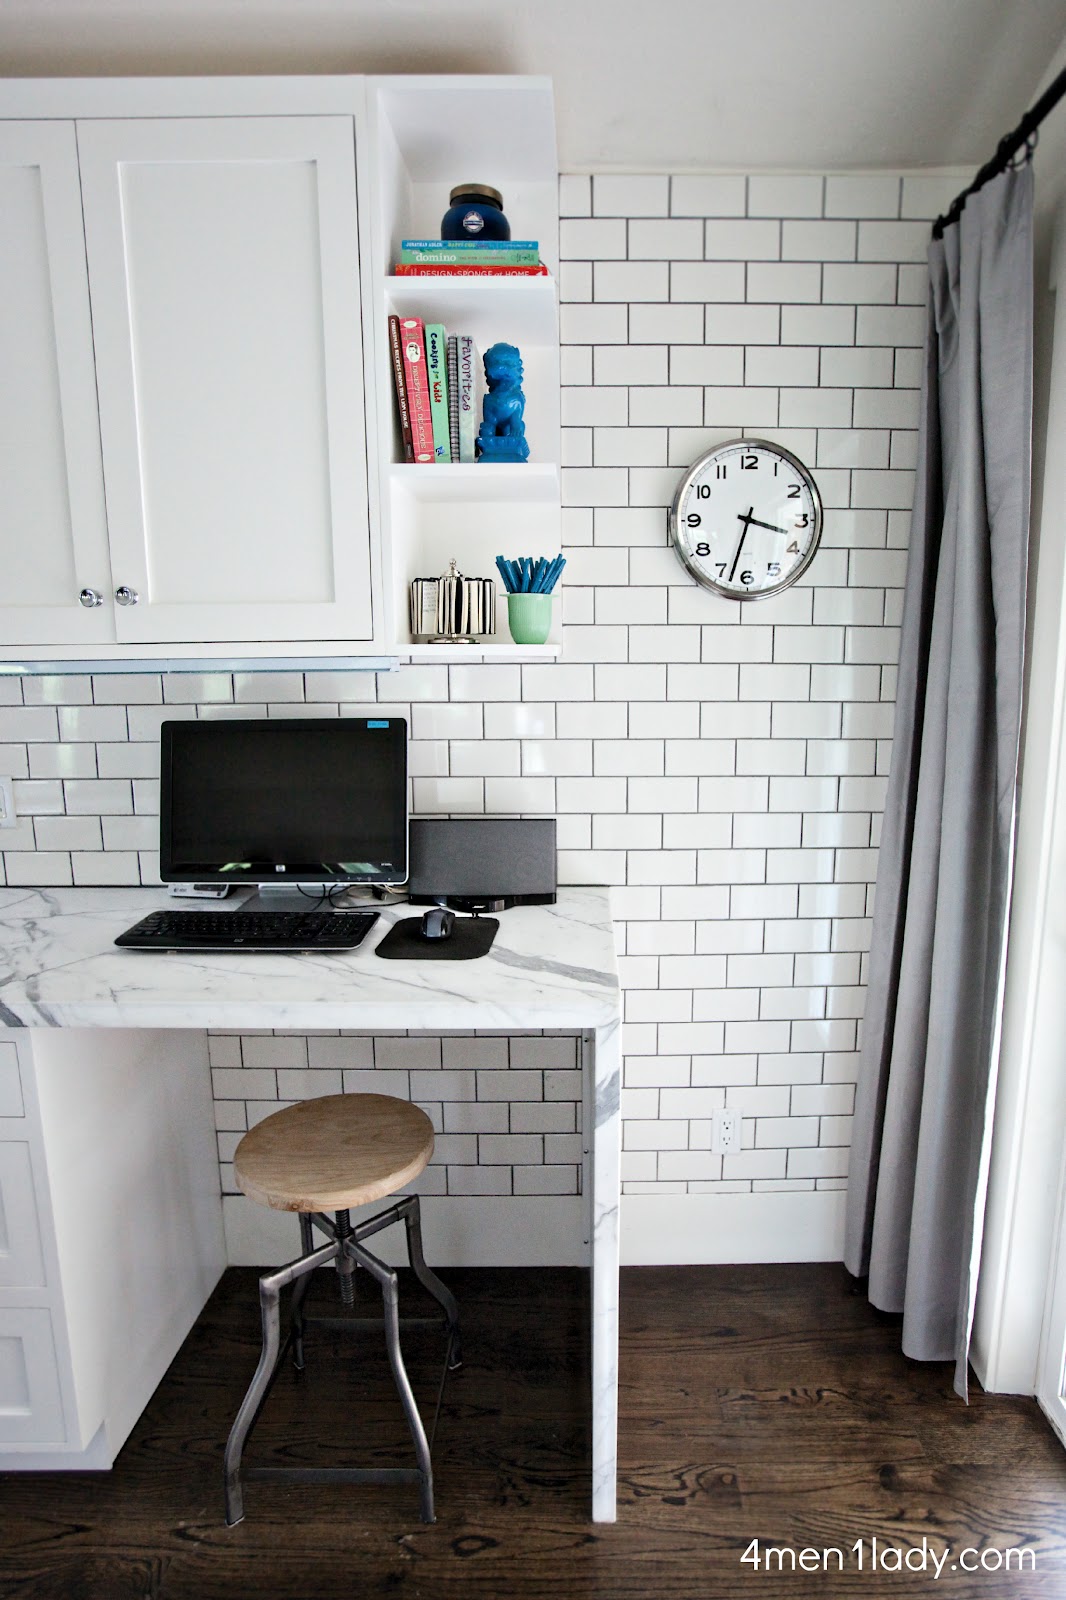
I would have run the counter top all the way over but it would run in to the door. I’ve been needing a spot for my printer and misc supplies but everything I find either doesn’t fit just right or is ugly not my taste. So, this weekend the Mr. and I made diy bookshelf for our kitchen out of some wood boards and plumbing pipe.
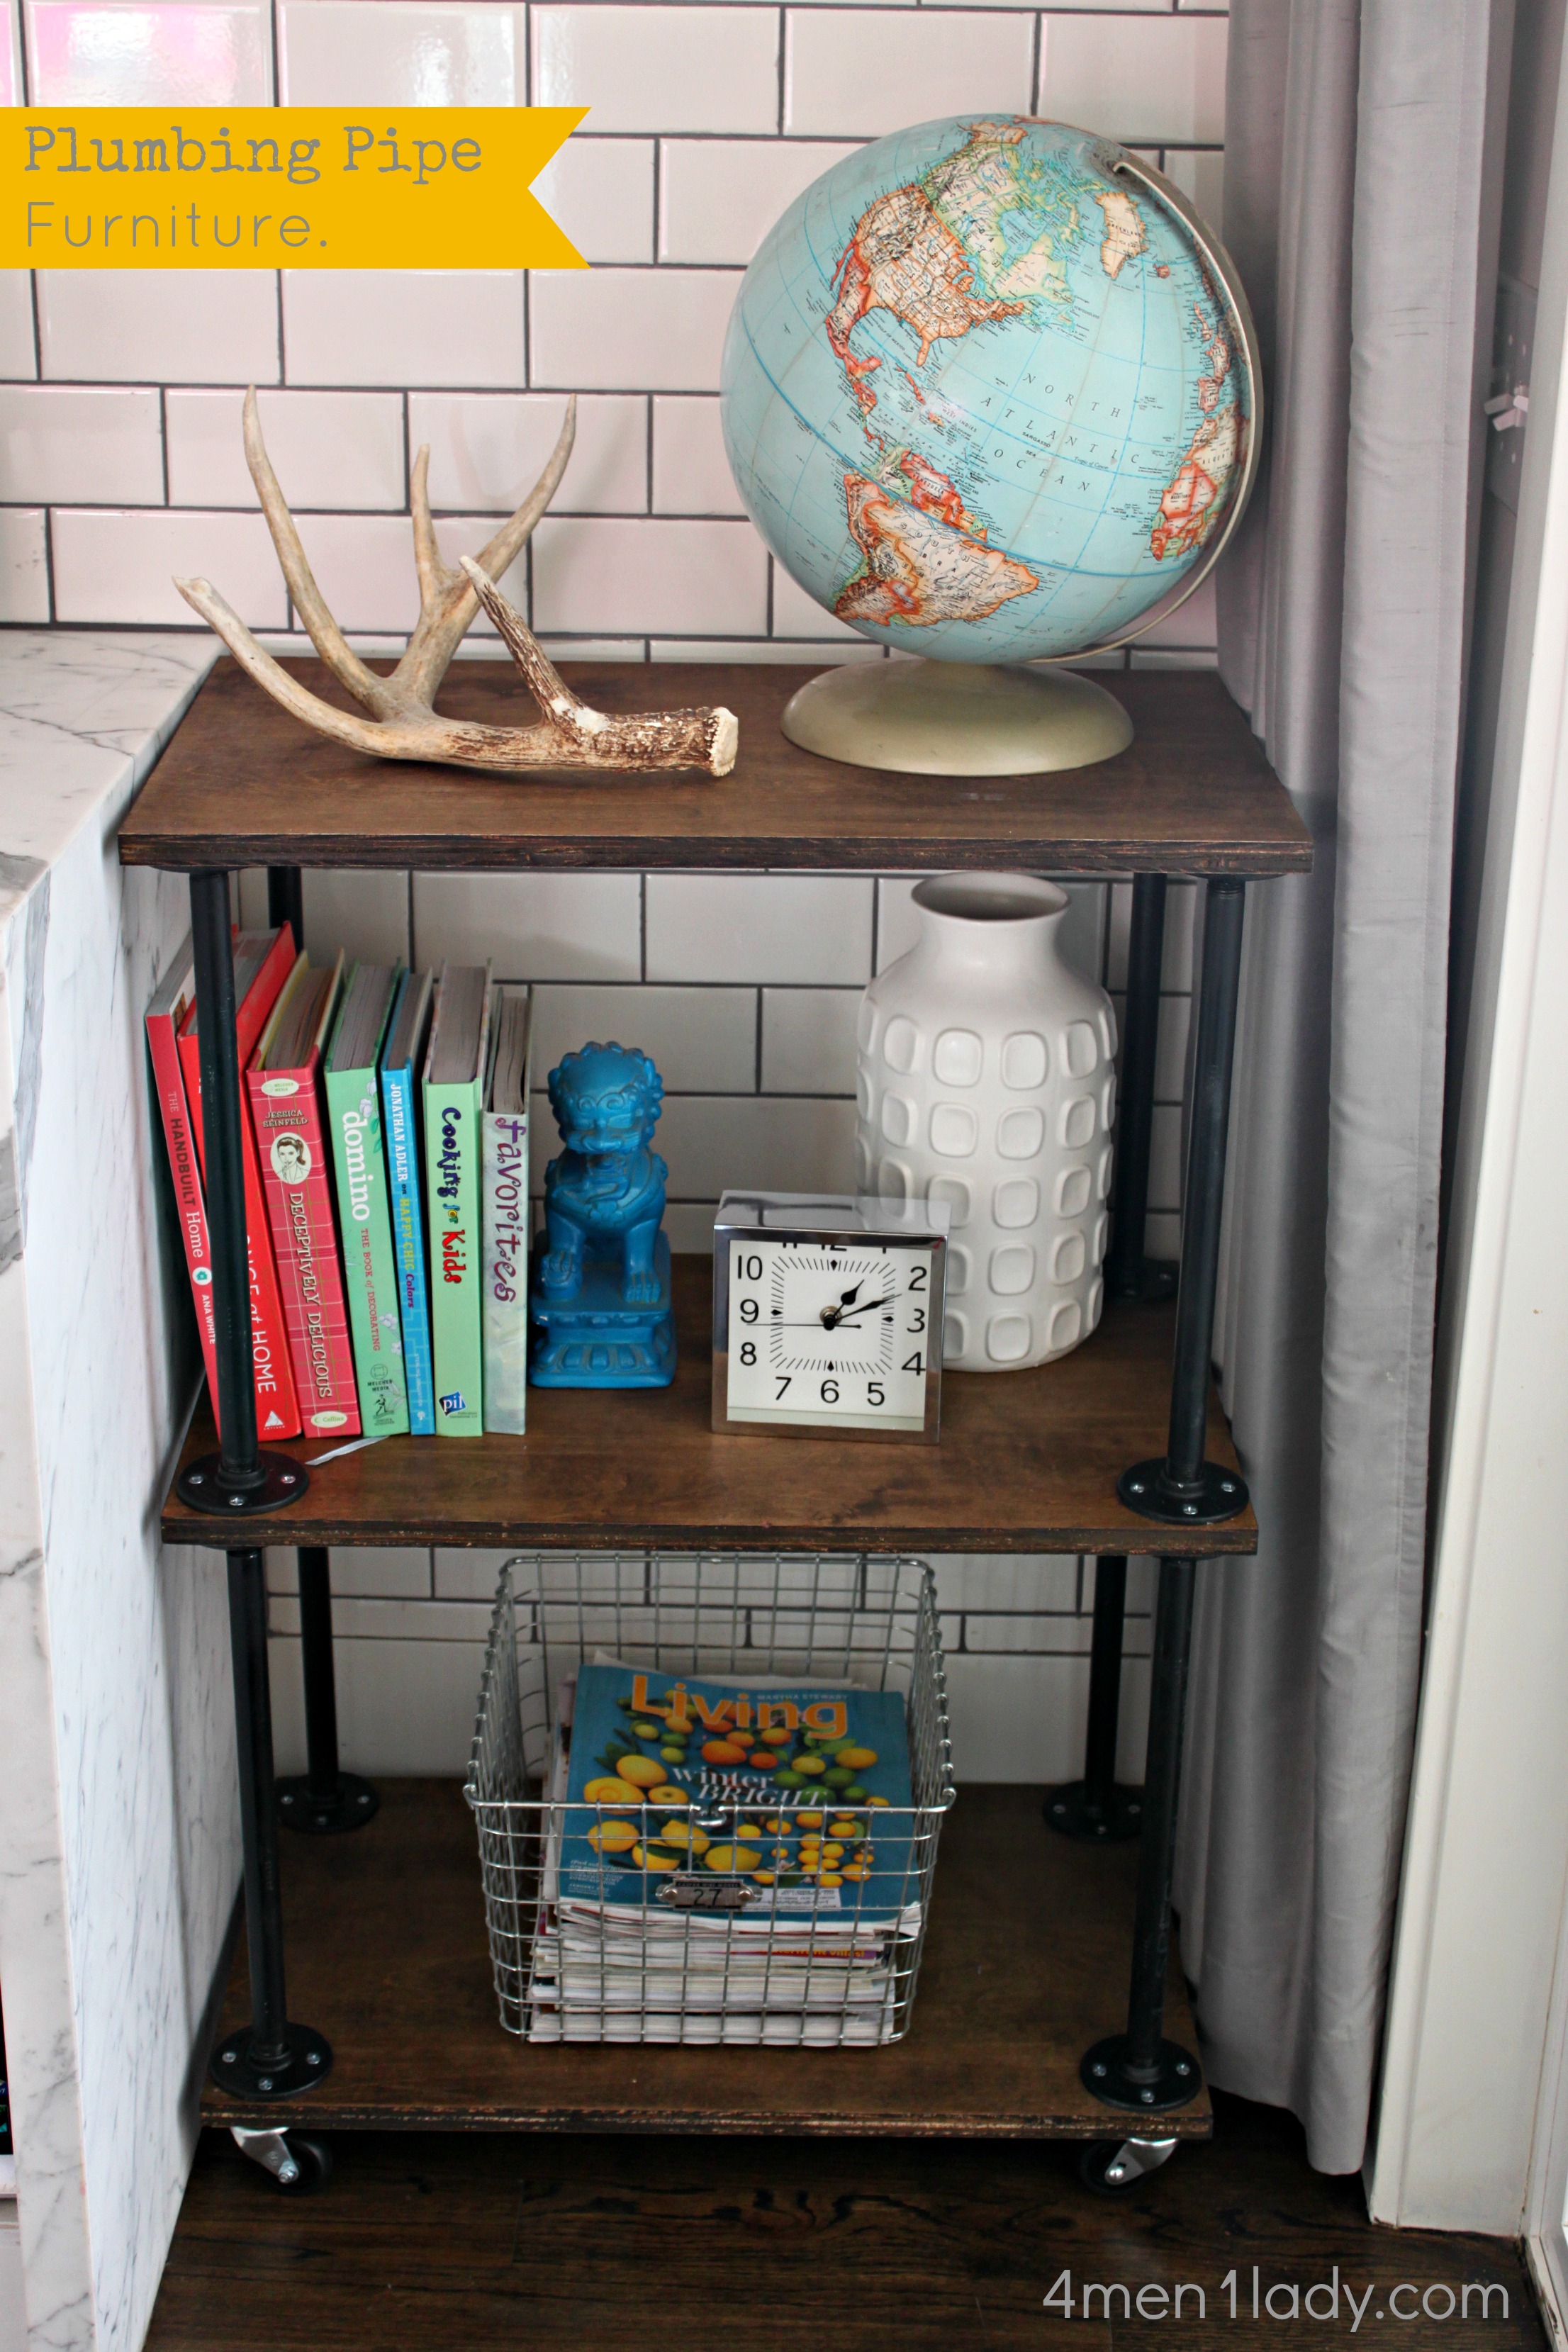
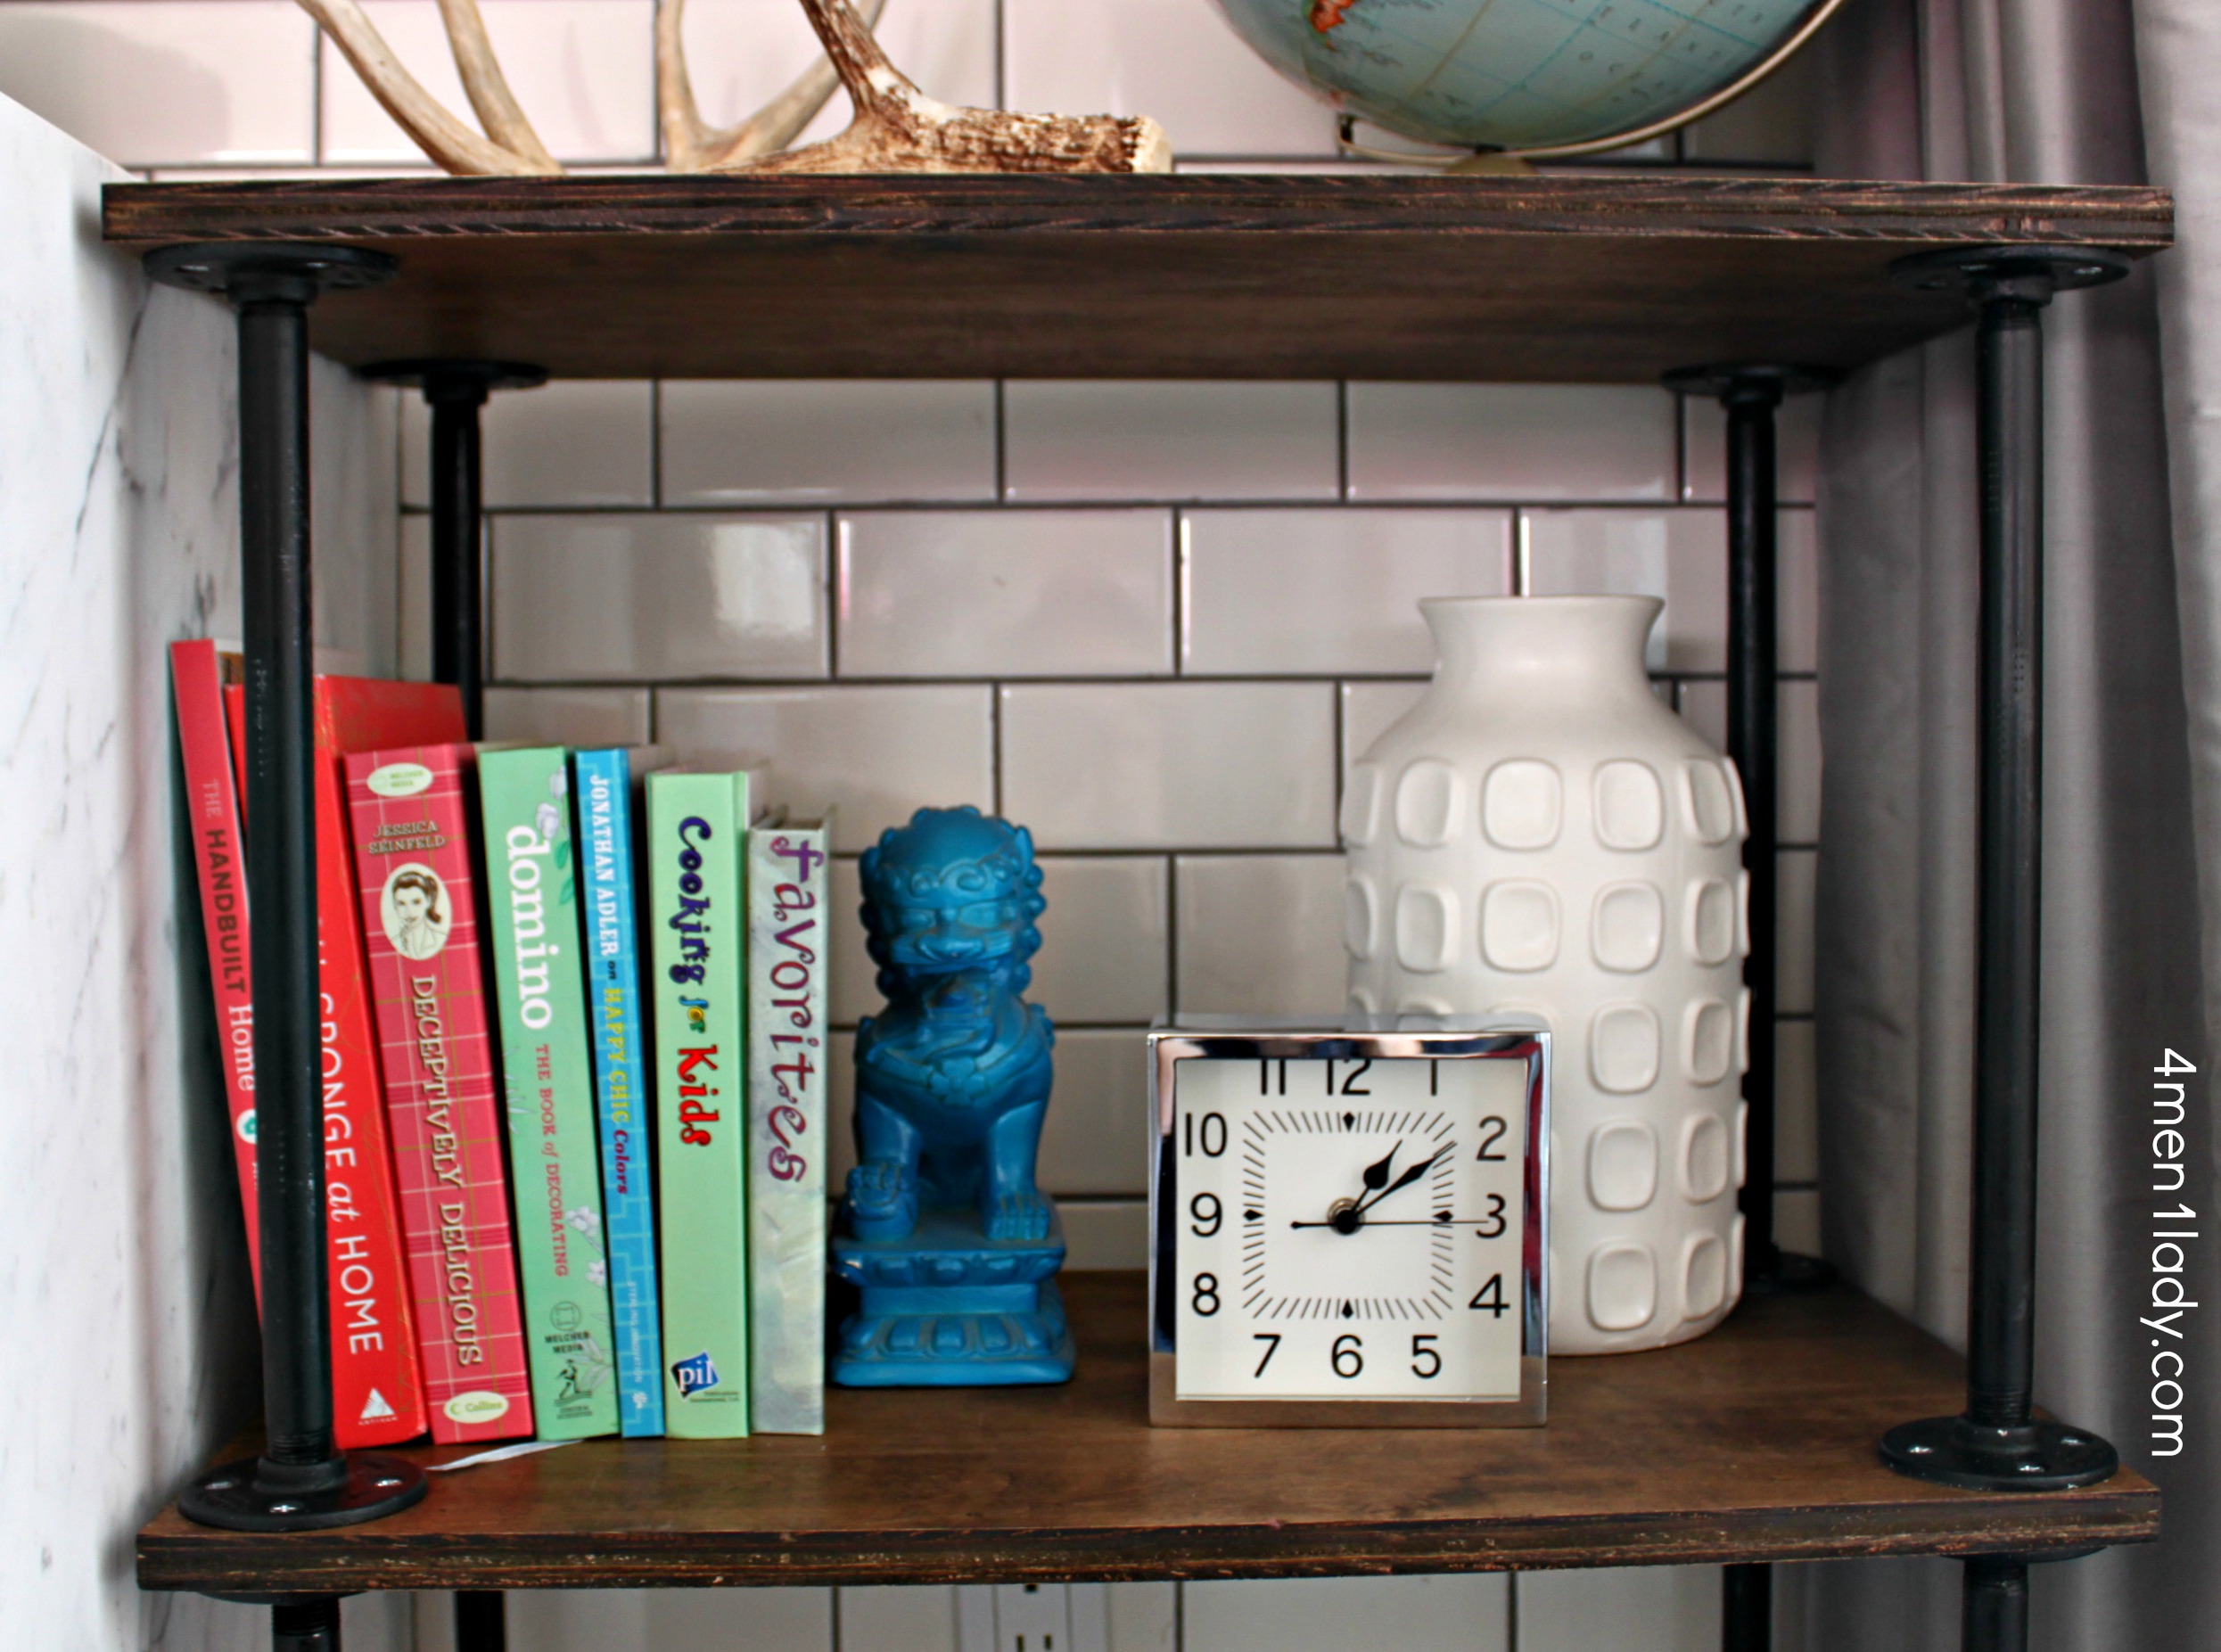
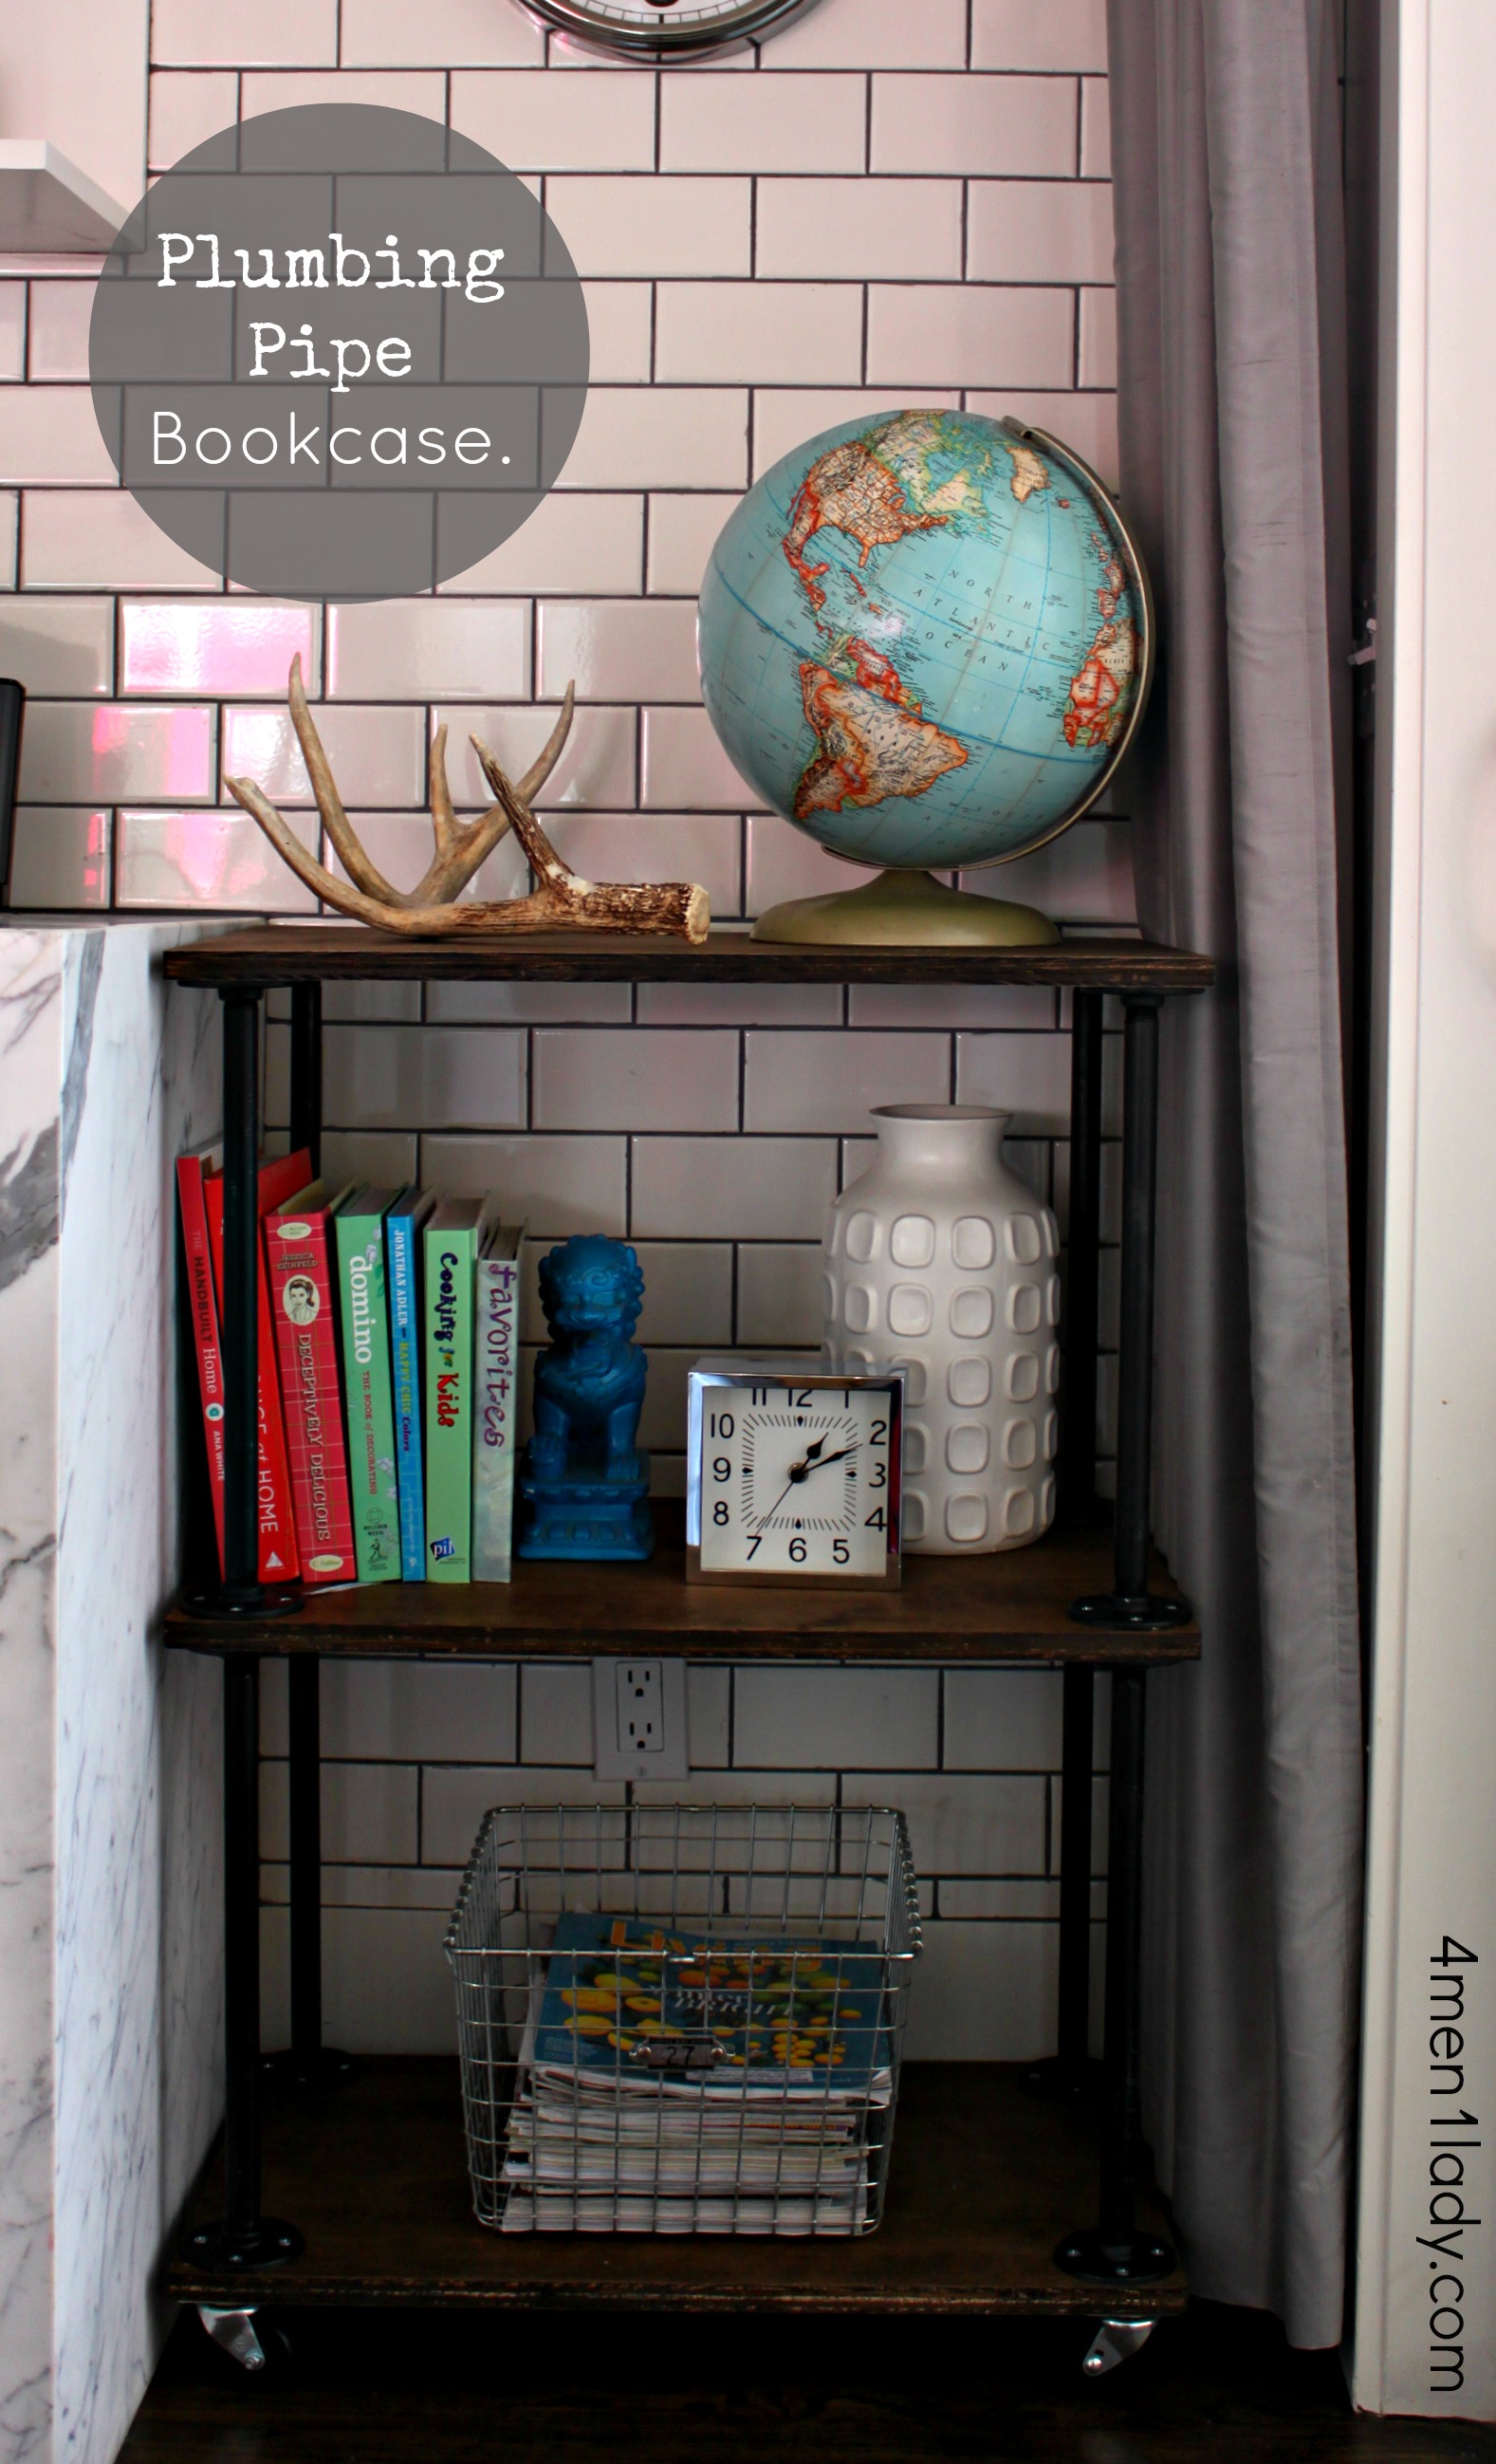
I love the industrial look to it plus when you do it yourself, you can customize it to your perfect dimensions.
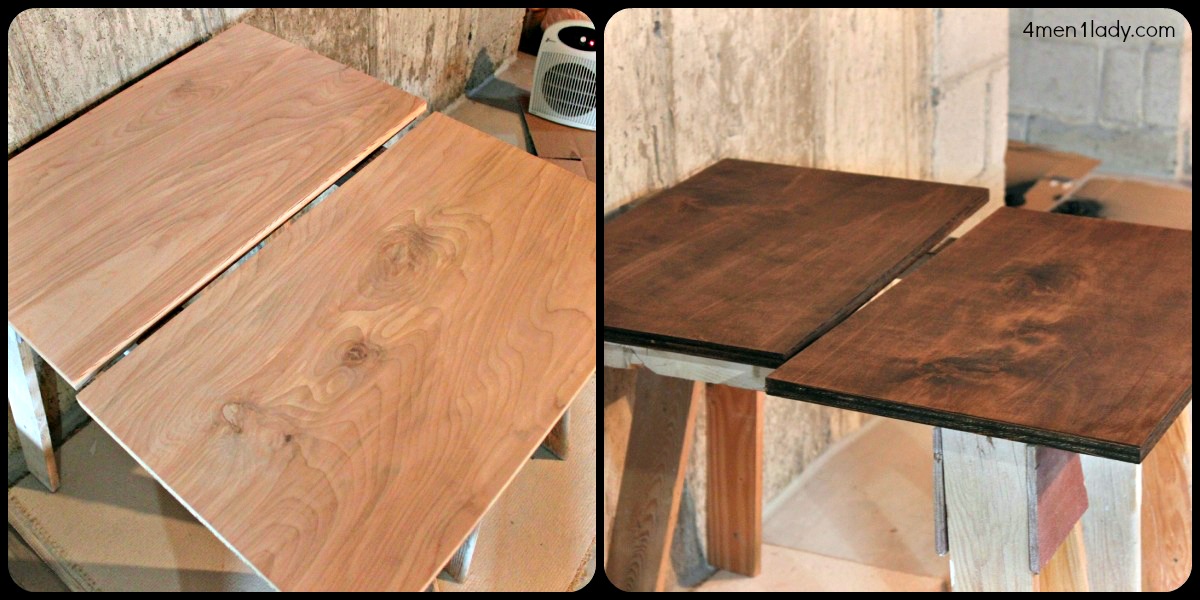
I picked everything up from Home Depot. My first stop was the wood department. I picked out a sheet of birch wood because I liked the look of the grain. I’ve mentioned this before but what I love about Home Depot is that they’ll cut down your boards to your specific dimensions for free. I was actually a fan of leaving the board as-is and sealing it with polyurethane but I wanted it to match the kitchen so I stained the boards Walnut then sealed it with Wipe On Polyurethane.
Next stop, the plumbing department. Now I was under the assumption that this was going to be a pretty inexpensive project. Turns out 16 floor flanges at $6.00 a pop adds up quick. After my sticker shock I might have re-thought the whole project but I already had the board cut and in my cart. I will admit for a brief moment I thought about stashing the boards in the light bulb isle then running but then I remembered…my momma taught me better…plus, video cameras.
Moral of the story…price things out first.
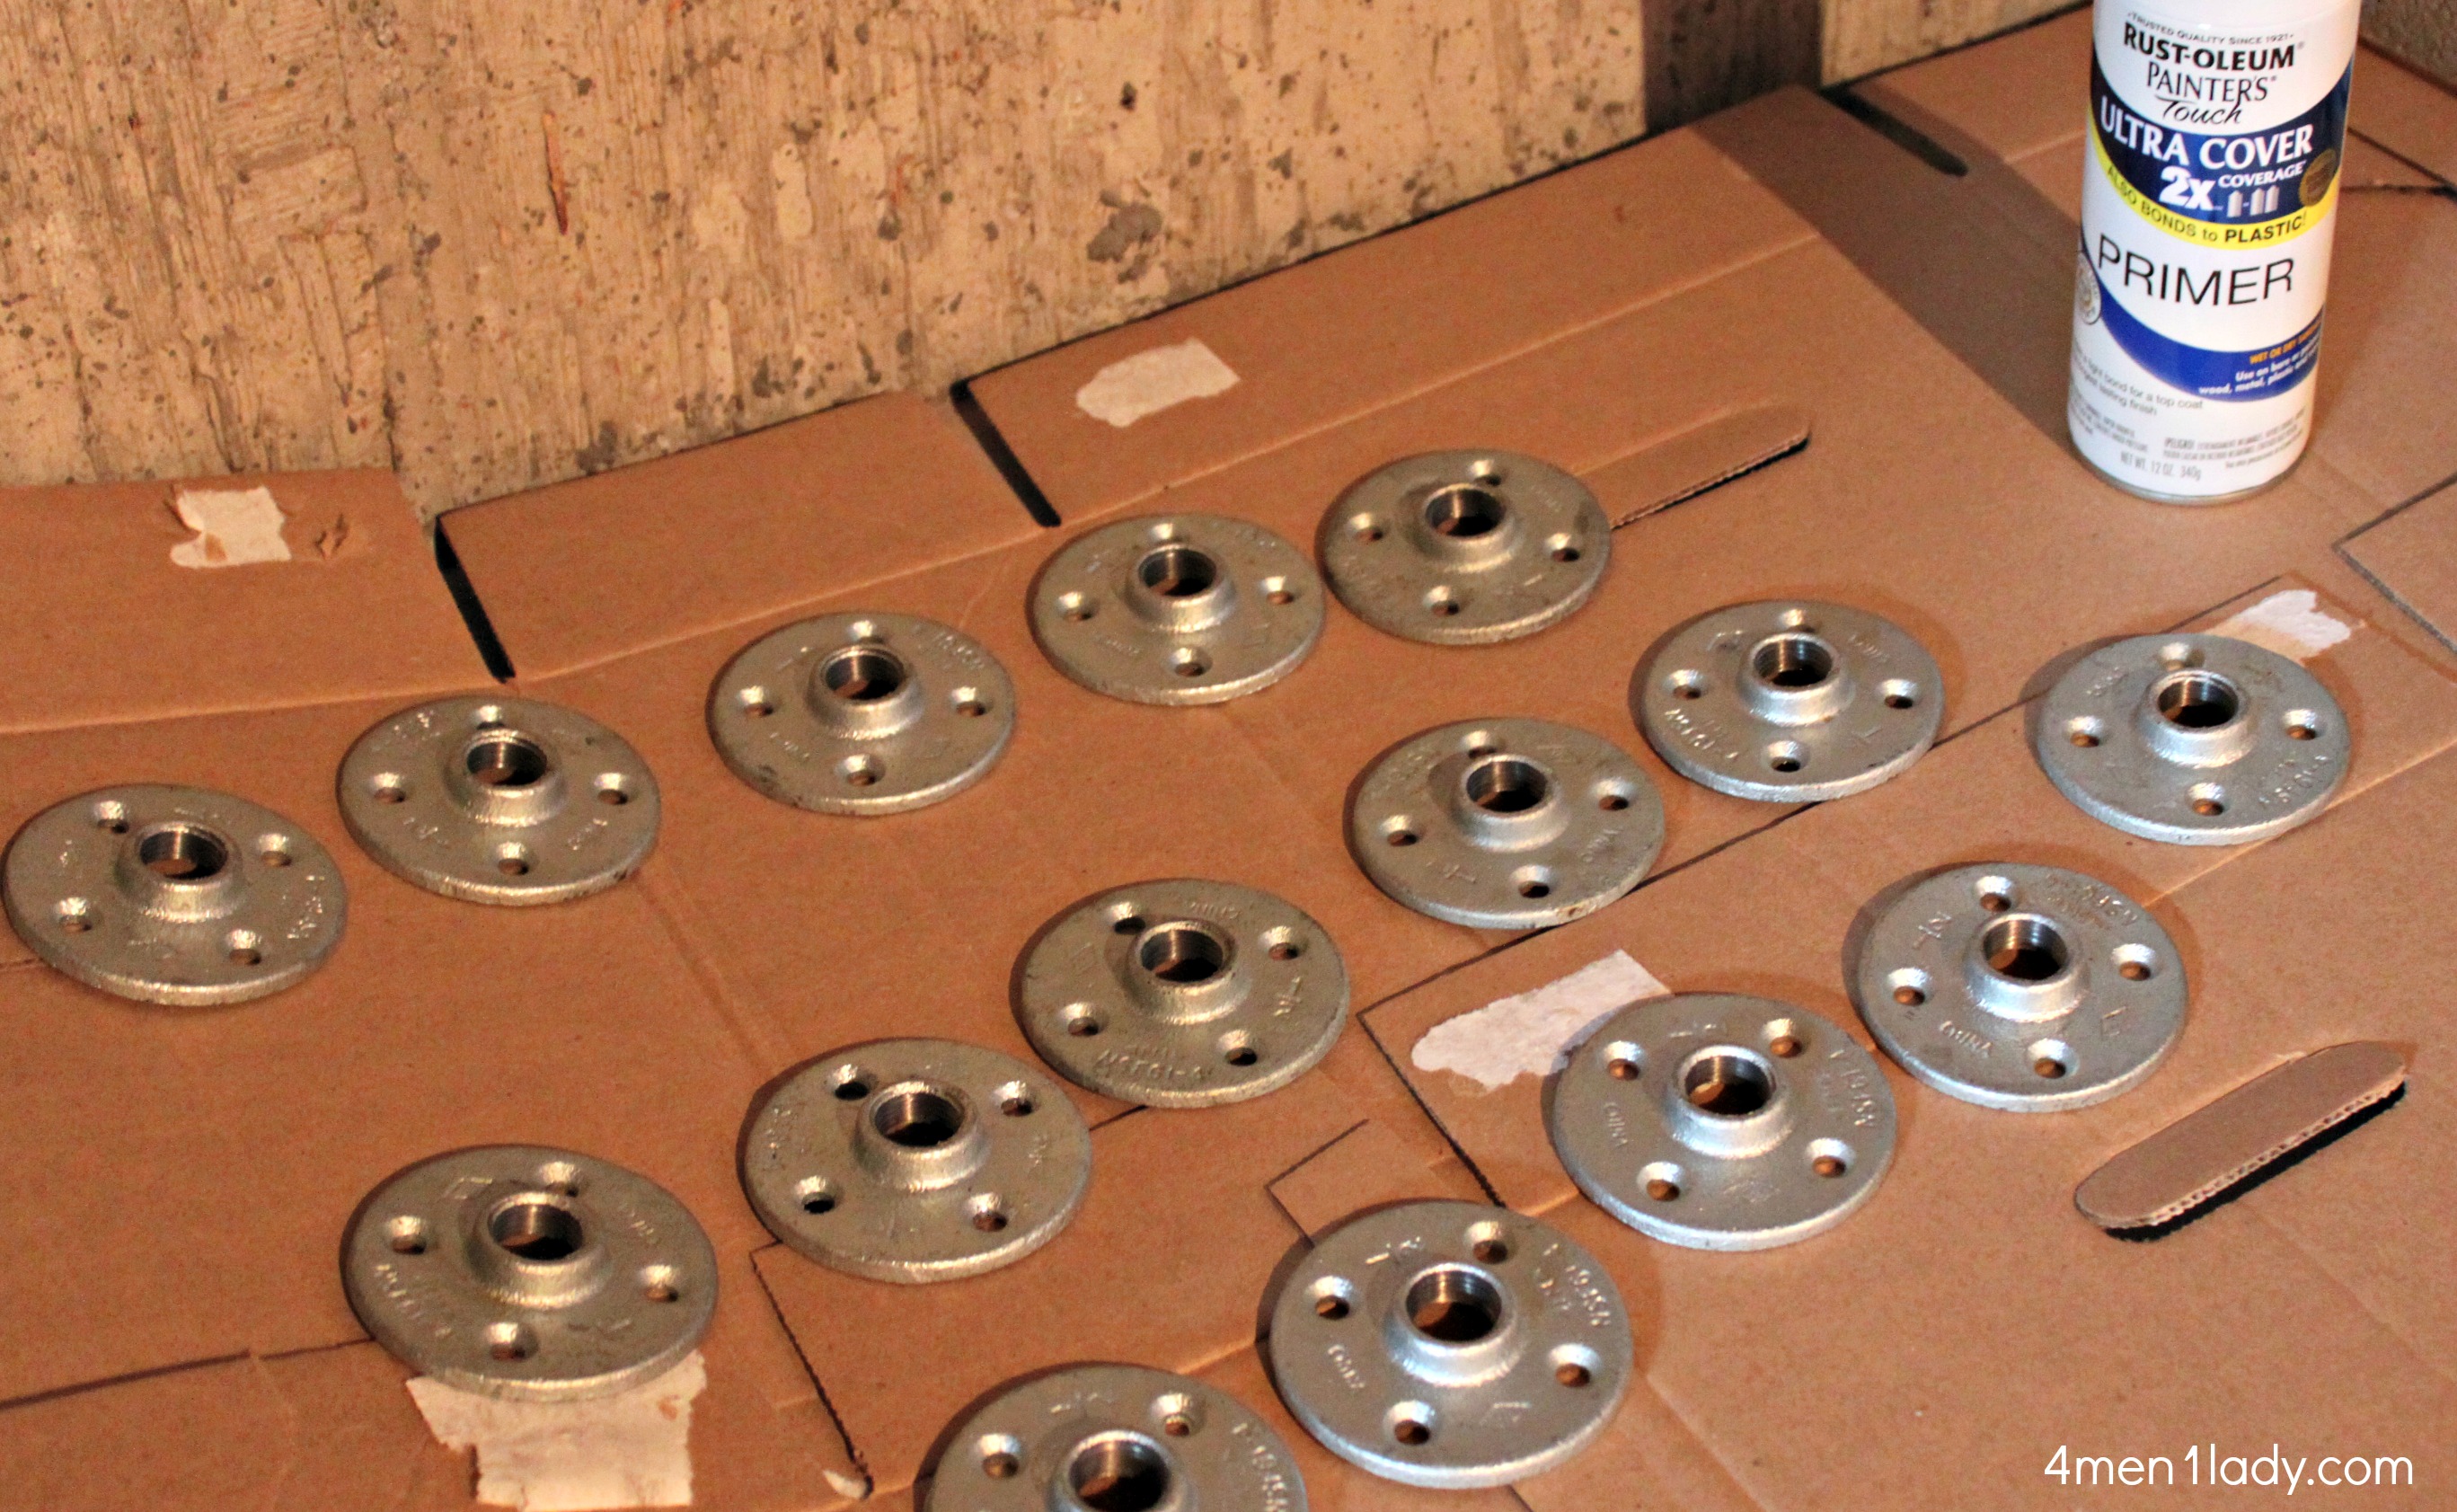
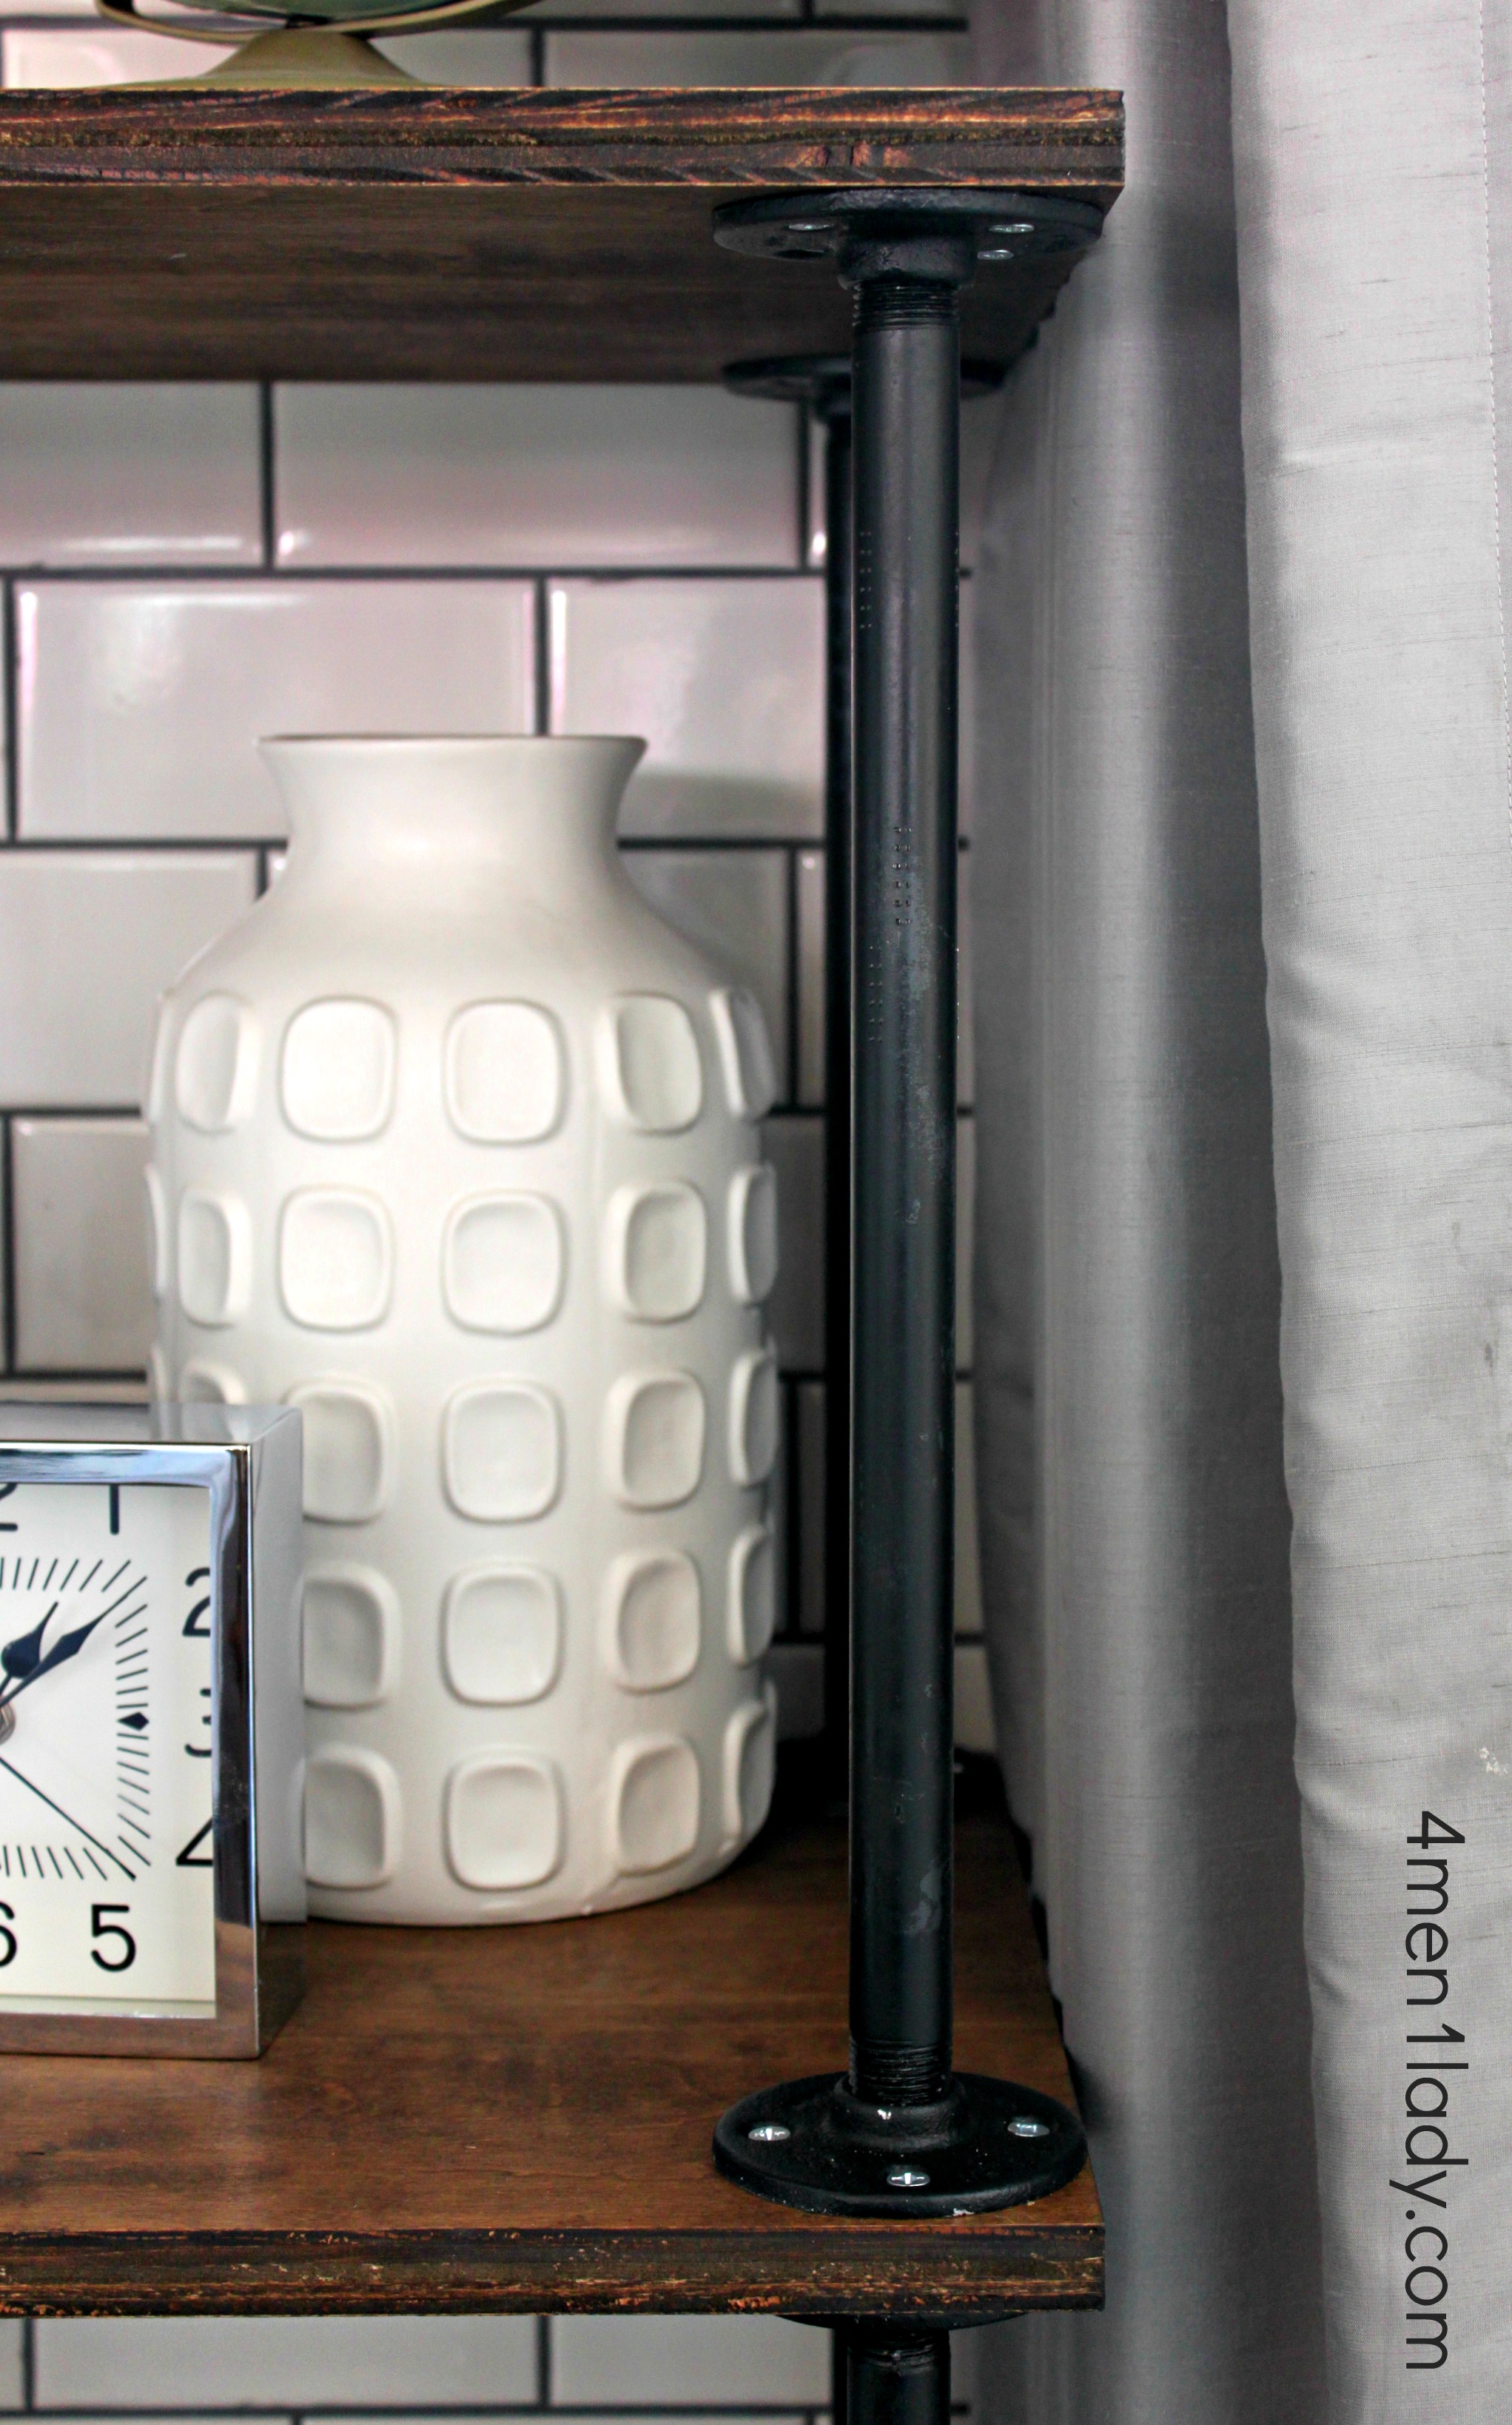
The pipes came in three different colors. Silver, black and green. I opted for black but the flanges only came in silver so I sprayed them a matte black.
I used 1/2 inch pipes, 1/2 inch flanges and #10 x 3/4″ screws.
Again, if you buy it, they’ll cut all the pipes down and thread each end to your specific dimensions.
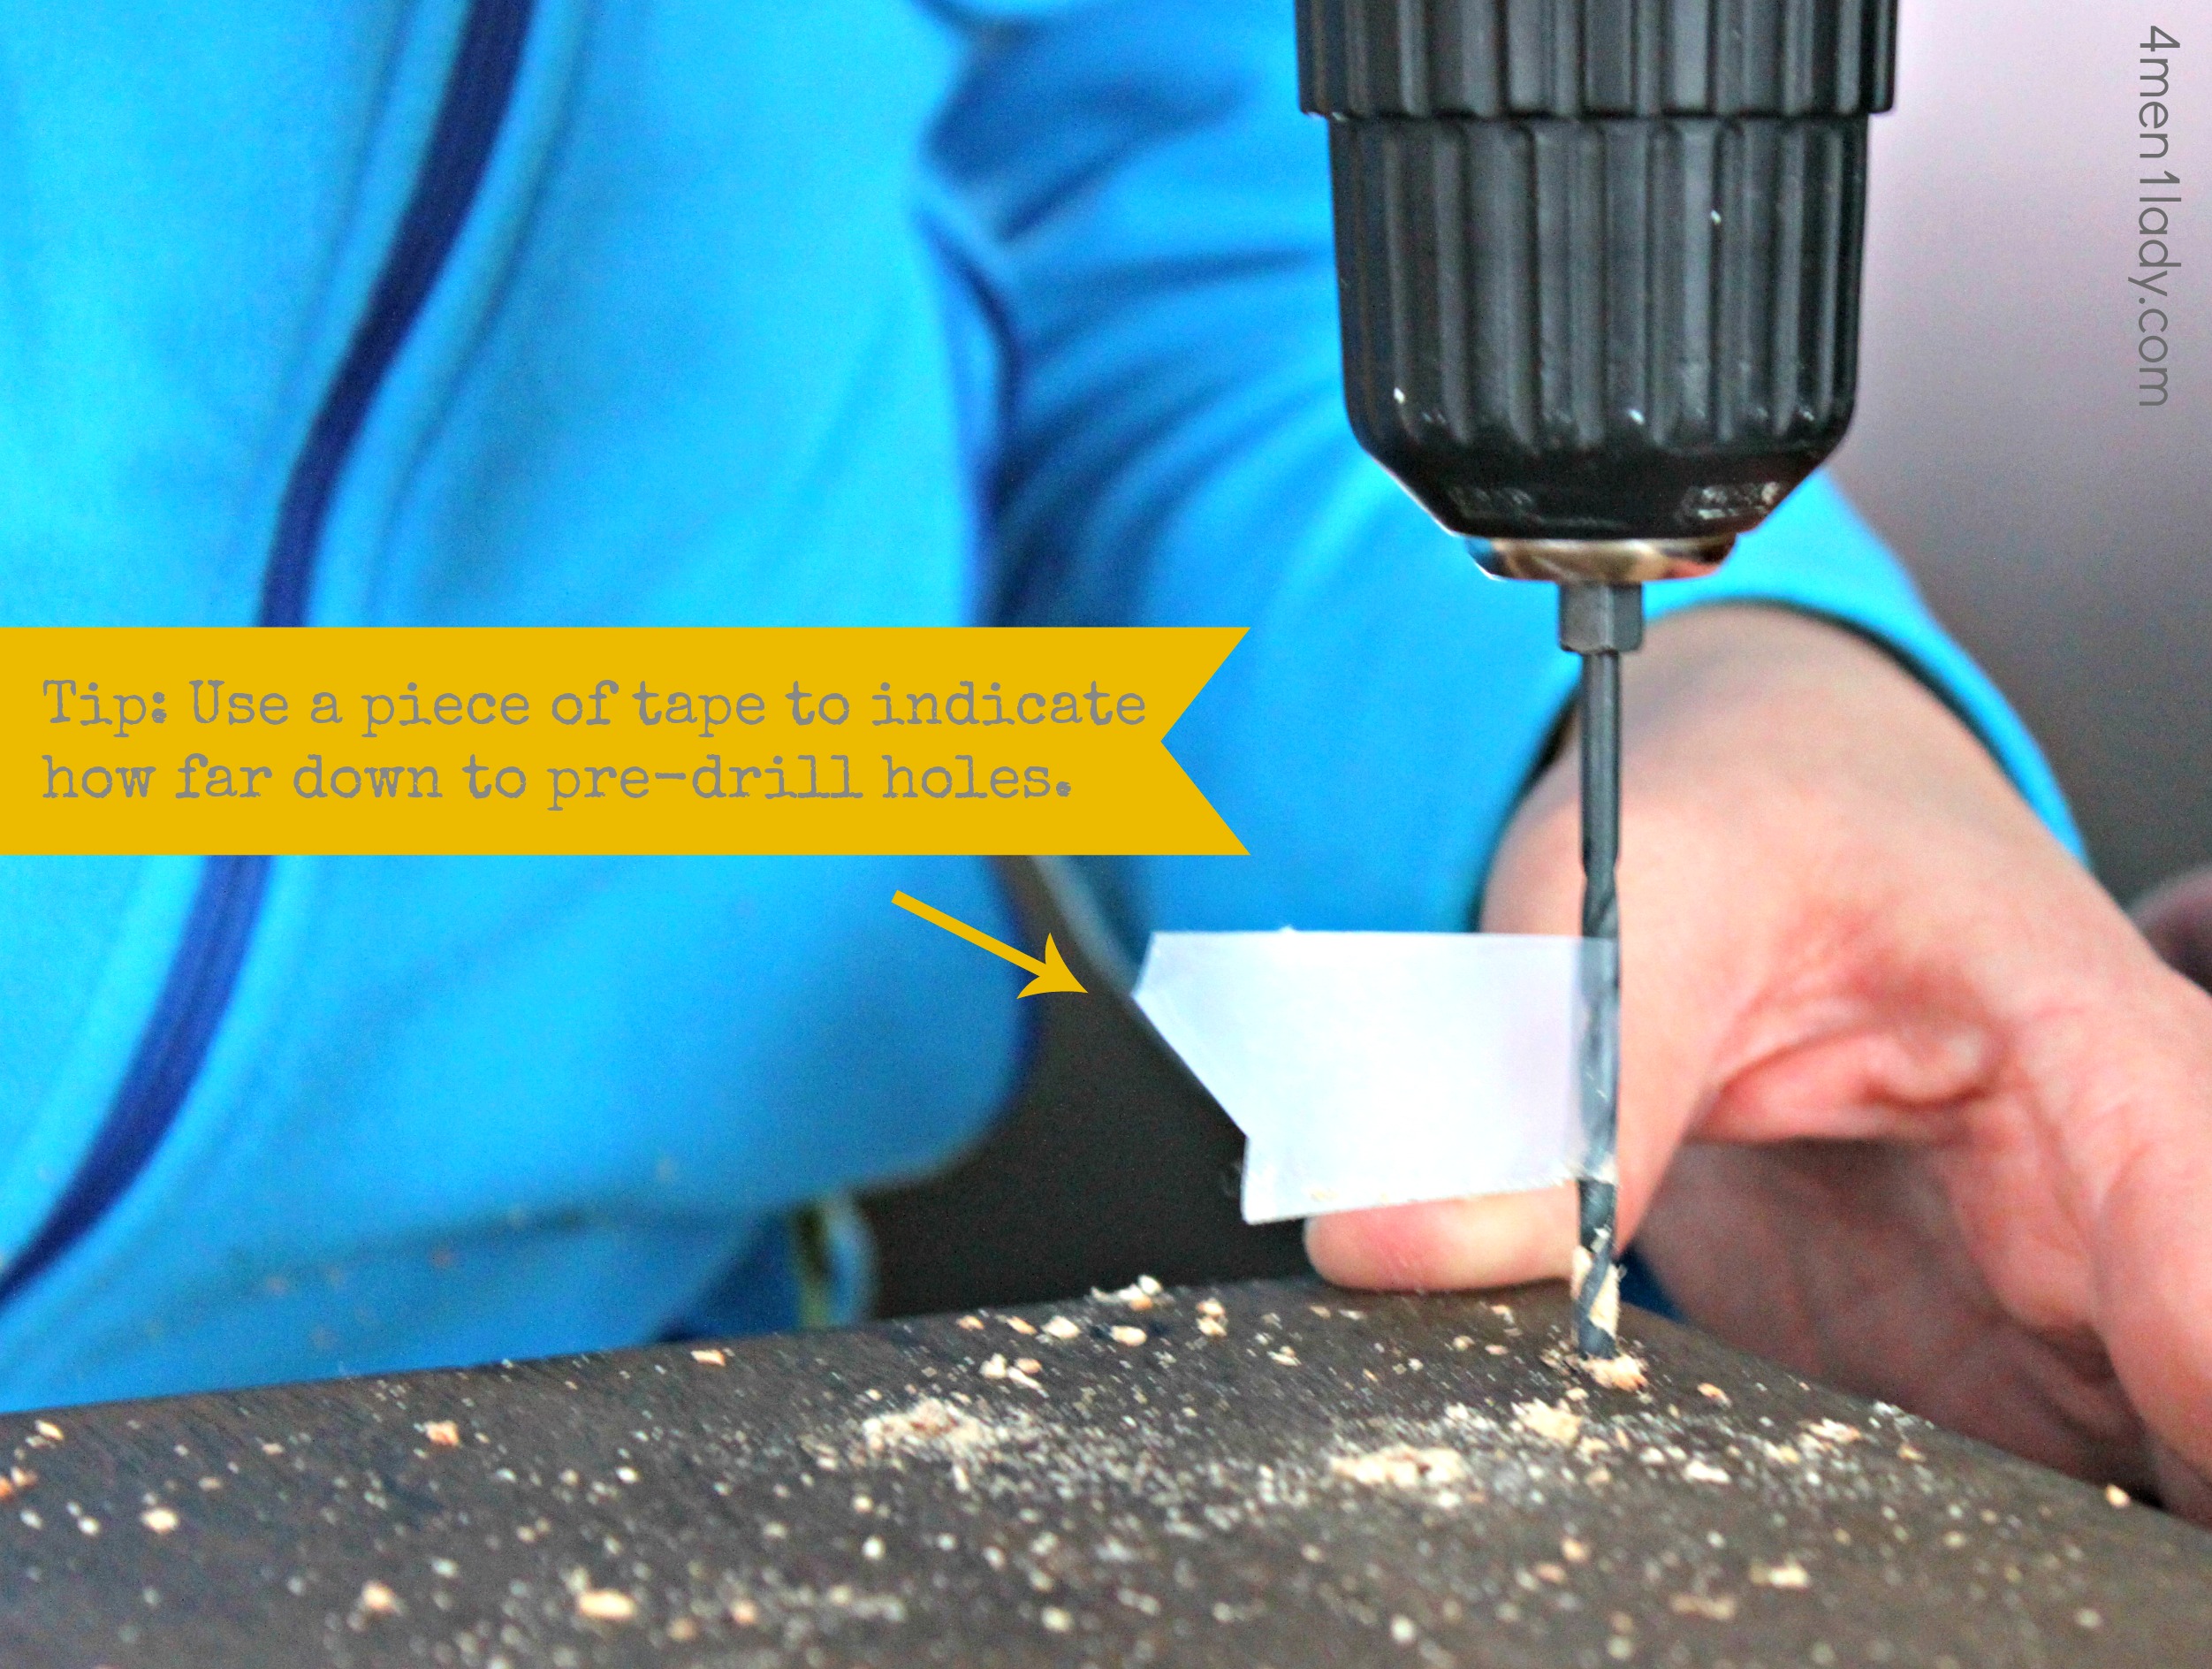
Before putting the screws in to the wood, pre-drill first so the wood doesn’t split.
Also, use a piece of tape to mark how far down to pre-drill so you don’t go all the way through the wood to the other side.
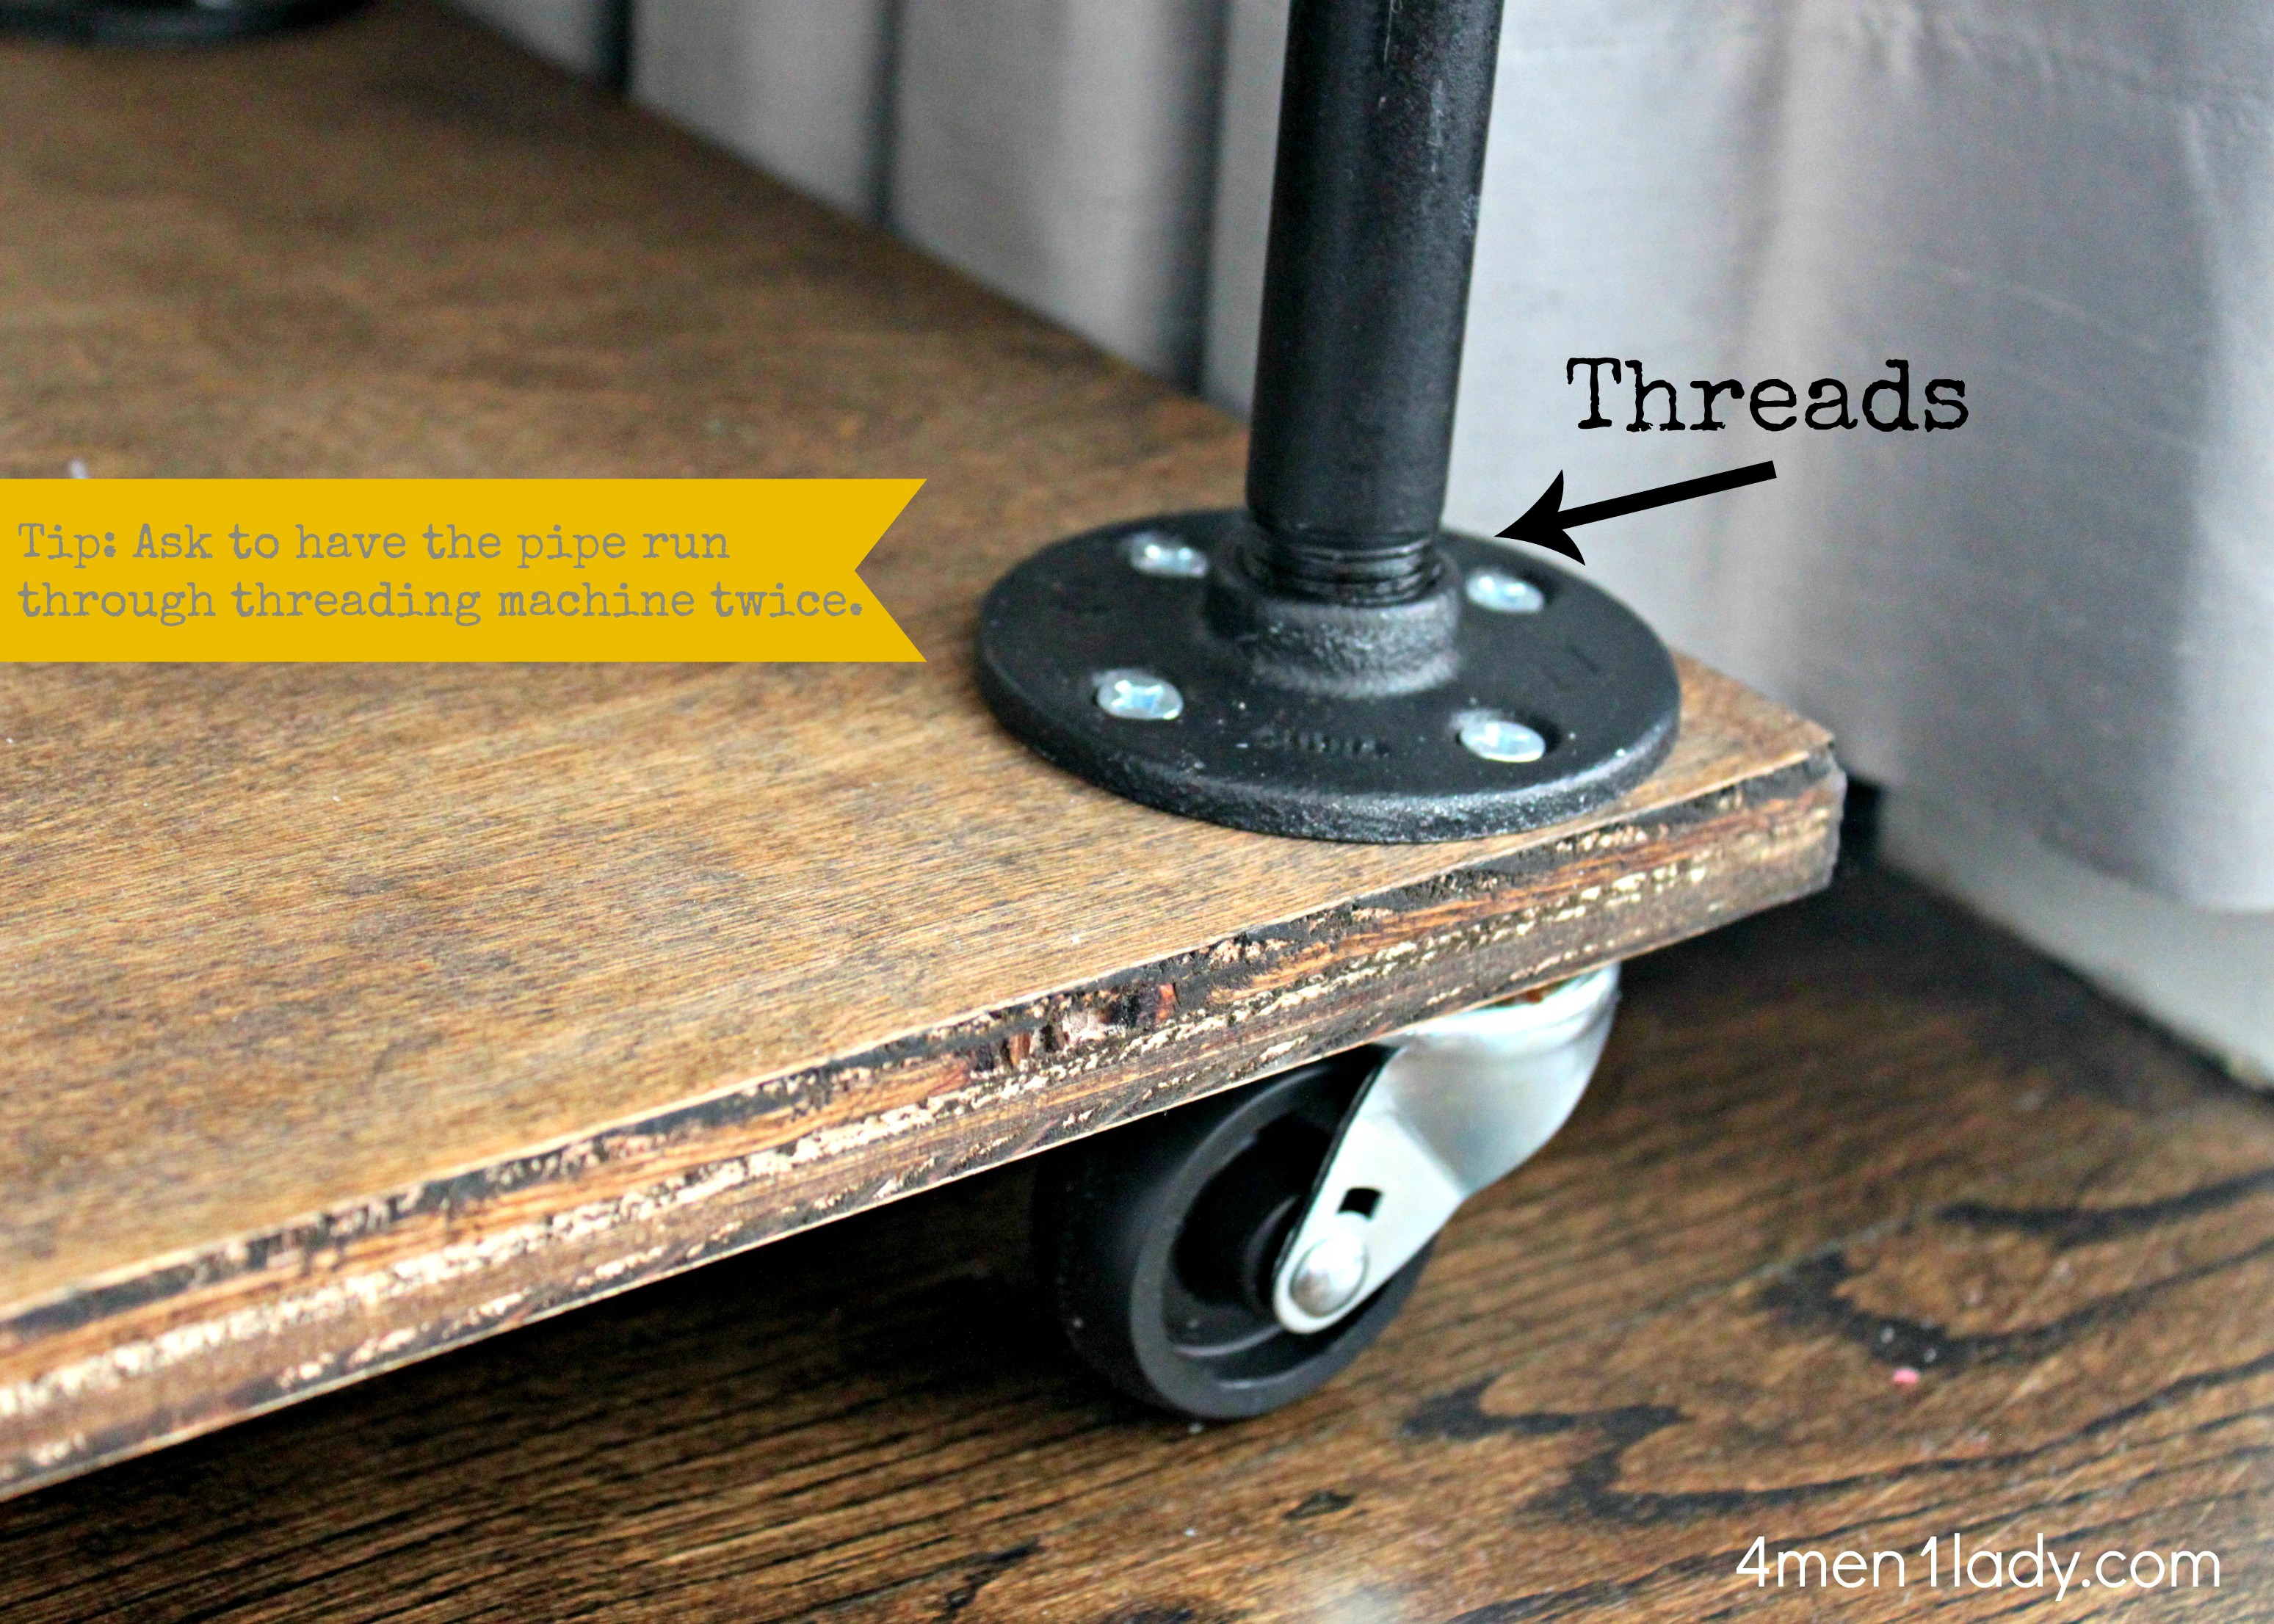
I had to make a second trip to Home Depot when I discovered that 3/4 of my pipes wouldn’t twist on to the flanges all the way.
So sweet Kent ran each one of my pipes through the threading machine twice to ensure they were all a good fit.
While you are standing there, twist each pipe in to the flange and make sure they will twist down before you leave the store.
I also put my shelf on casters to that I can move it for easy cleaning of the floor. Plus, the casters will make it easy if I want to use it as a bar cart for an outdoor party…wink!
In total, the project cost me about $200.00. Much more than I had wanted to spend…those little floor flanges really got me. I could have saved myself so money by buying the flanges for half online. Of course, I didn’t think of that until after I spray painted mine, %^$#! I’m really pleased with the result and would do it again. I’m even toying with the idea of doing a table next.
If you liked this project and would like to see more projects like this please leave me a comment, pin on Pinterest, Tweet and/or like us on Facebook. Thank you!
Don’t forget you can follow us on Pinterest, Facebook, Twitter and we just added Instagram!


 Hey there! I’m Michelle; I’m an Passionate DIY’er and in constant pursuit of how to bring beauty to my house full of men (3 boys + 1 hubby). Stick around and see what I’ve got up my hard-working sleaves!
Michelle, this looks fabulous. If Iwas to build a shelf that is 44 inches wide would you put supports in the middle too? Also, where did you find the flanges online? Thanks!
Kara
Thanks Kara,
I actually just Googled “1/2 floor flange” and found a lot of hits for much less than what I paid. My shelf is 25 inches wide and has a lot of weight with the printer I have on it and no problems. If you weren’t going to put much weight on the shelf I would try and get away with not putting any supports in. I guess it would depend on what you going to put on it. Thanks for your comment!
Love this! Love the industrial look, it’s a perfect fit!
Thanks Sarah!
Gorgeous, but I’m crying you paid HD’s awful flange prices. They will price match to the MetalMart (in Lehi) prices, which run between 1.25″ and 2″ for $2.29-3.99. I *love* MetalMart! Their site is metalmart.biz. It is a clunky site, but the search feature is fairly accurate. The store is pretty fun too!
It looks beautiful. This is exactly what we plan to do as part of the entertainment unit we are building for our family room. It’s great to see the look finished rather than just in my head. Love it!
Kiran,
Glad you like it…hope you’ll share pics of your finished product! Thanks!
Lovely but I don’t see a printer wink
I’m with you on the price, they are $8 a piece here!! Quickly spoils a plan, defiantly going to go online and search for a better price! I love how it turned out and great idea re the castors. I’m planning a sideboard/tv cabinet, thank you for the inspiration!
Hi Michelle
I love your blog and I have been following it for about 3 years now, everything you do is magic! I just thought I would send you a ink of my friends blog, she made a supper cool ibeam table! mabe it will give you ideas for you table projet? I think you’ll like it:)
Rebecca
http://prettydubs.blogspot.com/2012/09/i-beam-dining-table-rustic-industrial.html?m=1
Aww, thanks Rebecca! You made my evening! Can I just say that is THE COOLEST table EVER! I’m totally pinning that to my Pinterest DIY page. Props to her crew. That looked like a major undertaking. Thanks for sharing and thanks also for your sweet comment!
I love the way this looks! $200 is a little much for me :/
Hi Michelle,
Your table turned out awesome! Since I’ve seen that idea, I’ve been wanting to make one of my own. I just might have to. Thanks for the props on our I-beam table. It’s probably our favorite project so far (next to my Tufted Headboard). I look forward to reading your blog more.
Bonnie,
Love, love, love your project! Really creative idea. I’m going to have to search for your tufted headboard now! 🙂
Thanks! Here, to save you the search: http://prettydubs.blogspot.com/2012/04/my-diy-tufted-headboard.html. 🙂
Just checked it out and it’s AH-MAZING! Thanks for sharing…job well done!
Very good post, informative and thorough.
Yes, I want one!
Wow, I love this, why do I love industrial stuff so much? I am a middle aged, ok, elderly white woman from the Deep South! Anyway, here is a super cool bookcase I have been saving for while and I am trying hard to get my husband to like, tolerate, whatever. I tried unsuccessfully to get out just the bookcase url but the whole post is good.
http://www.apartmenttherapy.com/the-diy-gods-of-spanish-harlem-139813
Thanks Nancy!
Love this Michelle – it’s a great fit for your space!
Thanks Kris…I’m really enjoying my new bookcase. 🙂
Love your piping project! Keep posting
I love the way this looks like. i am enjoying this bookcase.,its really nice to watch, its really creative idea.keep blogging .
AWESOME! I love this project post, and just your house in general, it’s SO gorgeous! I’ve been following your blog for a while now and your old master bedroom (yellow & gray) has been my favorite for a LONG time.
I have inspiration images from the Brick House blog’s plumbing bookcase hanging up on my great room walls since that’s our next major house project. (Although I’ve had them up on the walls along with paint swatches when we moved into our money pit aka foreclosure 2+ years ago, LOL). We have super high ceilings and a huge wall so we’re hoping to build a huge custom plumbing pipe unit, so good to know we can find the metal flanges cheaper than HD, which happens to be our go-to store 99% of the time. So thanks to all the ladies in the comments above posting about how to get them elsewhere, cheaper. Good to know!!
Love your blog Michelle!
Thanks Rebecca for your kind words! I absolutely LOVE my plumbing pipe bookcase and even moreso that I built it myself. There’s something about pride in DIY’ing a project. Best of luck with the project and new house. I hope you share pictures!
This is fantastic. I was looking to do something similar for a console table in my living room. Out if curiosity, how long are the pipes you used? I’d like the table to be counter height like yours, but I’m not sure where I should cut them! Thanks!
I may have missed it…but how long did you cut the pipes? I like the shelf height that you have.
I had to pin this! This is super fantastic! I saw it over on Interior Collective and I had to come visit your site. It’s amazing, by the way!
Kerry,
Thanks for dropping a line. I’ll have to check out Interior Collective.
Thanks!
Your instructions are so great, especially the part about having the pipes threaded twice and checking them all before you leave! I just made a similar bookshelf and would never have thought of that without reading your post first. I have a question though, did you have trouble getting all the pipes to stand up exactly straight? Some of mine are a little wonky–the shelf tops are level, but when you look from the side you can see that the pipes are a little askew.
By the way, I am attaching a drop-leaf table to my shelf to use as a craft table, and when I post the directions to my blog I will definitely be referring readers to this post for the shelf portion!
Let’s talk! I’ll email you.
This looks great, Michelle. I really love the Walnut stain against the white tile.
-Bruce
Thanks Bruce!
Your shelf turned out great and I LOVE some of the great tips you shared throughout your tutorial. Good stuff! Pinned!
Thanks Angie!
Thanks for this, Michelle! I’m going to use this idea for a side table!
Coolio! Share pics of your finished result when you build one of your own. Thanks Bekah!
Hi Michelle!
I just discovered your website and I’m already pinning half your posts!! 🙂 You are a genius!!
I was looking for an industrial kinda looking table, and next weekend I’m copying yours! I’m very excited!
And i want a bench for one of the sides of the table, so i figured, why not do the same and follow this idea of your cart? So i have a question.. (and sorry for my absolutely non-technical terminology, I’m also Spanish, which makes this even harder.. haha) do you think i should put on the bench the same piece in the middle, connecting the legs of the bench, for secutiry? Or would it work just with 4 legs and no “connecting” pipe? I hope you know what I mean… and thank you so much for your help!!
You are such an inspiration!
Gracias!
Rocio
Rocio,
To make sure it is sturdy I would use the same system just on a smaller scale. I would also make sure to connect the pipe legs in to the bench so it doesn’t fall apart. Hope that helps.
Thank you!
I was wondering what length you had the pipes cut, and do you lose any length after threading them? Thank you! Love the table!!
Sorry, love the bookcase!! I plan on making a side table, so I was in my own head! 🙂
any suggestions on where to get the pipes and flanges at a low cost?
I also saw a similar project made with threaded pipe and oversized bolts with oversized washers. The cool thing about the second method is that if you need to make a shelf smaller or larger all you have to do is screw in the bolts in the direction you want. If anyone knows where to get the threaded pipe and bolts pls let me know. I am having no luck at lowes and home depot.
Thank you
Dan: I second that method. In the past two weeks, I’ve made a six foot tall bookcase, a four foot wide audio rack, and a flat file, all using crown bolts (the threaded pipe you mention), bolts and washers. Super simple: you just drill holes in the shelves where you want the crown bolt to go through. After that, you tighten it all down. Solid and good looking. You can spray paint the crown bolts, nuts and washers for super-swank.
I absolutely love this bookshelf,, and I just scored some boards for free that I think would work for this project. I just might have to try it out.
hi! just love your counter tops. are they quartz?
can’t wait to make this.
They are actually Calacatta marble. I would go the quartz route next time in the kitchen.
Great effort Michelle. I think $200 is not little cost as compared ti its design. It’s fabulous.