Now that we’ve shared our shed makeover reveal earlier this week we wanted to rewind a beat and talk shutters.
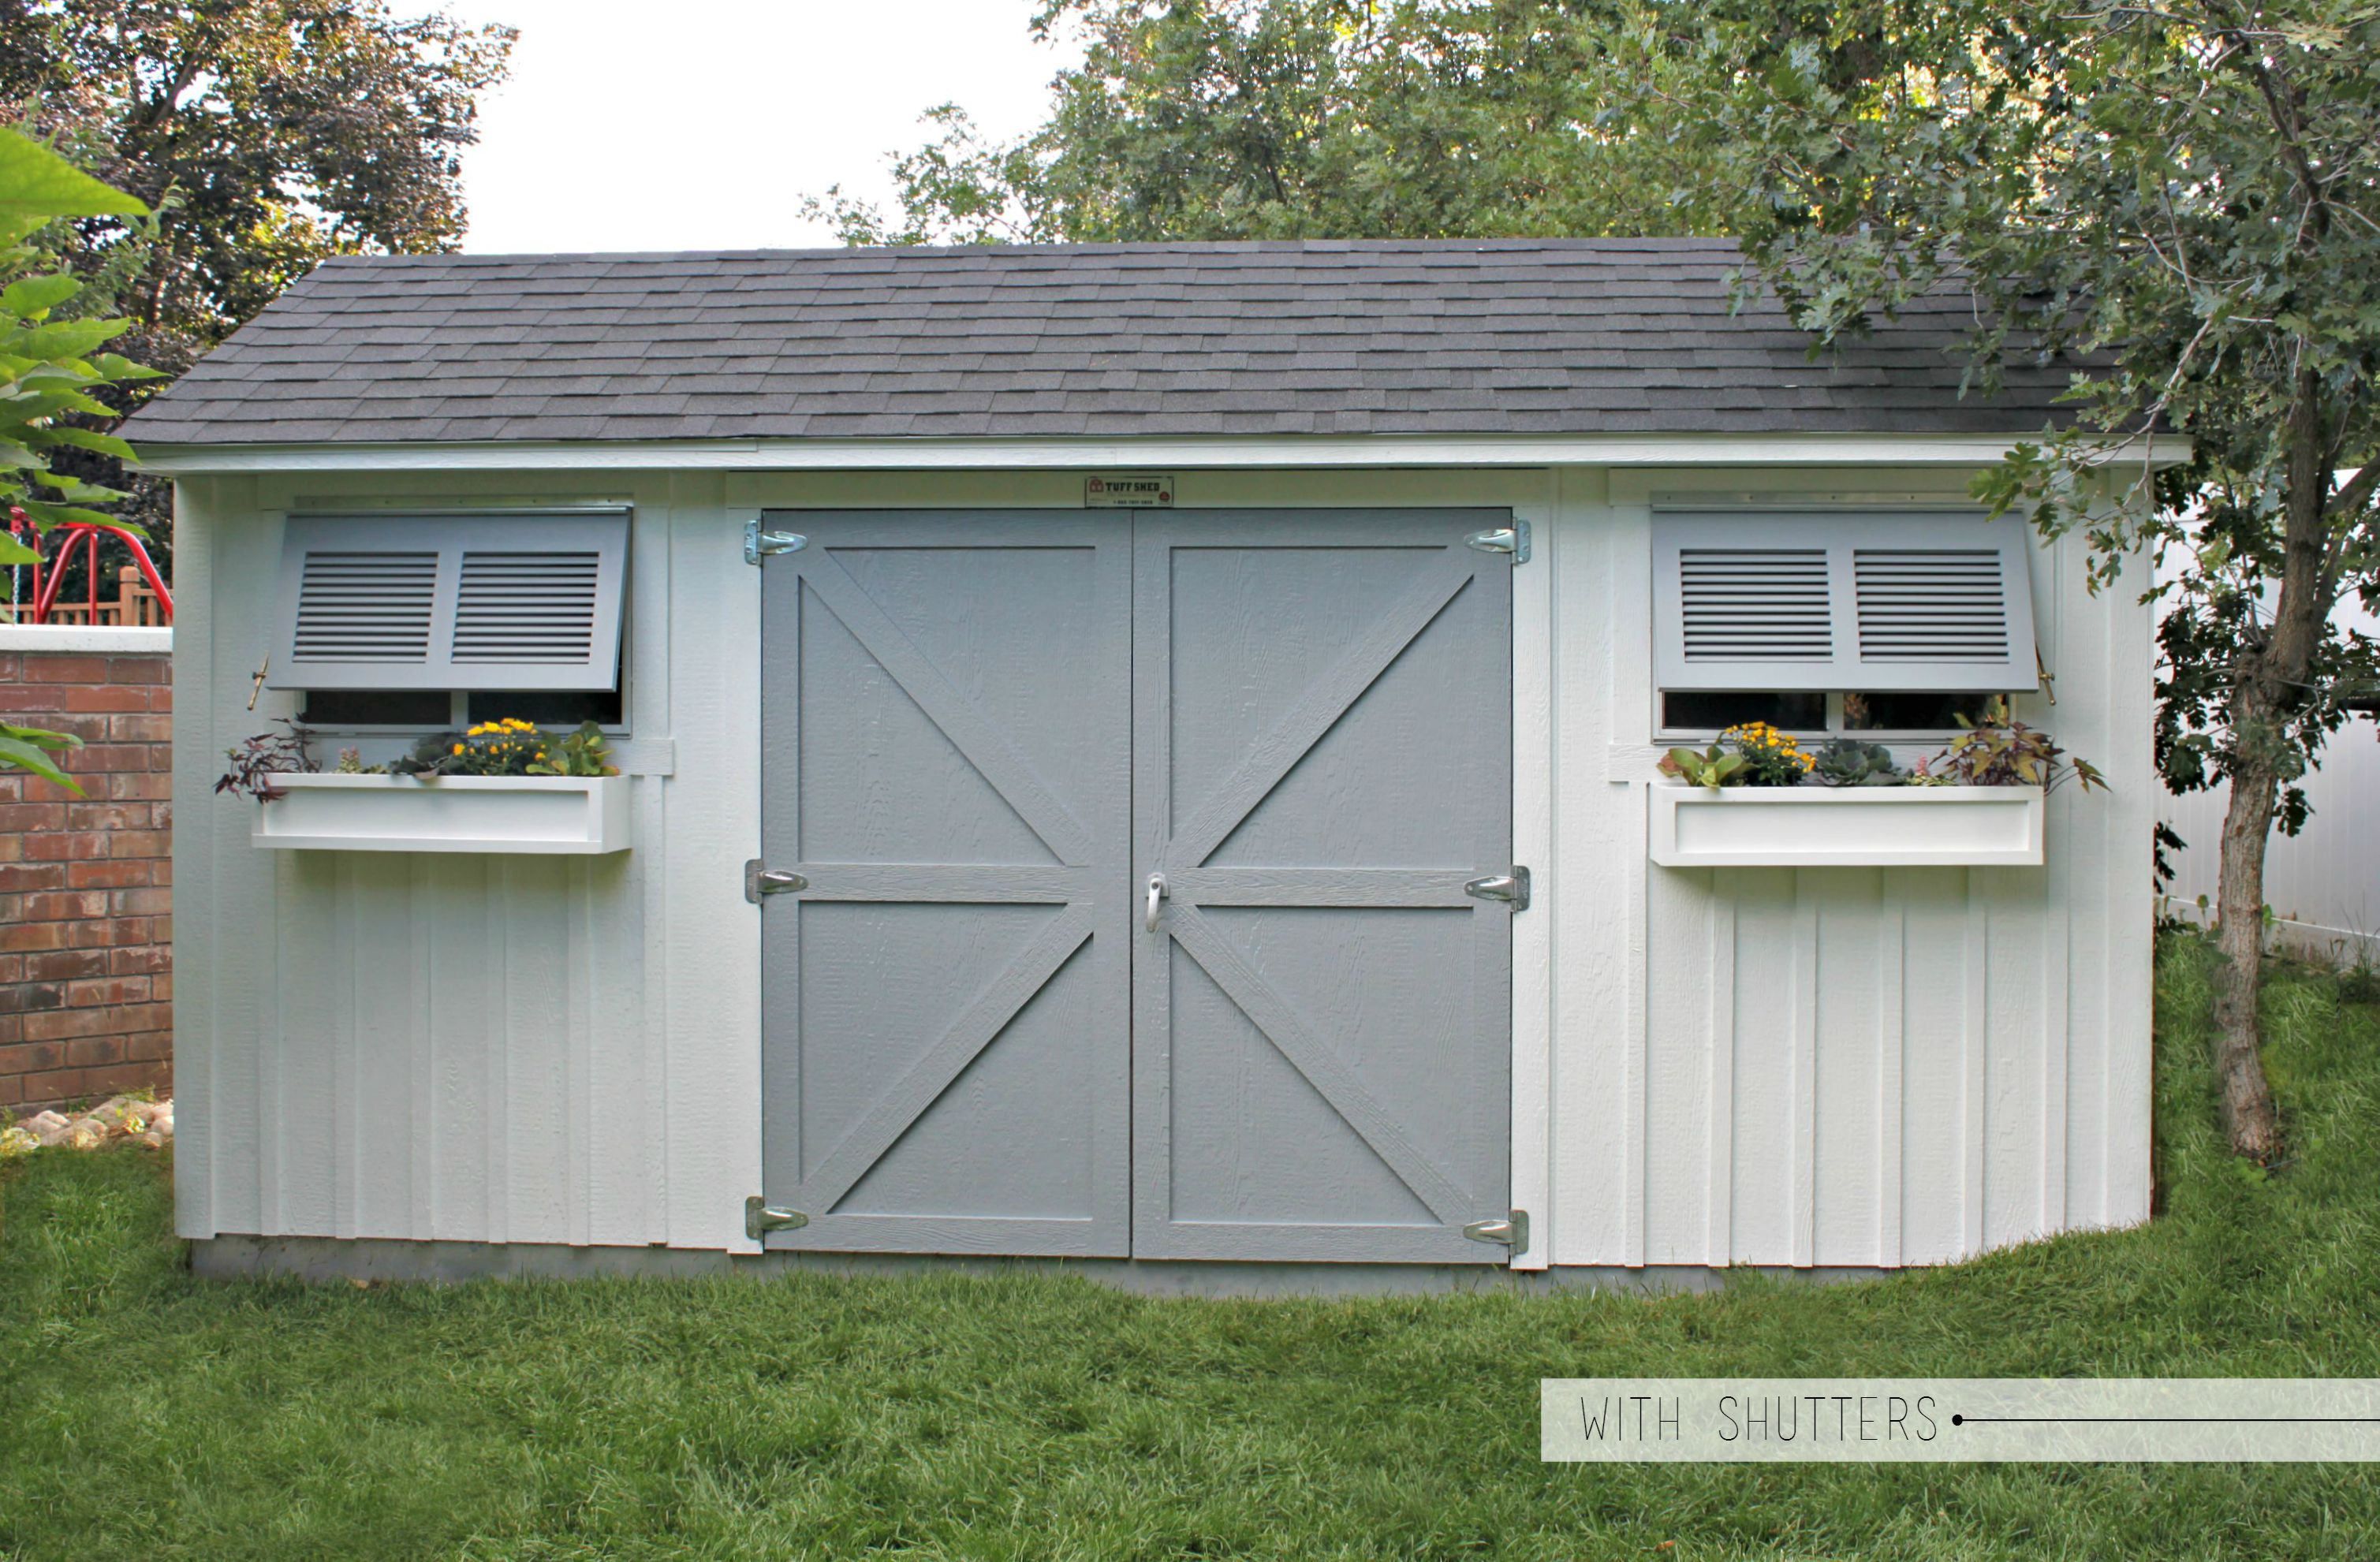
One of my favorite elements of this makeover was the addition of the Bermuda Shutters (also knows as Bahama Shutters).
If you’re not familiar with Bermuda shutters, they are a type of shutter hinged at the top meant to block out the sun but still allowing a breeze to come through.
They get their name from most commonly being used in the islands.
I’ve always loved the look of these shutters and in our case they were meant to be more decorative than functional.
You can see that we have two windows on the front of the shed that allow much needed light to come through.
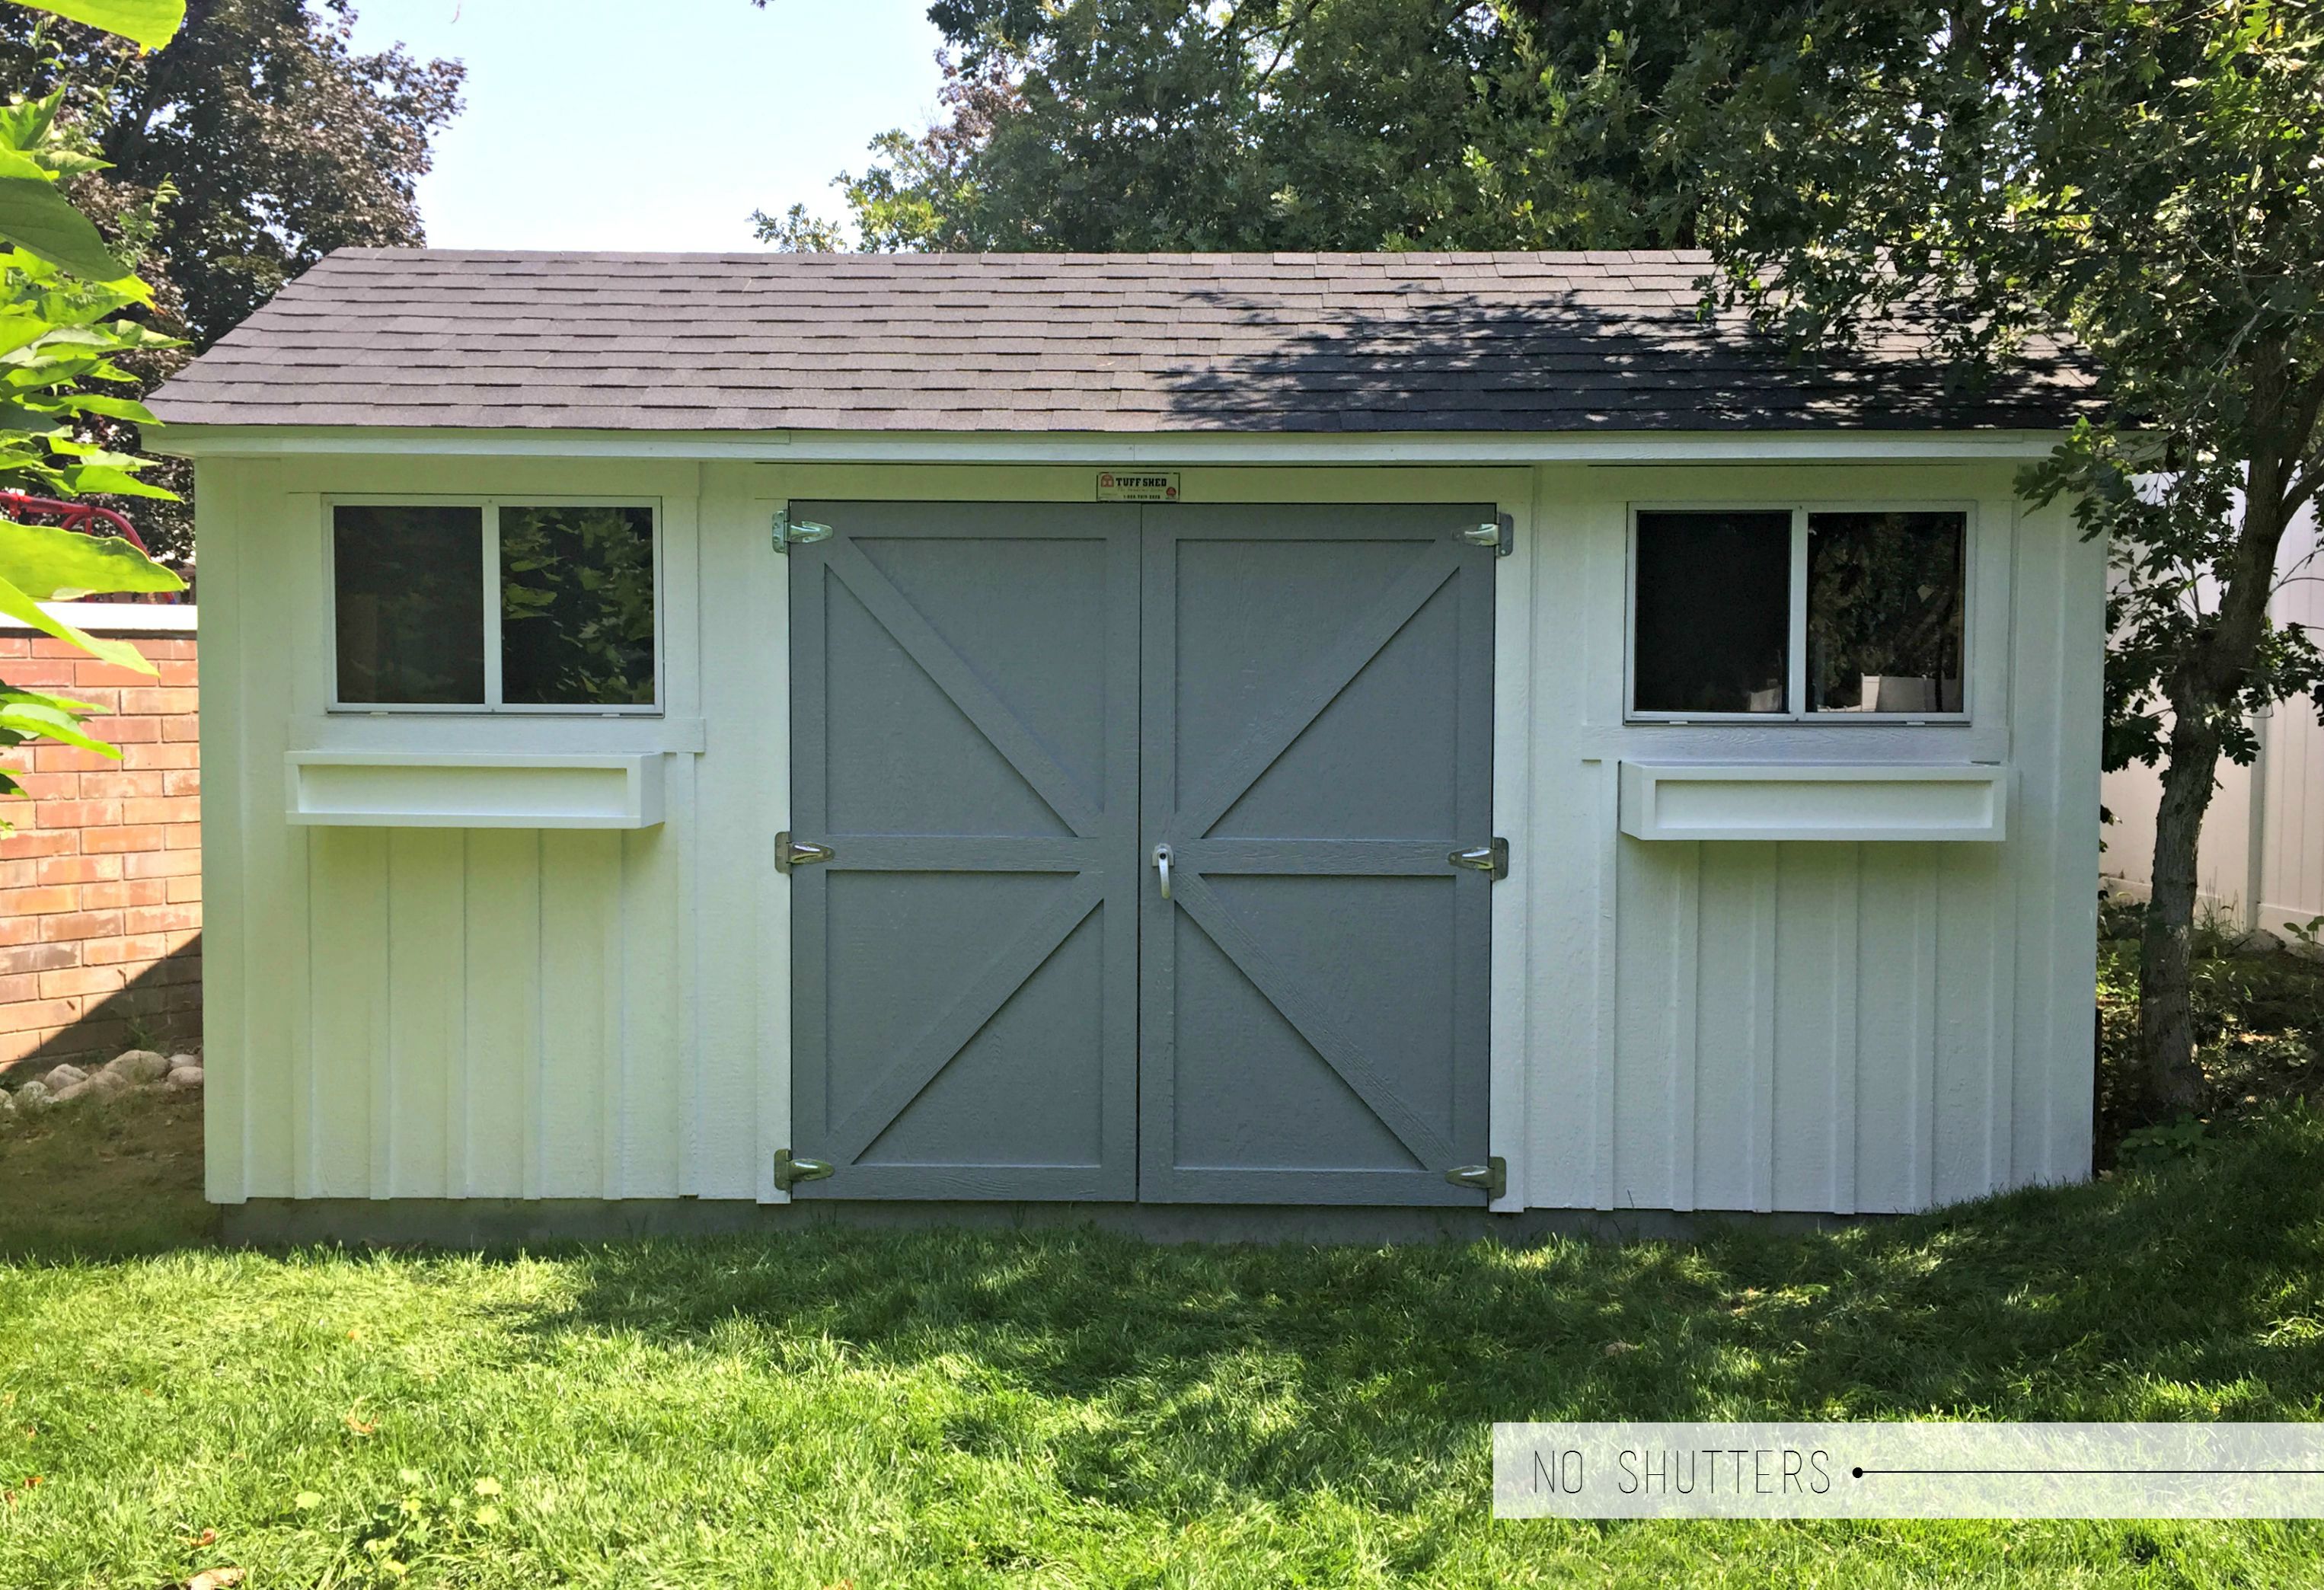
Problem is they reveal a cluttered mess inside the shed. At certain angles the windows look like two black holes.
By adding the shutters, we still have the illusion that the windows are there but they hide the black holes and mess inside.
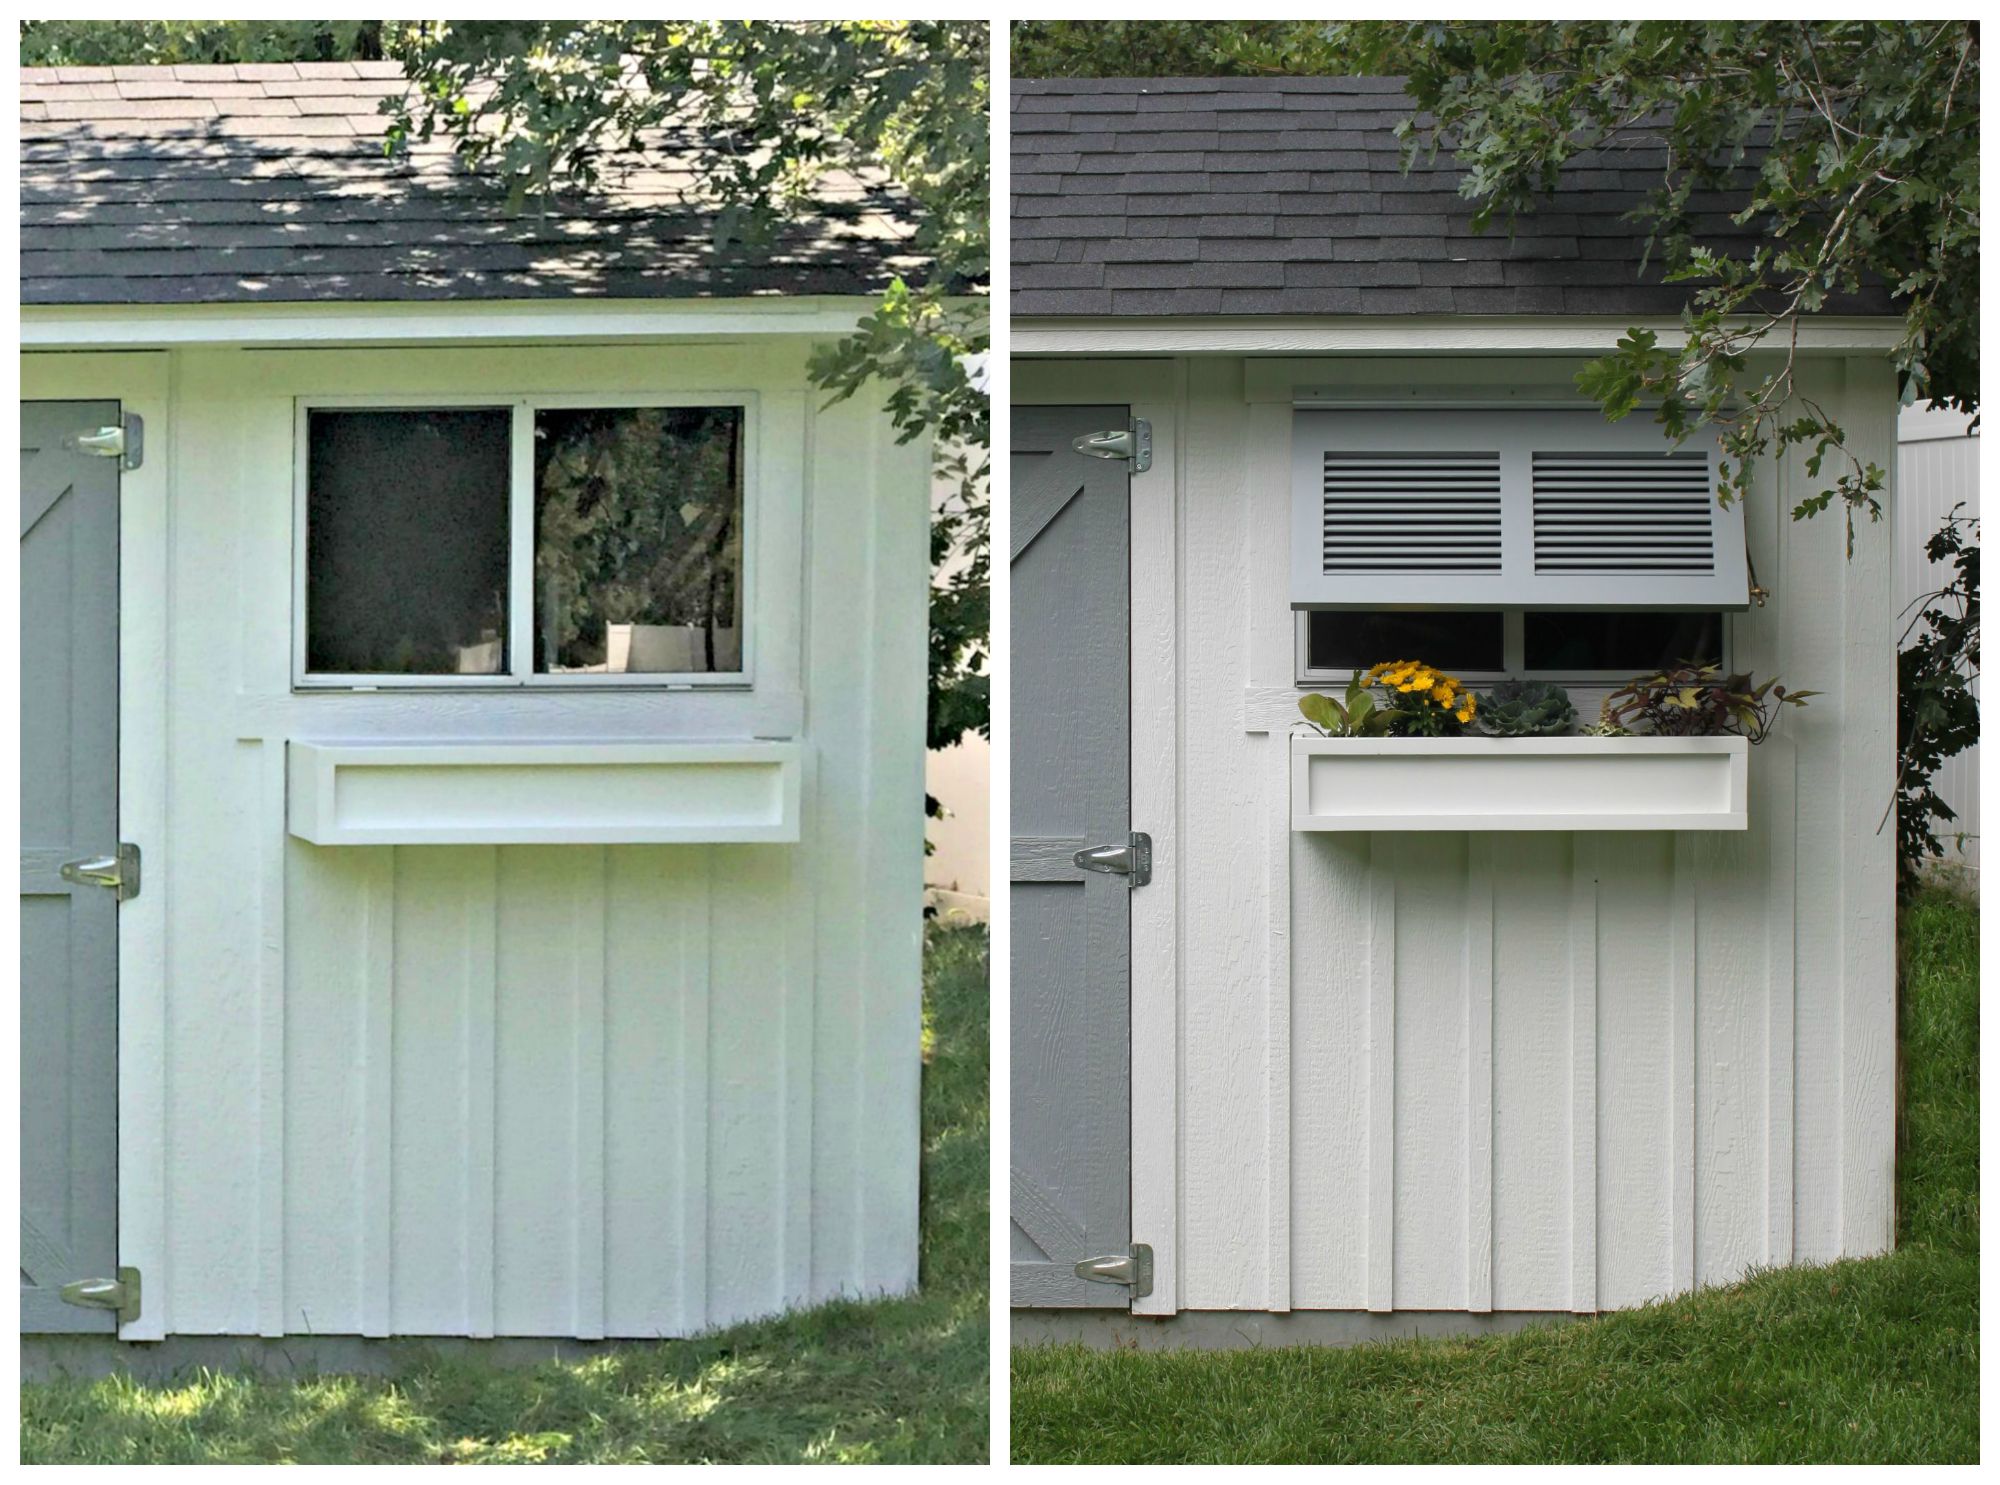
See the difference?
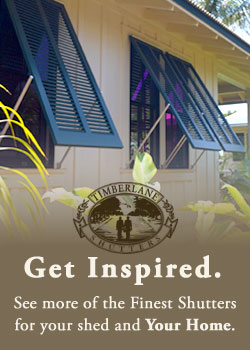
After realizing this was not a DIY project I wanted to tackle I reached out to a stellar company, Timberlane Shutters. They are known for their handcrafted shutters and every piece is custom.
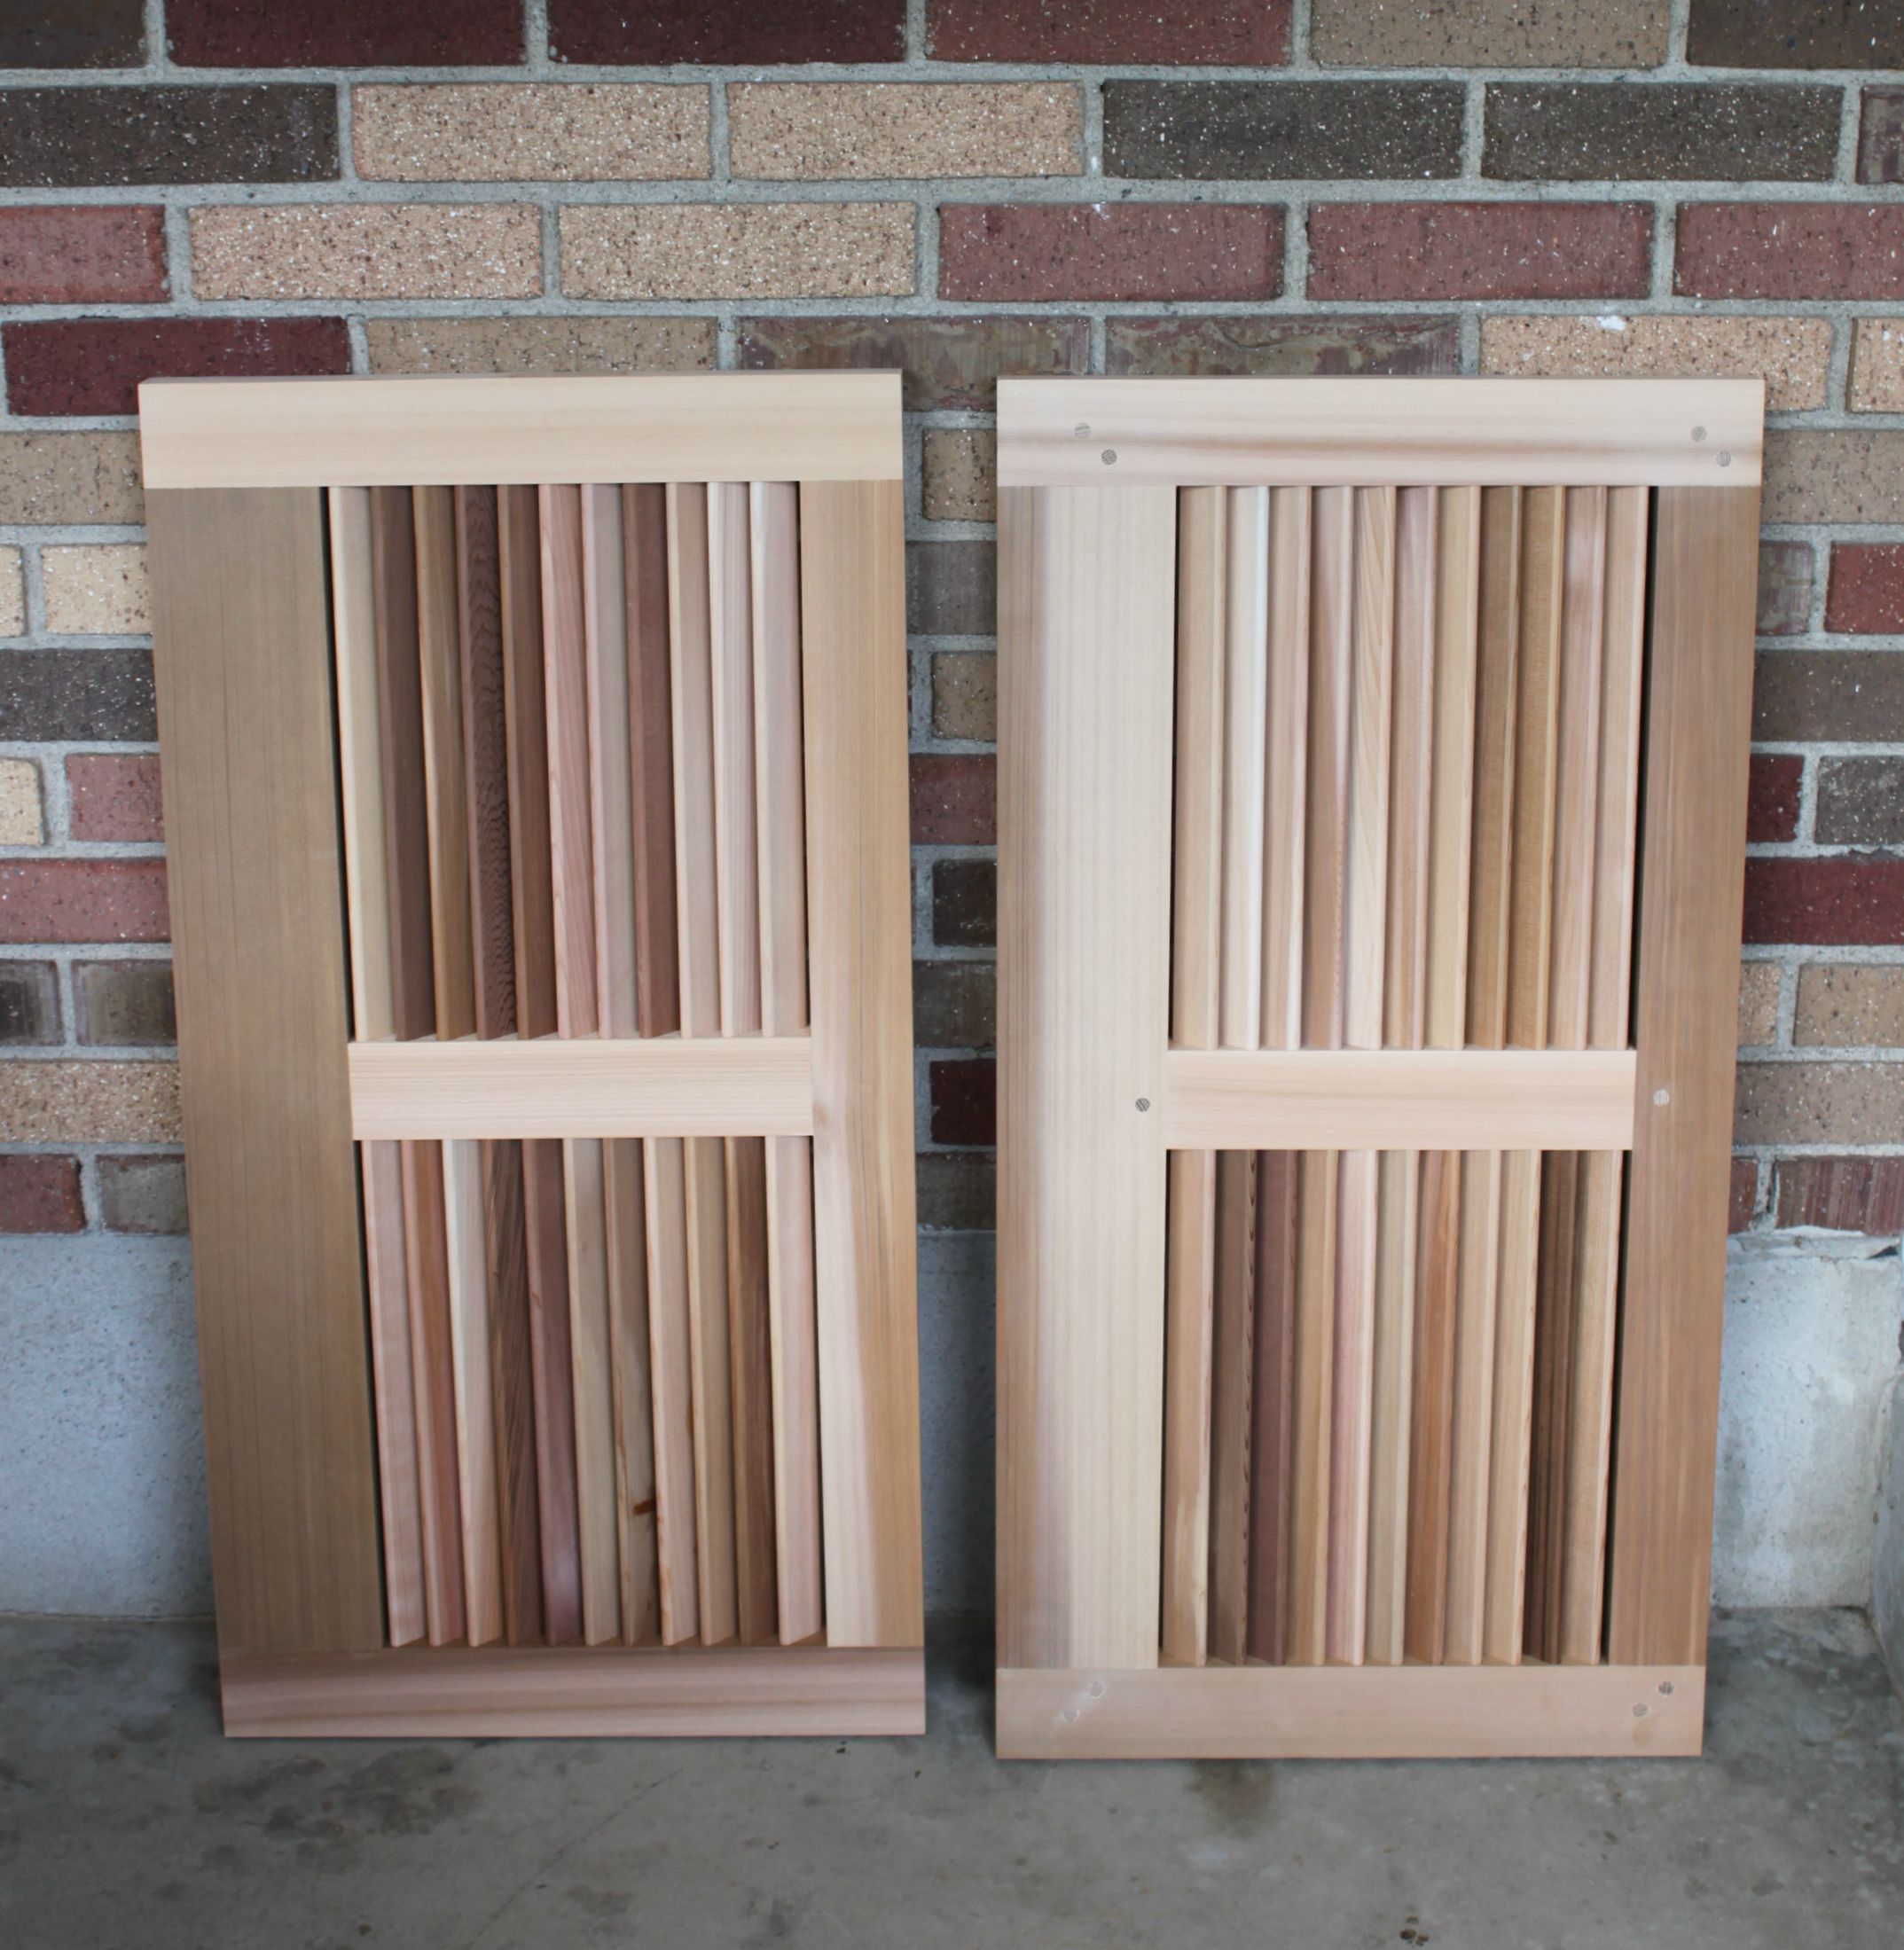
They were confident their shutters would make the project and they even sent us a pair of shutters to review.
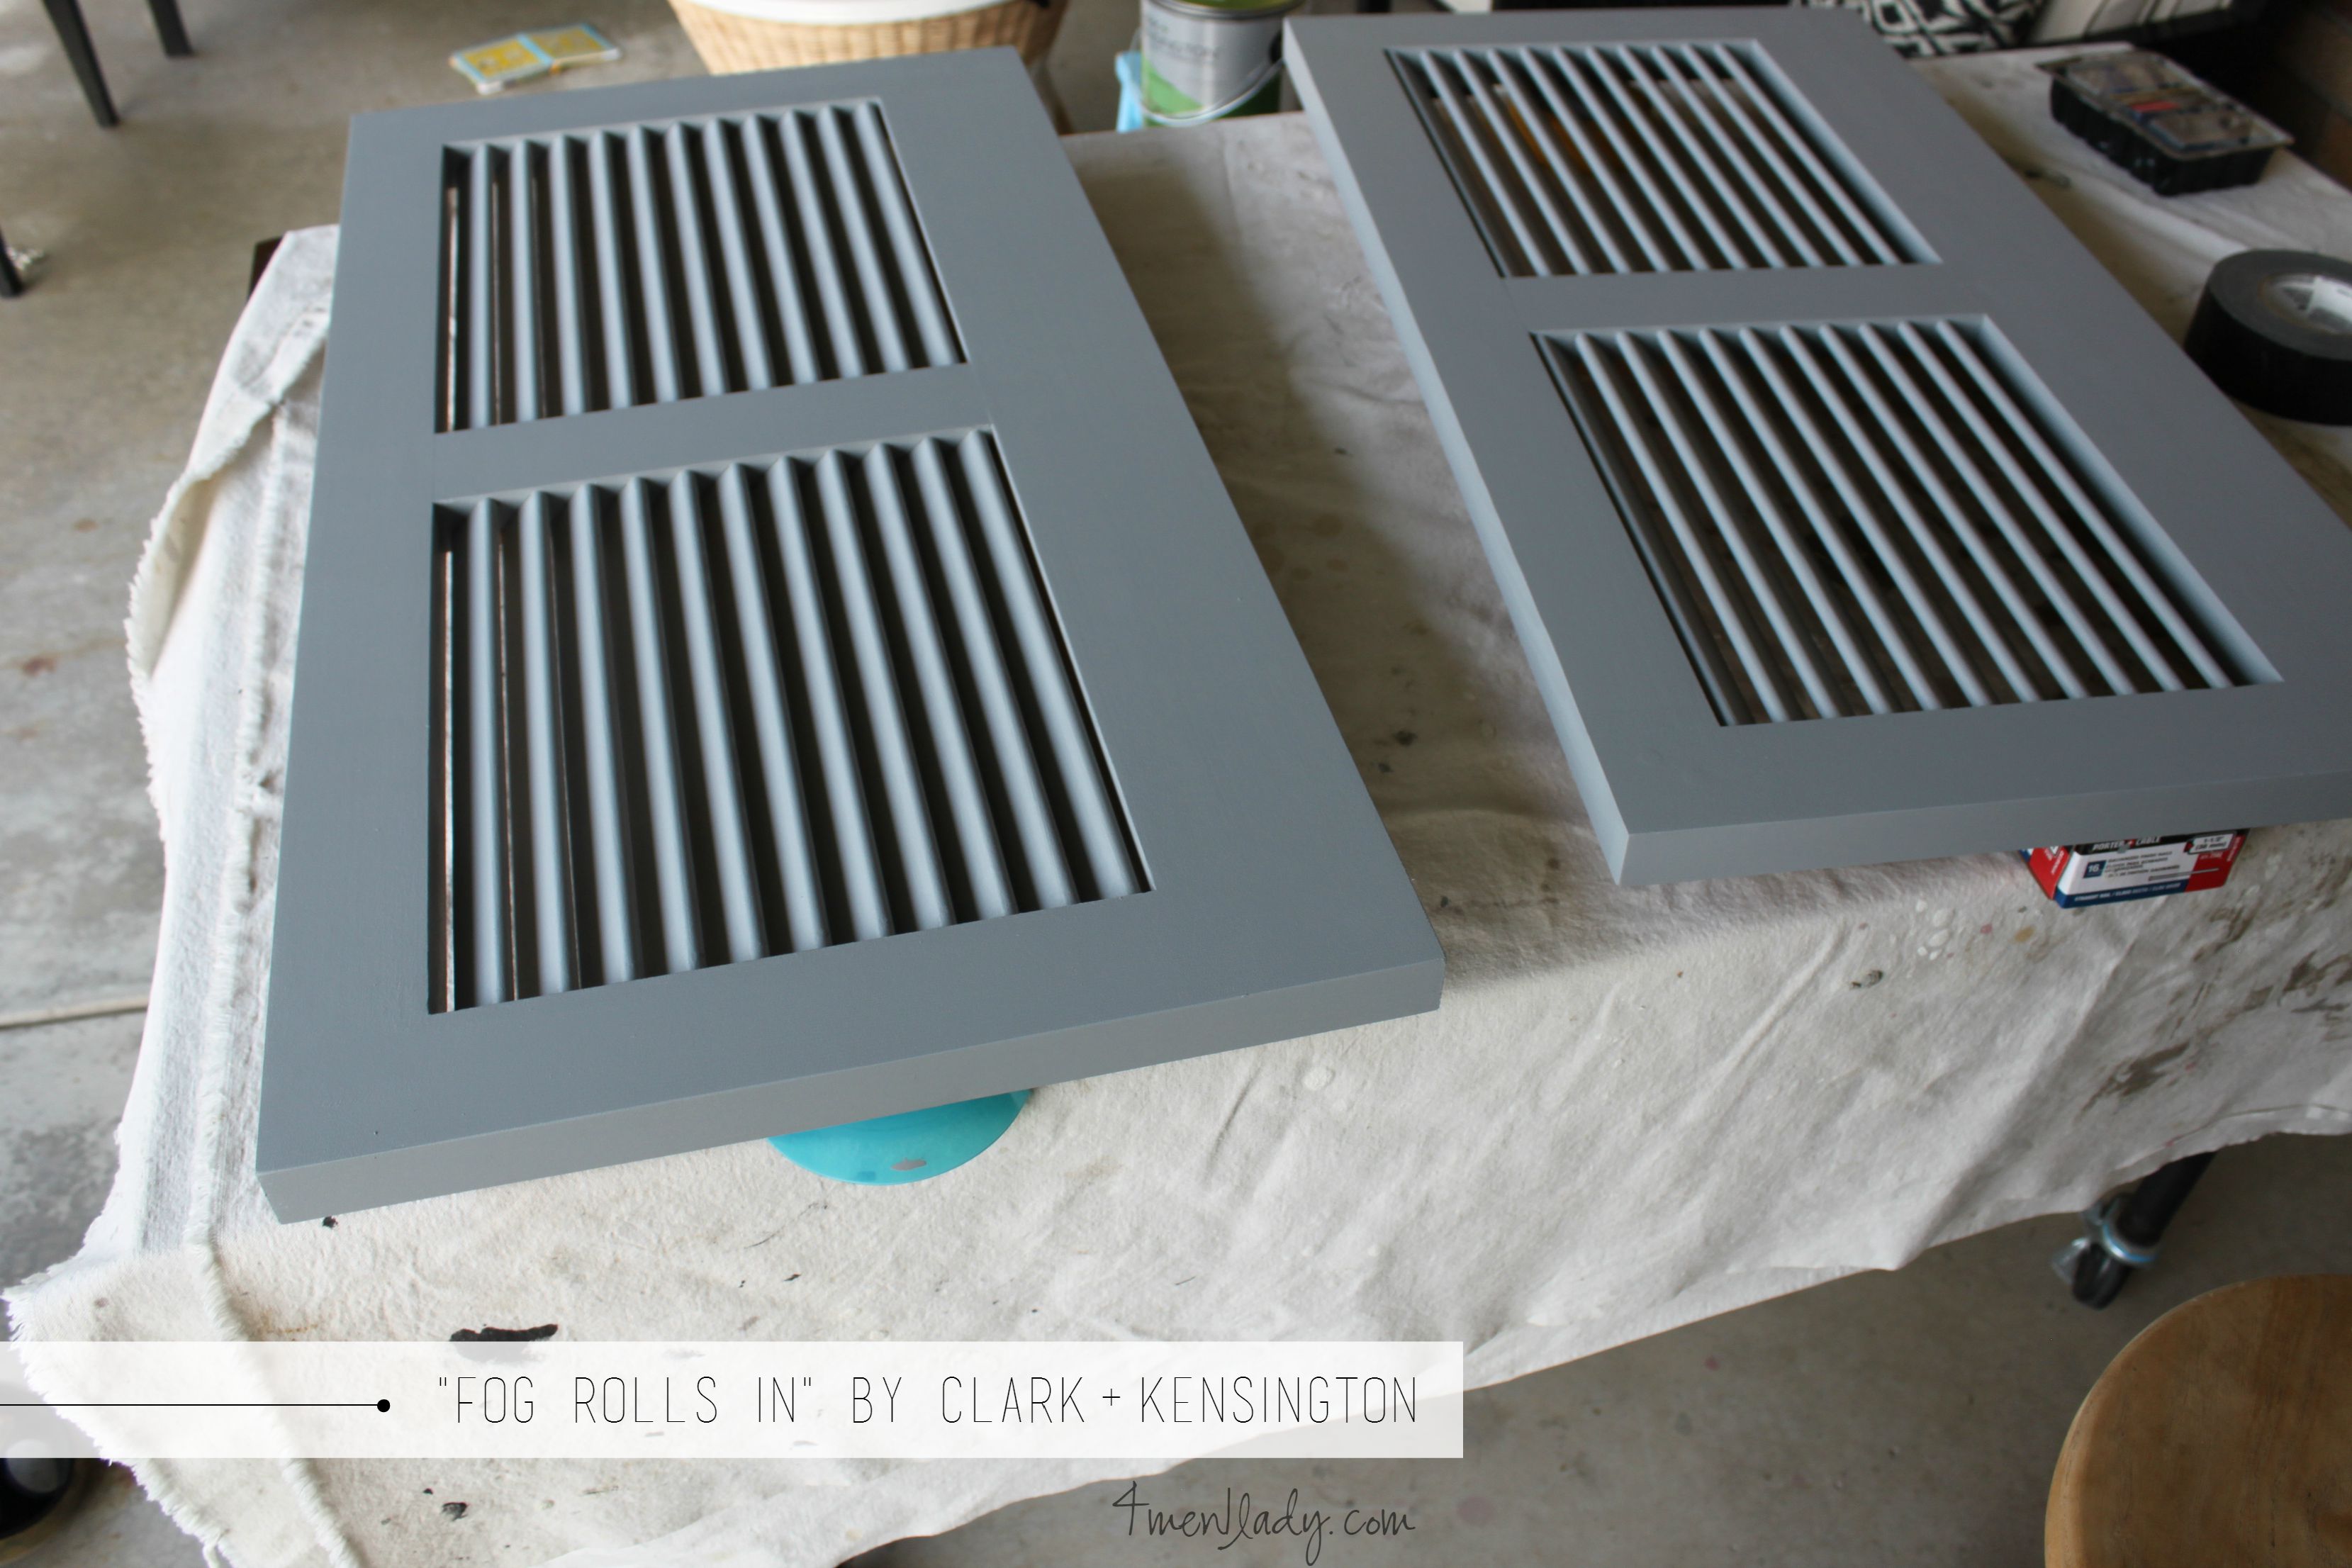
They were so beautiful in their original cedar state that I had a hard time wanting to paint them. In the end I chose the shade called “Fog Rolls In” by Clark + Kensington Paint from ACE Hardware. It’s a perfect gray.
One tip I learned from Ryan Reeder (who refinished our cabinets after the original paint job begin peeling after only 2 years later) was to sand any hard 90 degree angles before painting.
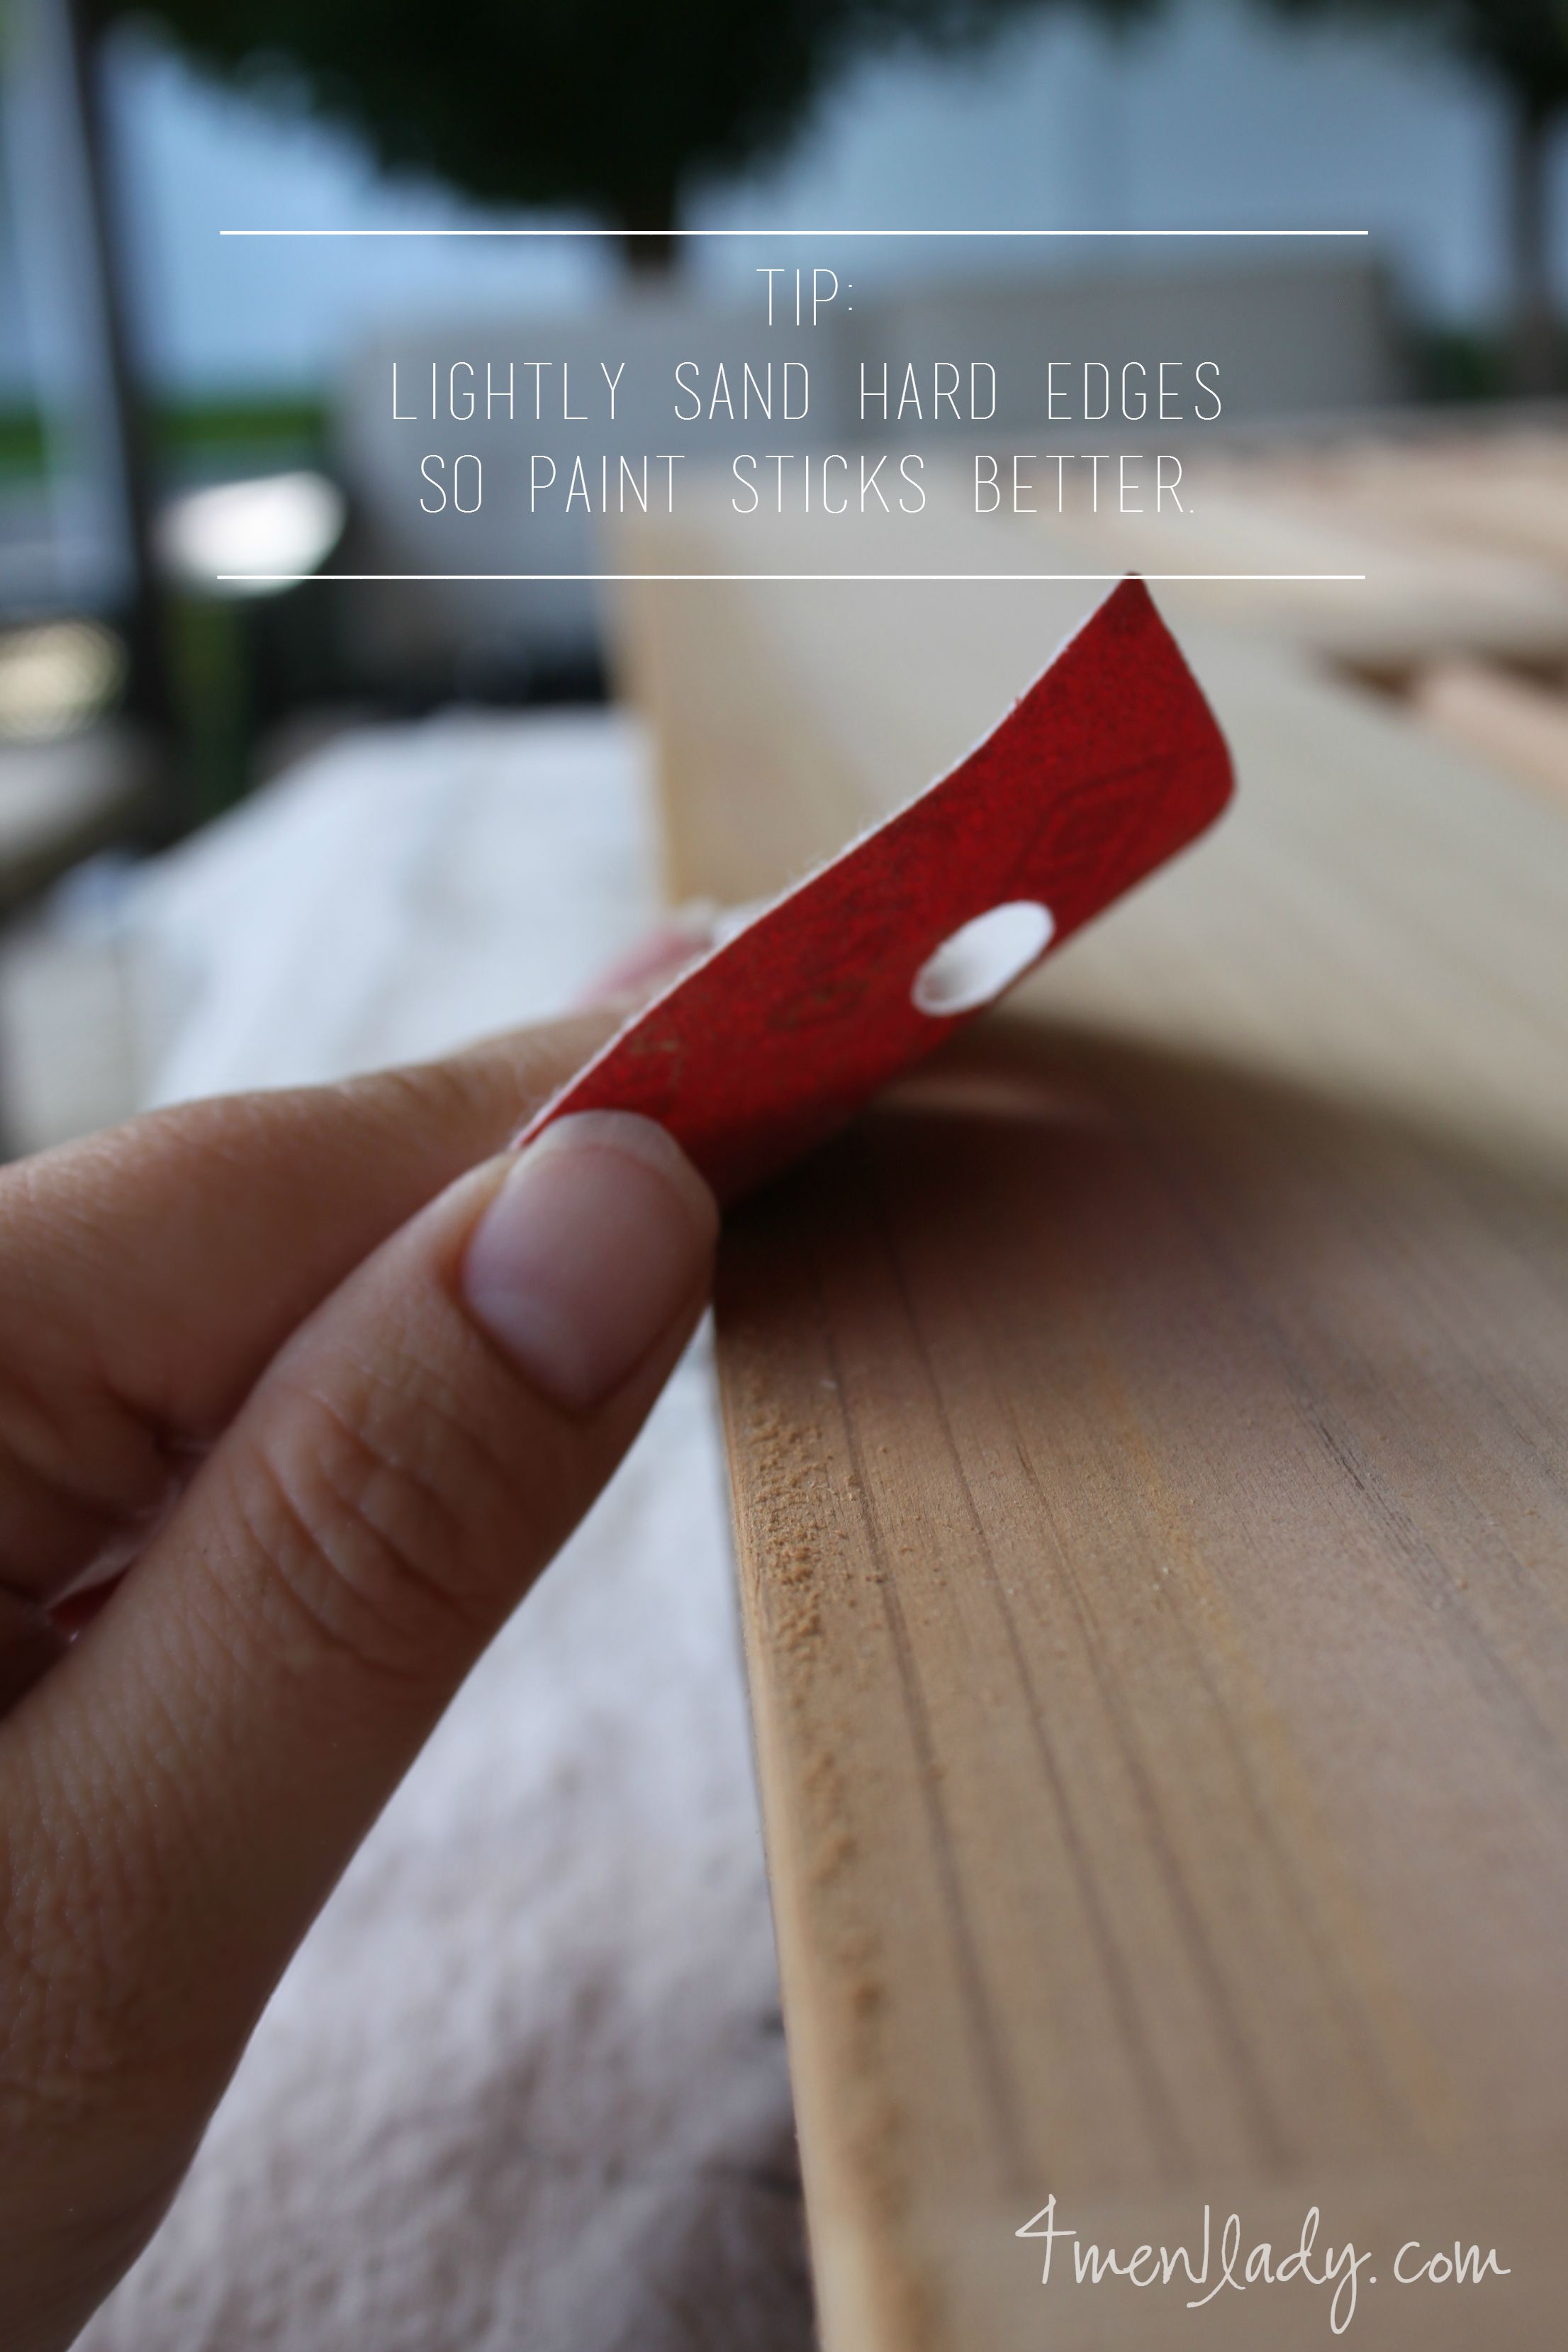
He taught me that paint can’t stick to a hard 90 degree edge so if you take some light grit sand paper and ever so slightly round the edge down the paint will stick and you won’t have worn paint down the road. You won’t even notice the sanded edge. It’s been a valuable tip I use on all my projects now.
The installation of the shutters was very straight forward. Timberlane has a large line of beautiful hardware to use on their shutters. Good thing because I wasn’t in the mood to mess up those beautiful shutters with some kind of rigged DIY situation.
I did however opt to use the reclaimed hardware for the arms I found in Kansas City, MO during our crazy cross-country RV trip.
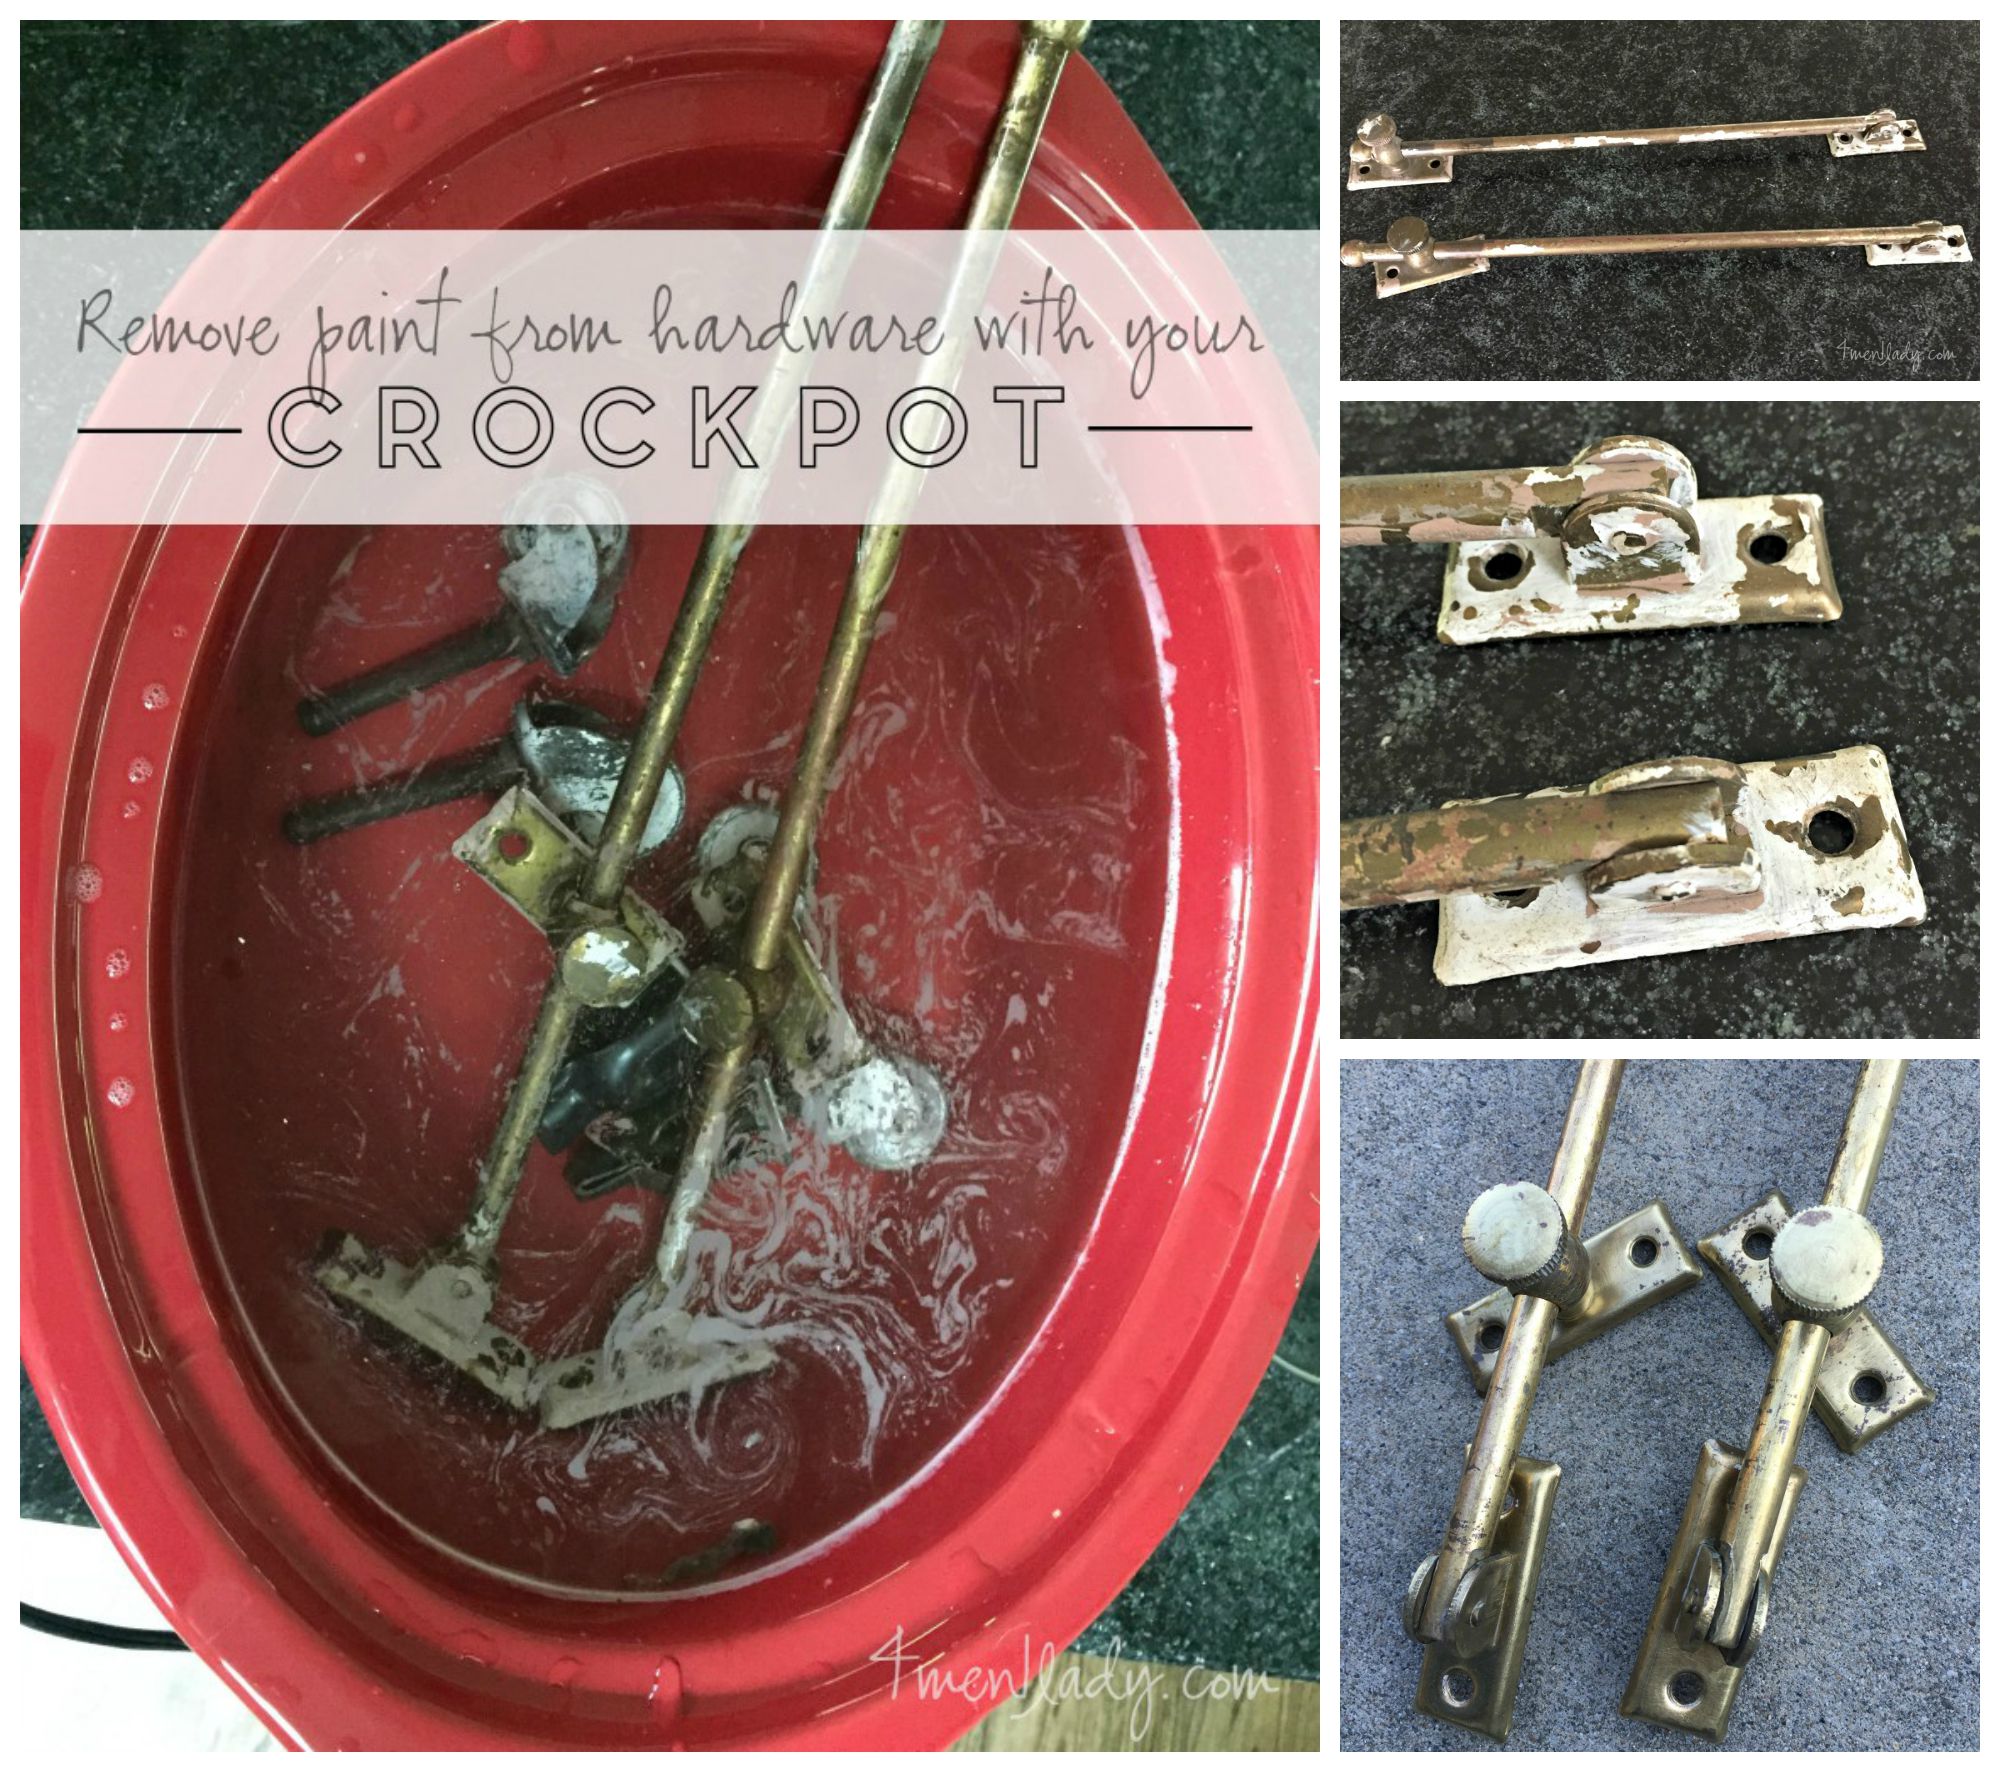
Using my crockpot (which has found permanent place in the shed with the rest of our tools) I let the hardware simmer for a few hours and then the paint fell right off (details here).
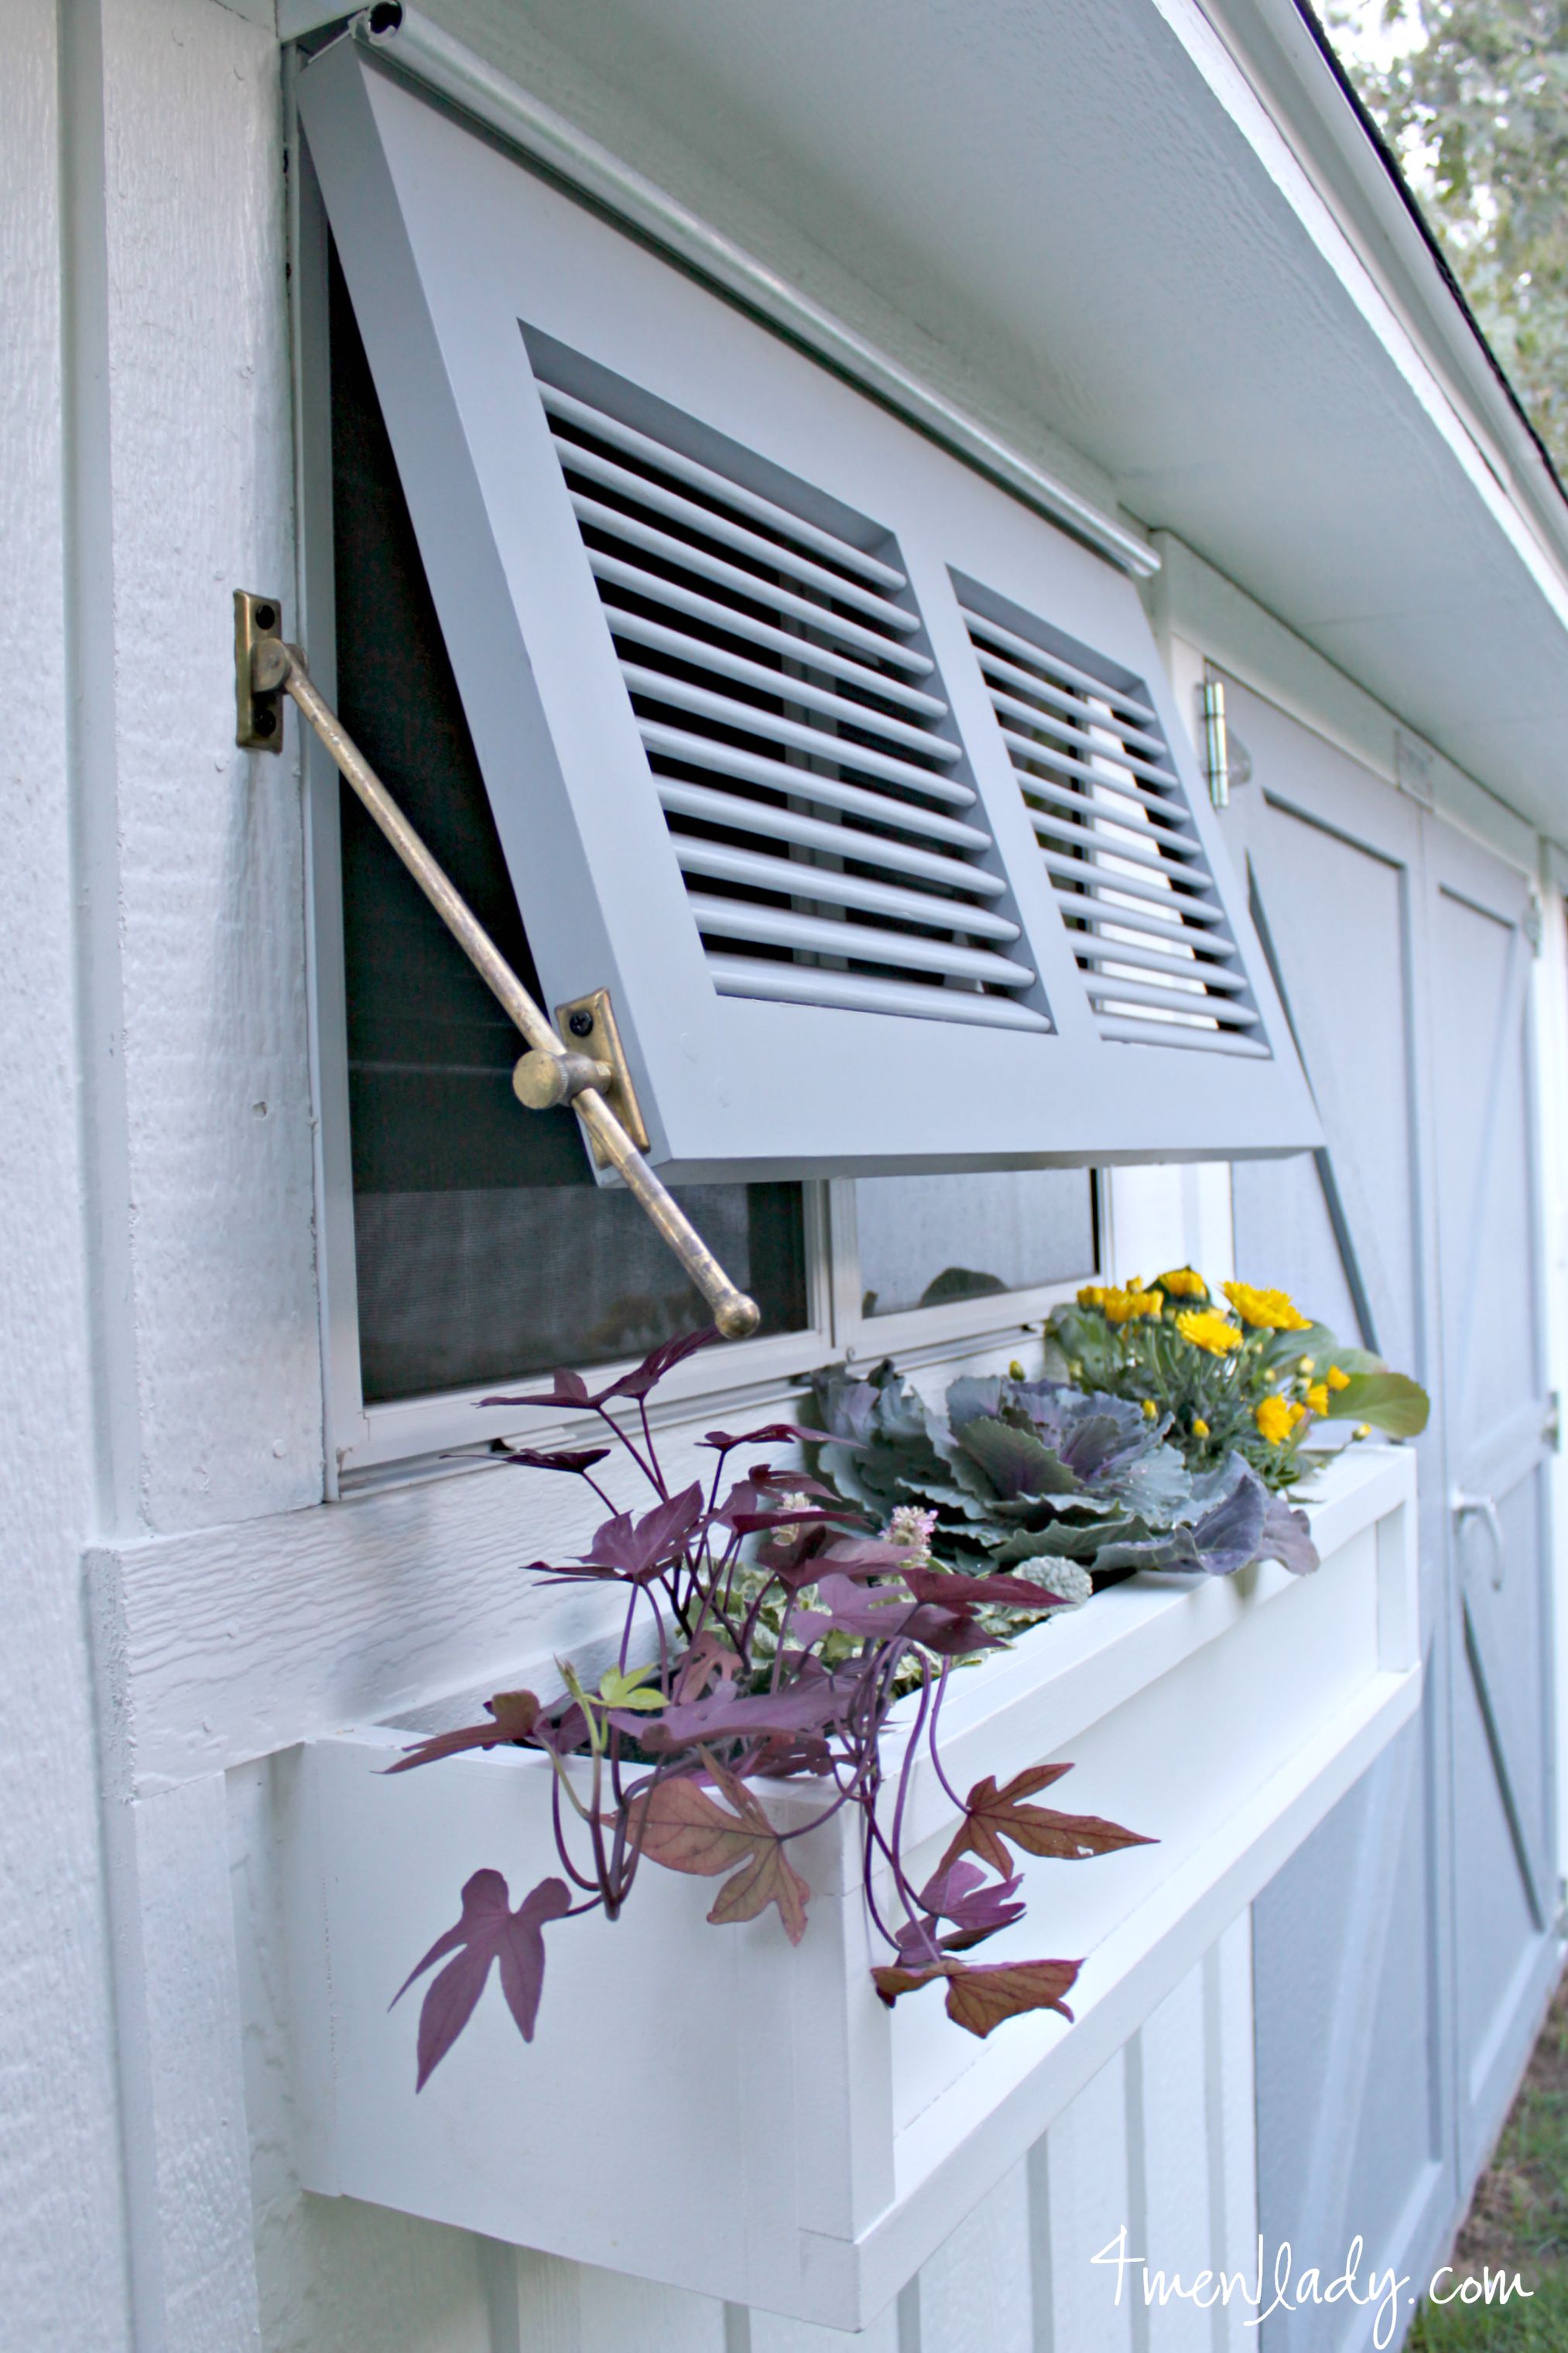
The round knob attached the shutter is adjustable which allows it to be extended out further or lay flat.
Here’s a quick video slide-show of the install.
If you’re thinking about outdoor shutters for your house (or shed) you’ve got to check out Timberlane. I mean it when I say their shutters are quality!
You can also follow them on their website or on Facebook, Pinterest, YouTube.


 Hey there! I’m Michelle; I’m an Passionate DIY’er and in constant pursuit of how to bring beauty to my house full of men (3 boys + 1 hubby). Stick around and see what I’ve got up my hard-working sleaves!
This al makeover is amazing! The shed looks fantastically.
Hmm, I must watch it again.
Thanks!
Where did you get your barn door hardware?
Thanks,
Allen
It actually came with the Tuff Shed.