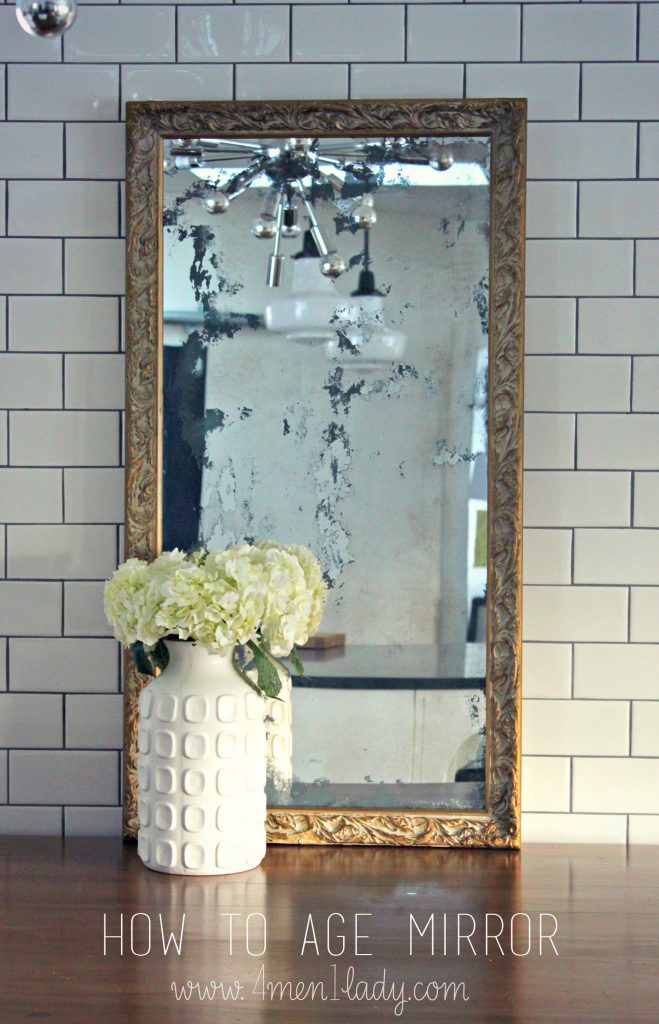
Old antique mirrors are a hot commodity in antique shops and cost a pretty penny.
Hold on to your hats because I found a product that will take your shiny mirror and make it look like they came right out of an old Parisian pied-a-terre.
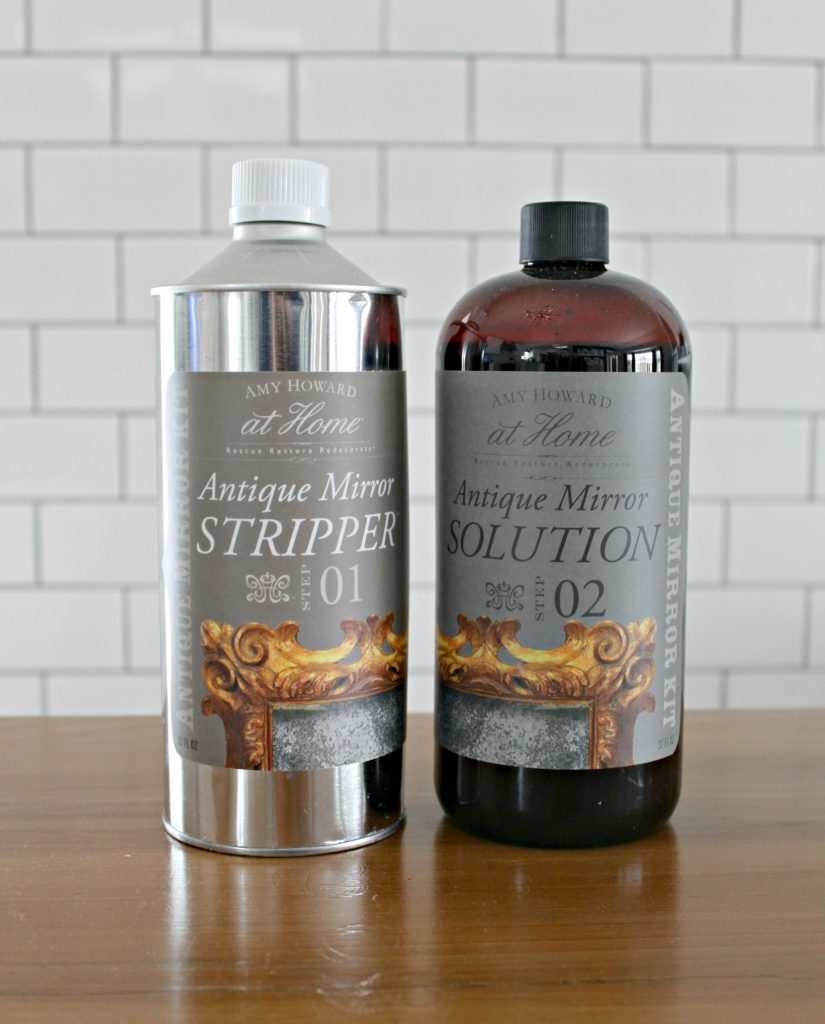
Leave it to the amazing Amy Howard to come up with another show-stopping product.
When in Tucson I scored this mirror from an estate sale. It’s been sitting in a closet ever since.
Perfect candidate to test Amy’s Antique Mirror Solution on.
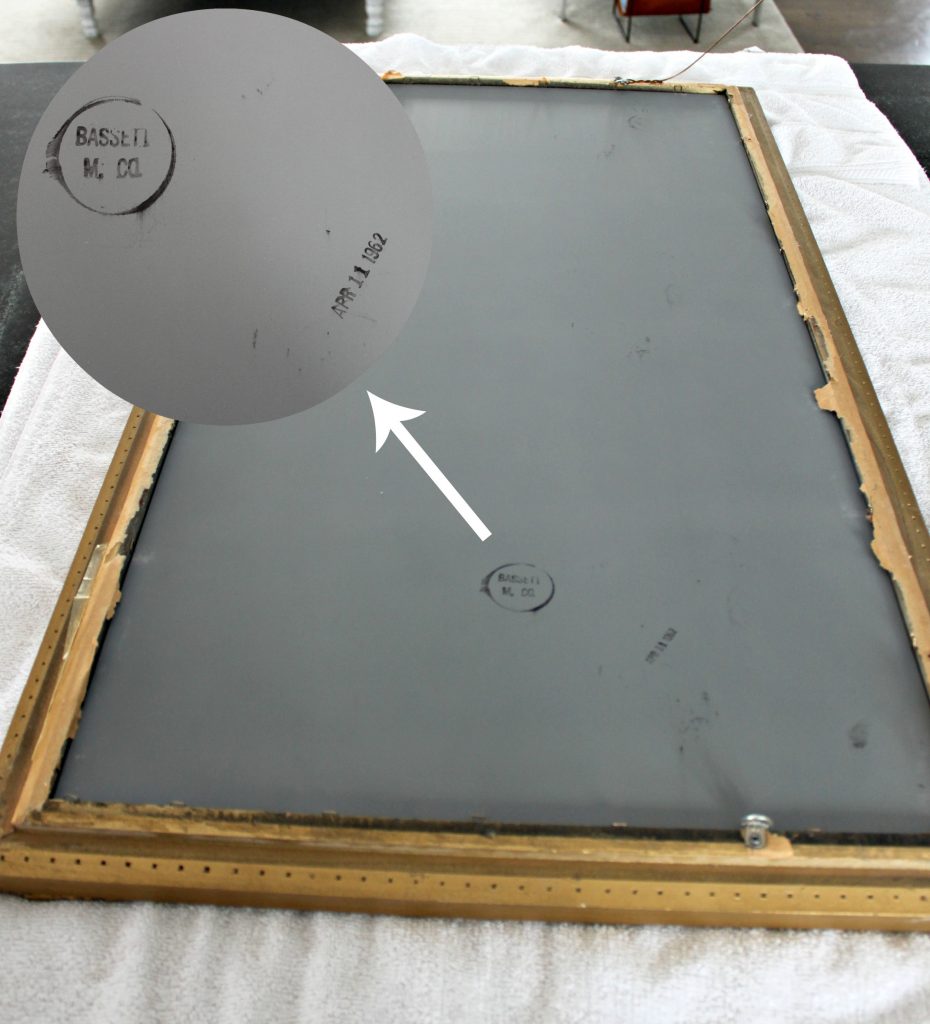
This first thing you want to look for is “real” mirror. Some mirror is actually plastic. Real mirror will have this enamel-baked gray finish on the back. After I removed the paper I discovered my mirror was made the Bassett Company on April 11, 1962. Cool.
Contrary to what you might think, you actually age your mirror from the back, not the front. Sounds backwards (literally) I know.
With either a paint brush or roller, apply the Step 1 Stripper to the back of your mirror.
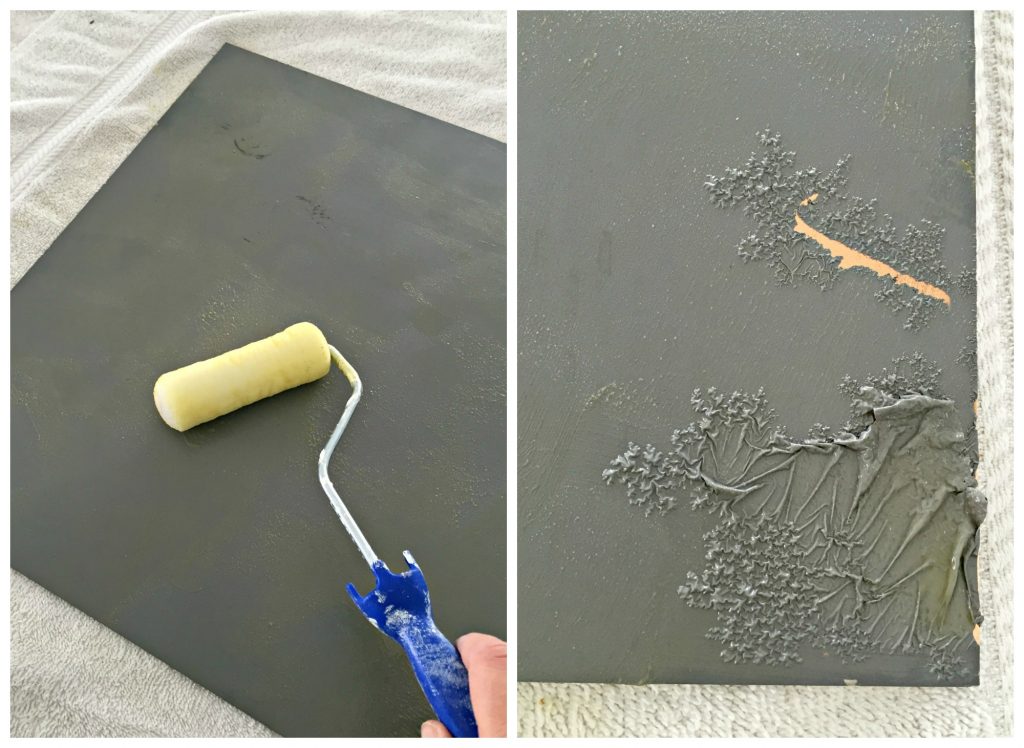
Less is more. You would think that gooping it on thicker would work quicker but a thin layer does the trick better. You want the whole thing to bubble. Amy suggests using brown Kraft paper to remove the enamel finish. I tried it, didn’t work. I’m sure there’s a learning curve to this magic trick but I sure didn’t master it on my first try (or second or third).
Amy has a great video on this whole process (scroll to the bottom).
You may have to repeat this step 2 or 3 times to remove all the gray finish. Between each step spray mirror with diluted Simple Green and apply to a water bath (or use a hose to rinse). After the 4th attempt a portion of my gray finish was just NOT going to come off so I went with it and left it as is.
(This is how photos turn out when you’re trying to use a camera using rubber gloves).
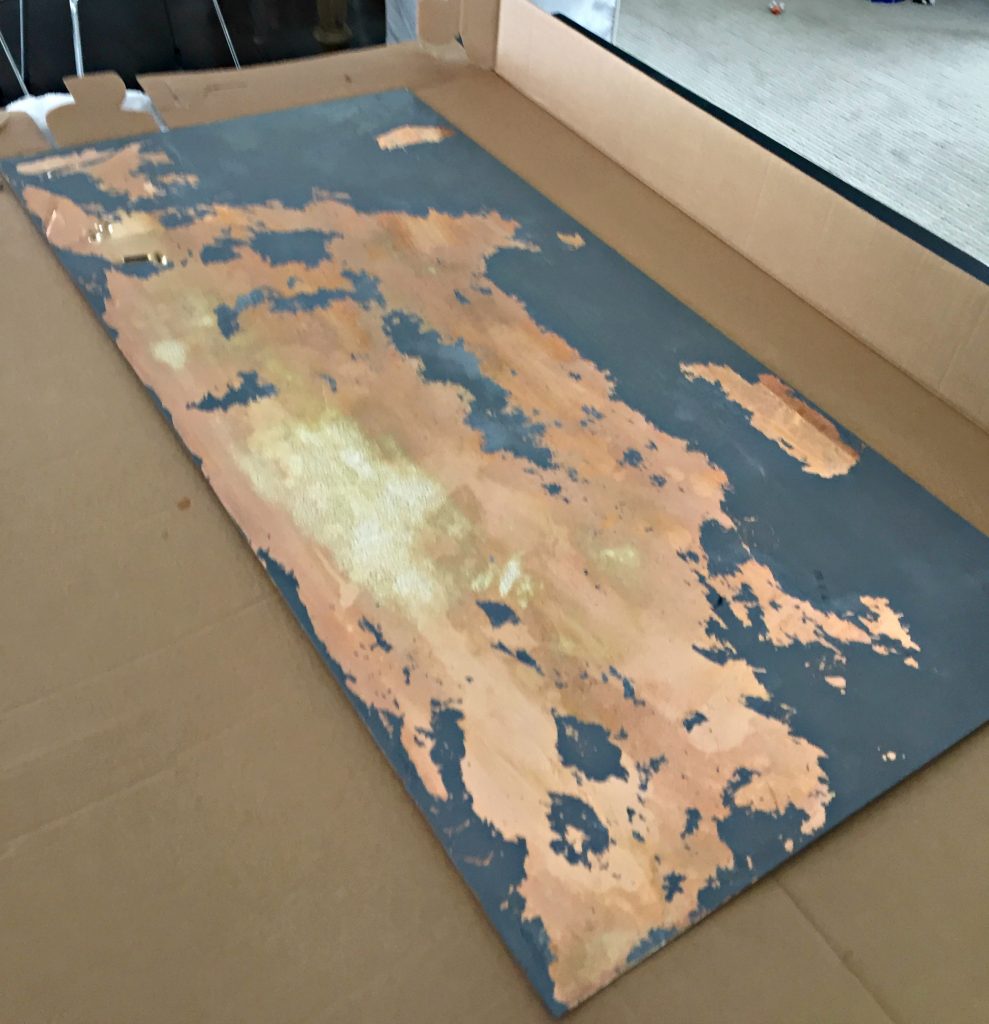
See that copper color? Using a lint-free rag and the Step 1 Stripper, swirl your rag in circles using a bit of pressure until it looks completely clear like a clean mirror.
This is how mine turned out.
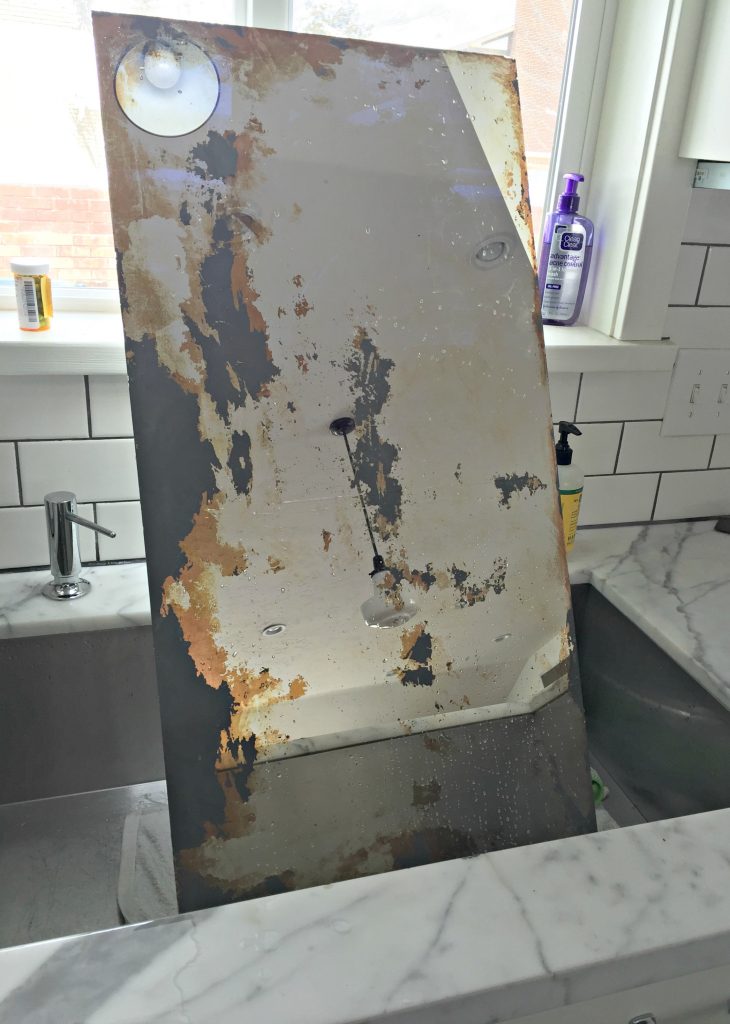
Keep in mind this is the back of the mirror and it should look like clean regular mirror before moving on to this next step. Mine doesn’t. I was about 1-1/2 hours in at this point and loosing my patience. My once clean kitchen looked like an explosion of gray particles, my littlest man returned home from preschool early and hungry and I about about broke the mirror twice carting it in and out.
This step I did outside in the freezing cold because the Step 2 solution smells like eggs. I wouldn’t recommend doing this in the winter either.
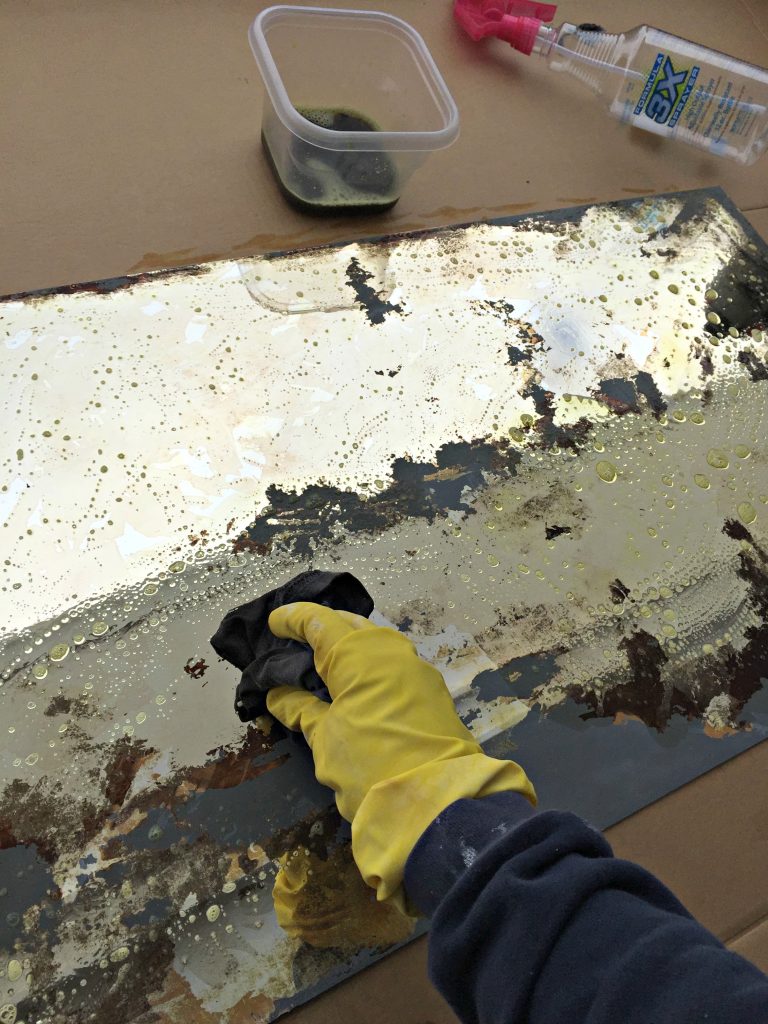
Apply the Antique Solution 2 with a lint-free rag in a random patting motion all over the mirror.
You can actually see the oxidation process happening as the mirror will start to turn a dark color. Check your progress by flipping over the mirror and checking the other side. Once you’ve reached your desired look, spray with Simple Green and rinse with water.
This is how mine turned out.
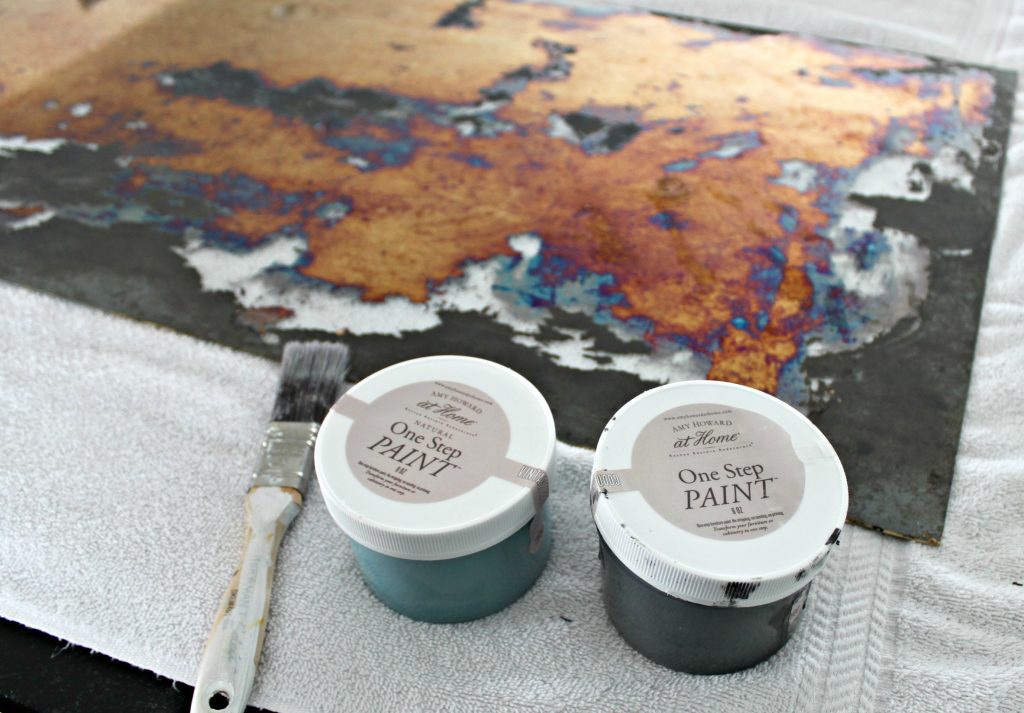
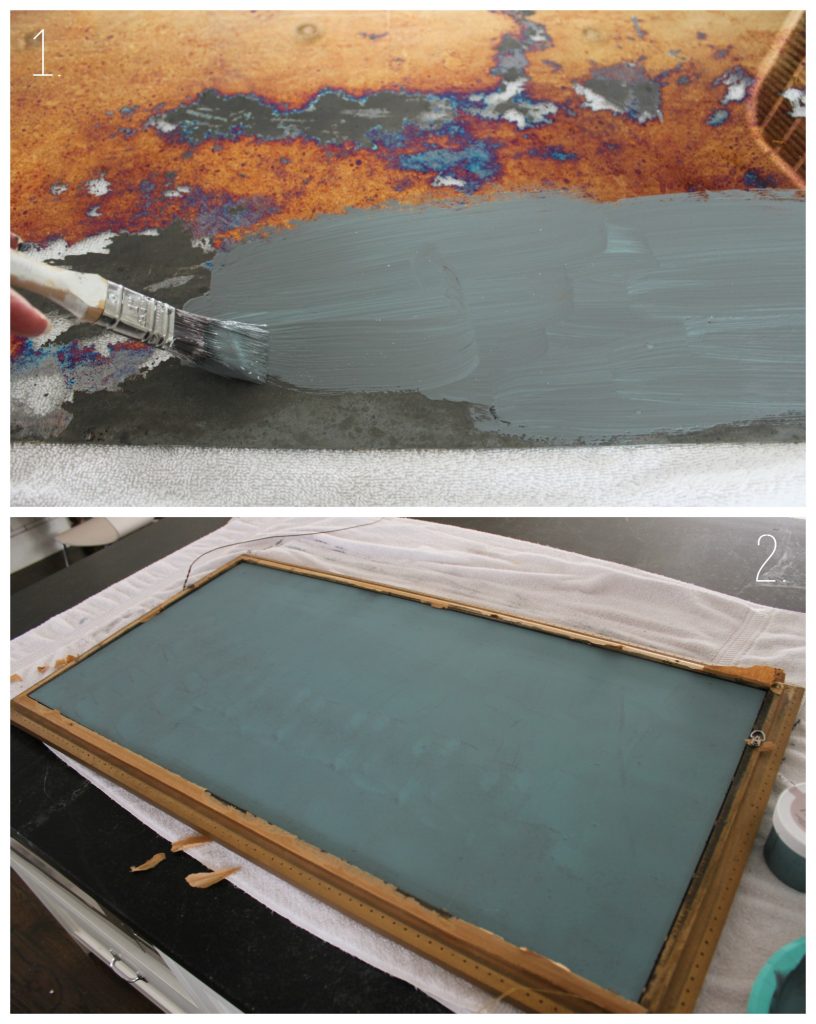
At this stage the back of your mirror will be susceptible to scratches so you’ll want to coat it to protect it. I mixed a combination of colors to give it a green-ish coppery color using Amy’s One-Step Paint.
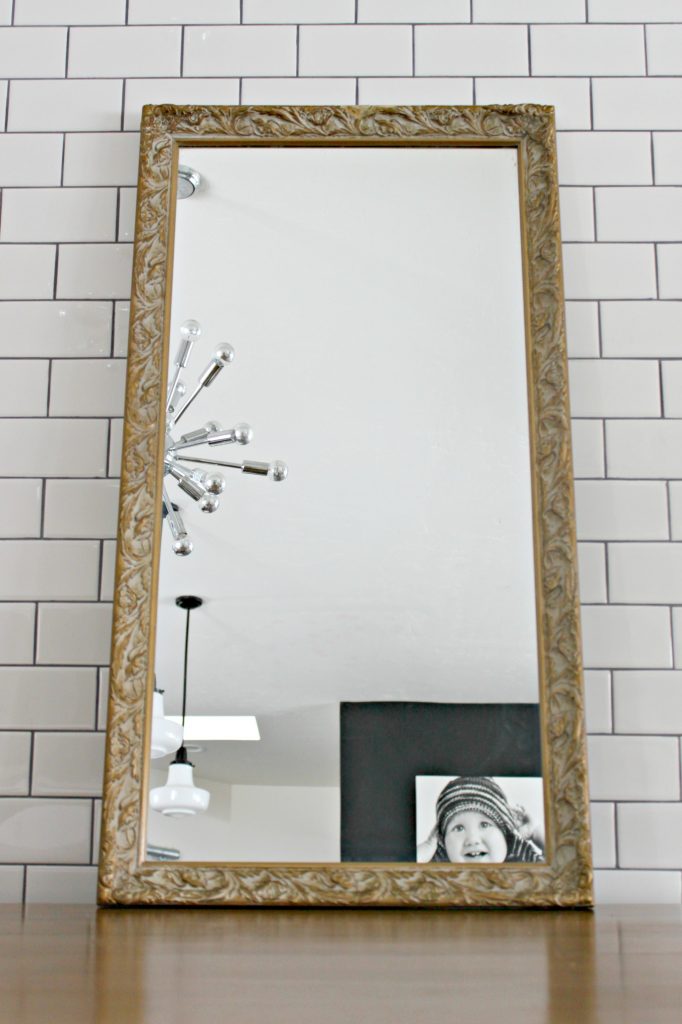
Here is the result from the front.
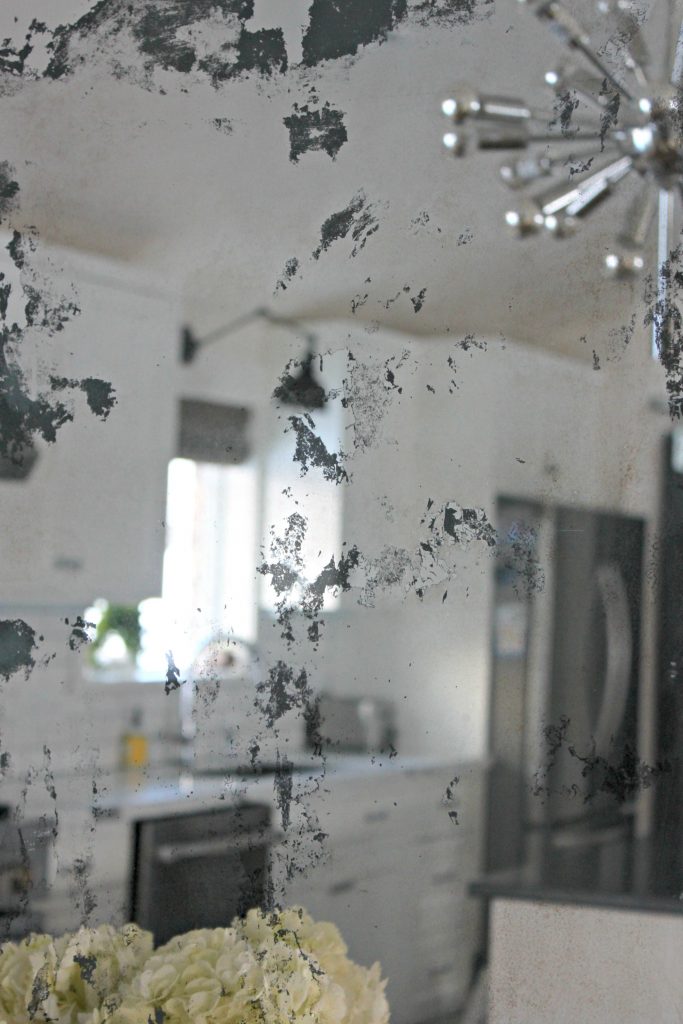
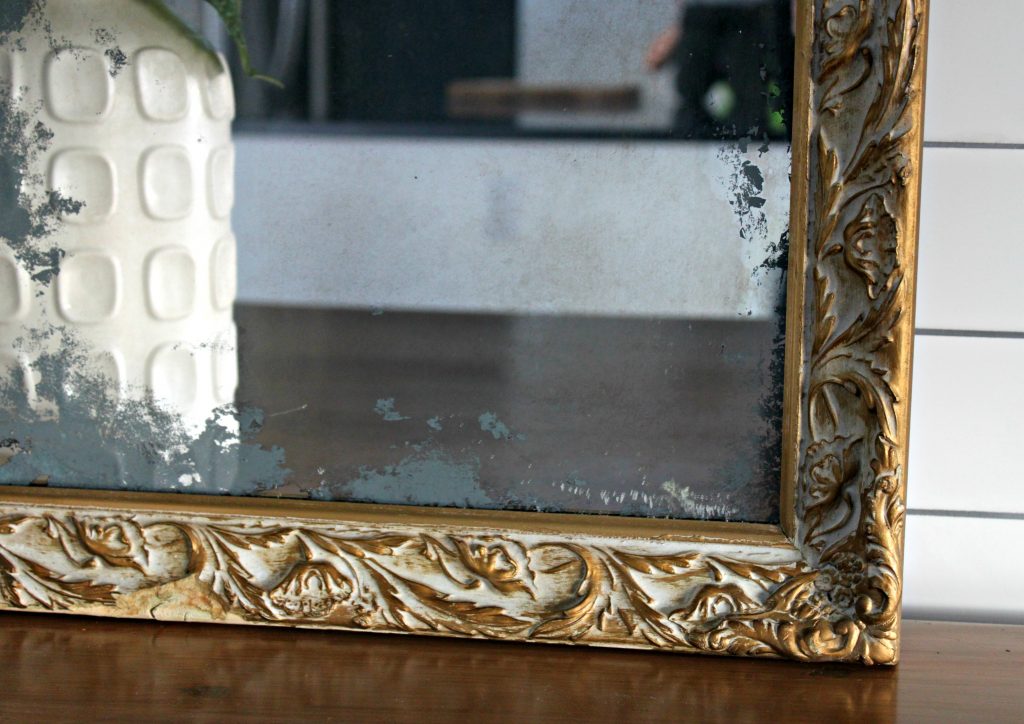
My mirror did not turn out exactly like Amy’s but I actually really love the result. It took much longer than I anticipated but after seeing it in the end it was totally worth it and I’d do it again.

For sure watch how Amy does it perfectly (and in 15 minutes).
2. Wait till it’s warm. Winter is NOT the season to attempt this project. Colder temps slow down the solutions ability to work well.
3. Have ALL supplies laid out before you start. I thought I had everything but I didn’t and ended up tracking an inch of snow in on to my hardwood floors. Put first things first.
4. Work with a buddy. There were several times a second set of hands would have been very helpful due to the size of the mirror I was working with.
5. Have all steps written down where you can follow along.
I watched Amy do I thought, “I got this.” Right about the time I had stripper burning my forehead I realized, “I don’t got this.”
Check out some of our other projects made with Amy Howard products:

Desk make over with Amy Howard One-Step Paint.

Desk makeover with Amy Howard’s Zinc Finish.

Bookshelf makeover with Amy Howard’s One-Step Paint.
Aging galvanized steel with Amy Howard’s finish.


 Hey there! I’m Michelle; I’m an Passionate DIY’er and in constant pursuit of how to bring beauty to my house full of men (3 boys + 1 hubby). Stick around and see what I’ve got up my hard-working sleaves!
Okay, not gonna lie, this tutorial intrigues and intimidates me. I have an old family mirror, stamped 1942. It’s not precious, but it has sentiment attached to it, and is screaming for a makeover like this. I just removed it from the frame, and now I sit here with the two pieces wanting to ask YOU to be my buddy to antique this baby! Interested in another go around with an eager learner? I’d love to learn this process with someone more experienced than I 🙂
I don’t blame you! I was totally intimidated too. But I figured I’m trying to make it look not-perfect. I can do not-perfect. Watch Amy Howard’s video…she will give you all the know-how and confidence you need. Good luck! 🙂