Remember when I posted about my ambitious plans to makeover my boys’ room? Well, I’m 99% done with the room. The most time consuming project ended up to be the DIY upholstered headboards (which could have been really simple had I not tried to attempt a Martha Stewart moment). Here’s how it all went down…
I first bought a piece of 1/2-inch plywood. Home Depot cut it down to my specifications for free. (Next time I would choose a more organic and “green” wood. The glues used on the plywood have a bit of an odor). For the width I went an inch wider than the width of the bed.
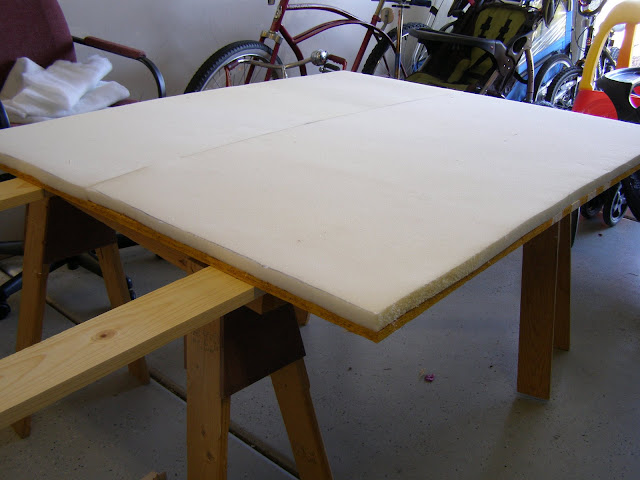
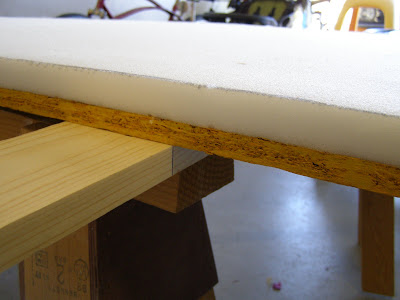
I then bought a piece of 3/4-inch high density foam and cut it (electric knife works best) to the measurements of my board. I used a spray glue adhesive to secure it to the board.
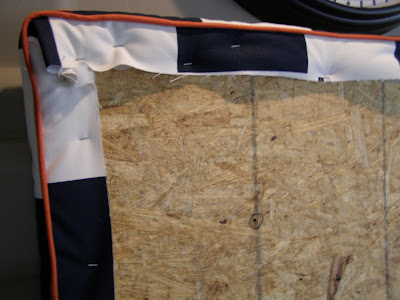
 Next, I covered the board and foam with a couple of layers of batting. I cut it a couple inches longer on each side, pulled it taut, and used a staple gun to secure it to the other side of the board.
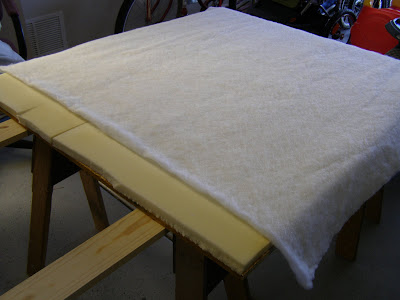 You can see here that I attatched 1X4 legs to the back of my board so that it would stand tall against the wall. (I ended up taking the legs off because it stood too tall for my liking).
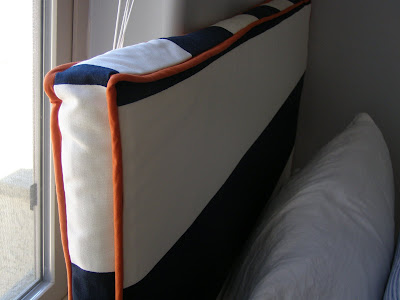
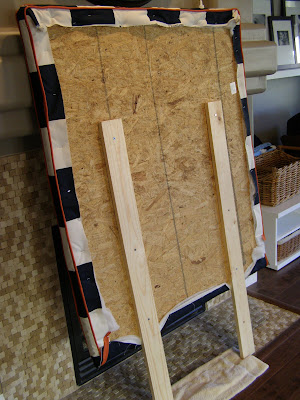 Here’s where it got time consuming. I covered a piece of cord with burnt orange fabric and sewed it around the edges of my fabric. I thought, “It’s all straight lines…how hard can it be?” I’d never done this before but the sweet lady at the fabric store assured me it was a piece of cake. Our definitions of “a piece of cake” were obviously different. It took me literally HOURS! Cut on the bias here, zipper foot there, 5th broken needle here… If I would have skipped the whole piping trim I would not have needed to sew at all and it really would have been a piece of cake DIY project. FYI.
 Whether you decide to fancy it up or not, pull your fabric taut and staple it to the other side (just like you did with the batting).

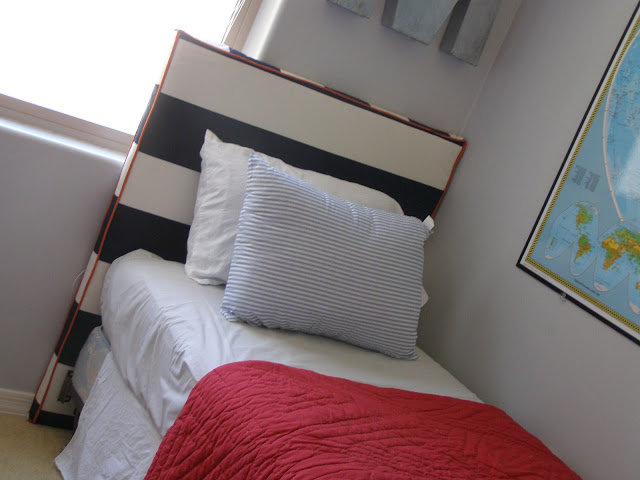

Here’s the finished result. What do you think? Complete room pics coming tomorrow.
(Fabric is Raulph Lauren found at Home Fabrics in Tucson).


 Hey there! I’m Michelle; I’m an Passionate DIY’er and in constant pursuit of how to bring beauty to my house full of men (3 boys + 1 hubby). Stick around and see what I’ve got up my hard-working sleaves!
I think the piping was totally worth the effort. Great job!
I’m sorry for the delay in returning the blog love. I meant to get over here sooner. That headboard looks great! I don’t think I would be that brave yet.
Thanks for stopping by my blog the other day. Now, I’m off to look around your blog. Have a great day!
That looks fantastic!! Nice job!
I like it and I like the added touch the piping added so GOOD JOB!! Can’t wait to see the rest of the room!
Hey busy one, I have to give you a tripple A for effort and mostly labor. The piping looks great – now I can buy red “stuff” for the boys. Hope you kept an album of all the DIY’s you have done.
wow you are truly brave. that is amazing. for how time consuming the piping was it looks fantastic! definitely worth the time. it is usually those small details that add so much and here it shows!
A M A Z I N G!! I love it. Can’t wait to see the whole room. I don’t even know if I should mention this, but they do sell already made bias tape in that color… But maybe that is a different texture. I really love them!!
Hi Michelle,
I stumbled upon your blog while surfin’ through the net and I find your blog especially because of your outstanding taste/ideas for design great.
I hope you don’t mind that I will follow your blog from now on.
Your latest project looks great and I will pick this idea up for our guest room.
Great job you did especially with the piping!!
Thanks and many greetings to you from Germany.
Anja
PS: You got a very nice lamp above your dining table! I got the same one with only a few bulbs less 😉
This comment has been removed by the author.
Glad I came across this!
I’ve been thinking of making my own headboard too; yours came out great!
AMAZING!!! your instructions need to be out there for all to see, great job. they turned out so beautiful. love the fabric choice!
the orange piping MADE it, soooo worth the effort in my opinion. i just found your blog and can’t wait to dig in!!! i have that kind of striped material on a chair for my son from pottery barn kids— it’s the green and white stripe with navy piping. fun! fun! thanks for the step by step, i will be using it!
I love this! love the colors, love the design. Great job and what a great idea.
I came across your blog as I was searching for diy headboard instructions… you did a beautiful job! The piping adds a great touch. I have all of my materials cut… just need to put it all together (fingers crossed!)
Check out our Upholstered furniture including Headboards in our etsy shop.
http://WWW.BELEGANTHOMEANDPET.ETSY>COM
i am in love with the look of this. i’m redoing my little boy’s room right now and am thinking of using the same fabric (the thick stripes) for curtains. where did you find it and who makes it? thanks!
Em- Fabric is Raulph Lauren found at Home Fabrics.
This looks great! I love the orange. I am wondering how you finished the fabric on the top of the headboard. The lines don’t match up like you just wrapped it. It looks like some of it was cut and sewed to achieve the veritcal / horizontal switch at the top. How did you do that?
Hi !
I have NO sewing skills whatsoever, and I’m not even going to attempt the piping.
I was wondering if i could glue on the piping…?
Would that turn out okay ??
thoese colors are exacly the color from the monterrey mexico fotball team “rayados”, check this out 😀 http://todosobrecamisetas.blogspot.com/2008/07/lanzamiento-oficial-nuevas-playeras-del.html
Gorgeous! Where did you buy the foam and batting? Thanks!
Intriguing read. Do you have to screw it onto the bed frame or can you just lay it behind against a wall?
I searched for headboard + piping and you were the first result! And now thanks to this post, I am NOT going to do piping on my headboard slipcover. I have done my own piping before, but I just don’t have time right now, so easy peasy we’ll go!
Hi, my name Isabel and I love your blog and your home and all the work you do i wanted ask what are the measurements of this headboard hight and width I have most of my supplies just need to get the plywood. i got some of my own measurements but the hight on your bed looks perfect so i hoping you help me out with that i’m making 2 of the same headboards for my boys time to redo their room. Thanks a bunch…. 🙂
Hi!
Very nice post. You did a great job. I really like your work. For a wide range of new headboards on cheap prices visit http://www.dreambedroom.co.uk/compare_headboards.html
Thnx for providing these details on your site.
Hi! Love your blog! What are the dimensions of the headboard? Hoping to make them this weekend 🙂
Thanks!