1 1/2 years later…
(My three men are at the zoo so here we go.
Thanks for your patience).

From Home Depot I purchased a couple of 2 X 6’s.
They will cut them per your specifications for free.
I think I had mine cut 40 inches each.
Once you assemble them as illustrated below you will have a perfect box square that is approx. 42 X 42 in.
I then had Home Depot cut two pieces of pressed, particle board the same dimensions as my box frame (42 X 42 in.). I only ended up using one.
Attach the pressed board right on top of your box frame with screws.
I knew I wanted to add button tufting so I took a drill and made holes where I planned for the buttons to be.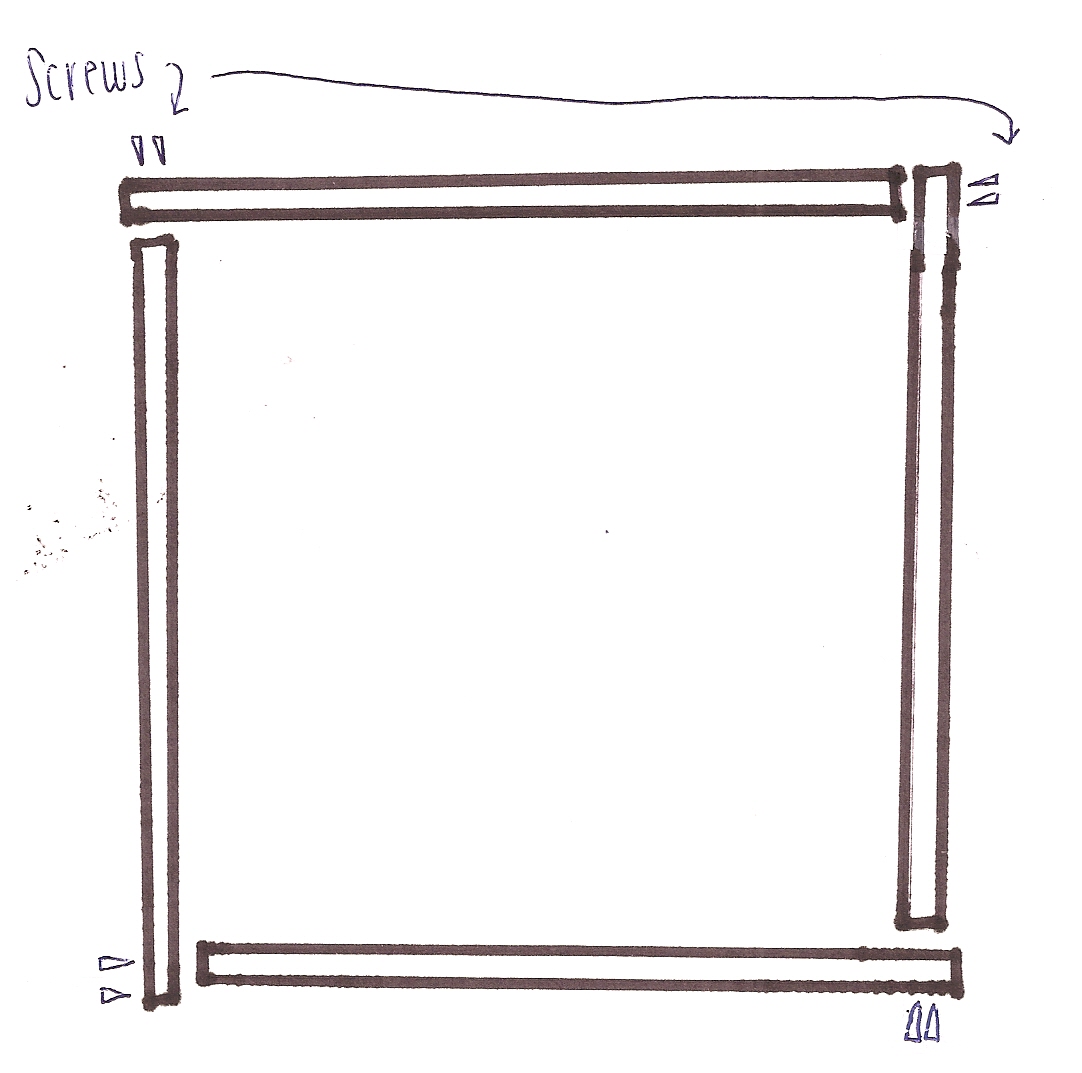
From my local fabric store (I went to Hancock because I had a 40% off coupon) I purchased some high density foam (I believe it was 4 or 6 inches thick). They cut the foam to my specifications with an electric knife.
Use spray glue in a can to attach the foam to your particle board.
The legs came from Home Depot which I spray painted white. I’ve always felt they are much too whimpy for the size of the ottoman.
It’s been on my to-do list to change them out but time + kids + priorities…blah, blah, blah.
There are a lot of places you can get legs…just Google. Or, here is one great source.
After your foam is is in place, cover the entire thing (foam and frame) with batting. I wouldn’t recommend using any less than 4 layers.
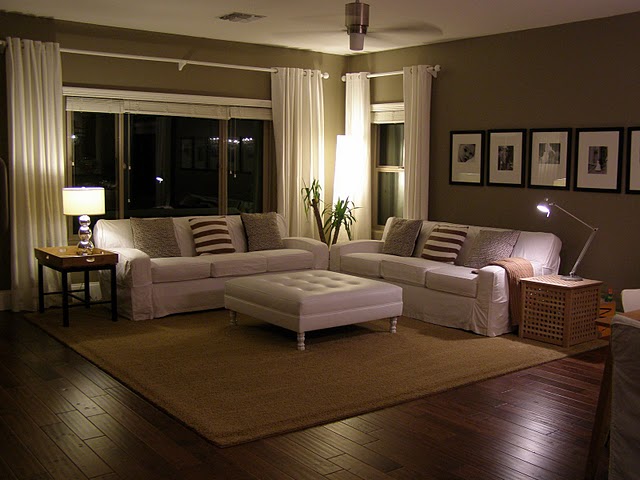
Now you’re ready to uphoslter or slip cover.
I bought white vinyl (faux leather) because I love white and I could wipe it clean.
After breaking a few needles on my sewing machine I realized my Singer was no match for vinyl. I took it my favorite Upholsterer, Chavez and he charged me $100. to upholster it and put in the tufting buttons. When I got it back I could see that $100. was the best money ever spent. He added piping, did a fab job on the covered buttons…I was very pleased.

There you have it.
Happy DIY Ottoman-ing!


 Hey there! I’m Michelle; I’m an Passionate DIY’er and in constant pursuit of how to bring beauty to my house full of men (3 boys + 1 hubby). Stick around and see what I’ve got up my hard-working sleaves!
Absolutely love your ottoman. I’m a huge fan of vinyl, at least while there are multiple kids in the house. That was a great price from your upholsterer!I think you’re right about the legs but it’s not glaringly obvious and they look great painted white.
Very inspiring post:o)
Angex
It looks great!!
Michelle, precioso!!! Tu living es hermoso!!!
Looks fantastic! Love the bold yellow you have in there with the pillows and the lamp. If I had a dollar for every time I sent a link of your master bedroom to someone, I would be rich!! Great style and vision you have.
I love your place Michelle! And that ottoman looks so amazing!! I am planning on reupholstering one myself, so I’m super excited to start now!
How did you get it to look like 2 separate pieces? You said tht you covered the whole thing in batting… but it looks like there is a “pillow top” on top of a box…?
Was the whole thing upholstered, except for the legs?
Thanks for the tutorial! It looks amazing!
I am so excited to try this! I never thought of vinyl for the kids, and since I have a 5 month old that will work perfectly! Thanks for the tutorial!
Anonymous-
You’re right, it does look like two pieces. It is actually only one piece. There was a problem with the cut of the vinyl so the upholsterer worked his magic on it and came up with what you see.
I’m confused about the frame and upholstering. You describe making one box. Is there some type of second box below it? How would one normally make the double look- I know you had a fabric snafu here but how would it be done normally? Also, when you say cover entire frame and foam, do you mean just over the edge a little bit?
Thank you for helping!
You’re right, it’s only one box but the upholsterer did a piping in the middle that gives it the double look. I cut the foam even with the bottom and used spray glue to adhere it to the frame.
Nice work. And your place looks great.
oh my gosh. you are my lifesaver –I’ve been searching high and low for a giant tufted ottoman on the cheap, and now I’m totally inspired and going to try to make it myself. You are so crafty — thanks for sharing!!
Thanks, Michelle! We’re getting ready to build our ottoman for our living room. I’ll be sure to share when we’re done!
I love it, the only thing it lacks is a trampoline in the middle for the boys to jump on!
michelle,
where did you get your canvas prints of your boys above your sofa? i am looking to get some right now, but can’t seem to find a place that does square canvases.
ps- im about to go make myself an ottoman! thanks for the instructions!
I never knew you made that ottoman! Great job.
AMAZING! Your family room looks so perfect.
You are so great! you always make things look so easy!
Fantastic…you have almost convinced me that I can pull something like this off..looks awesome.
I love the living area with the pops of yellow…stunning. x
I love your place Michelle! And that ottoman looks so amazing
PPC Advertising India
Great ottoman! I am actually in the process of getting two Louis chairs covered in white vinyl with nail head trim…great for kids! I love your blog. You have inspired me in many ways and now I too am a blogger. Come visit me soon at livingladuree.blogspot.com
Best,
Amy
I love your photos in the wall!!!
It’s gorgeous! Do I correctly understand your directions: Is the bottom “piece” the wood 2x6s and the top “piece” the foam + 4 layers batting?
Jenn M-
Good questions. It goes like this (from bottom to top)…ottoman legs, 4X6 frame, presssed board, foam, batting, upholstery.
How do you attach the upholstered pressboard/foam to the 4X6 frame?
If you hadn’t had to jerry rig your upholstery, how would you normally upholster the “open” frame on the bottom half?
Thank you!
I spray glued the foam to the frame. I had it professionally upholstered. They used sort of a mess on the bottom. It’s commonly used on most furniture pieces so tip a chair or sofa over and you’ll see how it’s done. 🙂
awesome diy! Ottomans – especially large tufted ones like yours are so pricey!
Thanks for sharing. Your ottoman looks fabulous!! The vinyl will be great with your little guys.
Umm… That’s totally awesome.
Michelle, the ottoman is amazing, I had no idea you made it yourself! You’re inspiring me to make a few things on my own! I think the legs on the ottoman are good, it really lightens up the space.
great ottoman..please tell me what the name of the paint is on your walls are I love that shade of grey!
what size are the three canvases across the wall? i have a big wall like it and want to do that- i now i have 5 frames going across like the first pic in the post, but we are having some beach portraits done and id like to do big square canvases instead….the size you have is perfect- also, if you switch back and forth…how do you cover the holes?
Ashley,
Canvases are 30X30.
Looks great and suits your room.
Hi Michelle,
I love your work… I was wondering what are the measurements for the holes you drilled for the uphoulstery?? from the end to the middle? and how far apart should they be?? Thanks soo much! This ottoman turned out really really fantastic!!
Your ottoman looks great and shows perfect matching.
plastic card holders
plastic business cards
scratch cards printing