I would consider myself a moody decorator. I change out throw pillows, move furniture around, put different art up not just seasonally but sometimes weekly all according to my mood. And why shouldn’t I? People dress according to their mood, eat according to their mood, style their hair a certain way according to their mood. I get that going out and buying a new a new pair of jeans is a little different than buying a new sofa just because your in the mood but still…
Remember a couple weeks ago I talked about my hallway gallery wall dilemma? I came up with a new solution that cost me under $6.00 per piece.
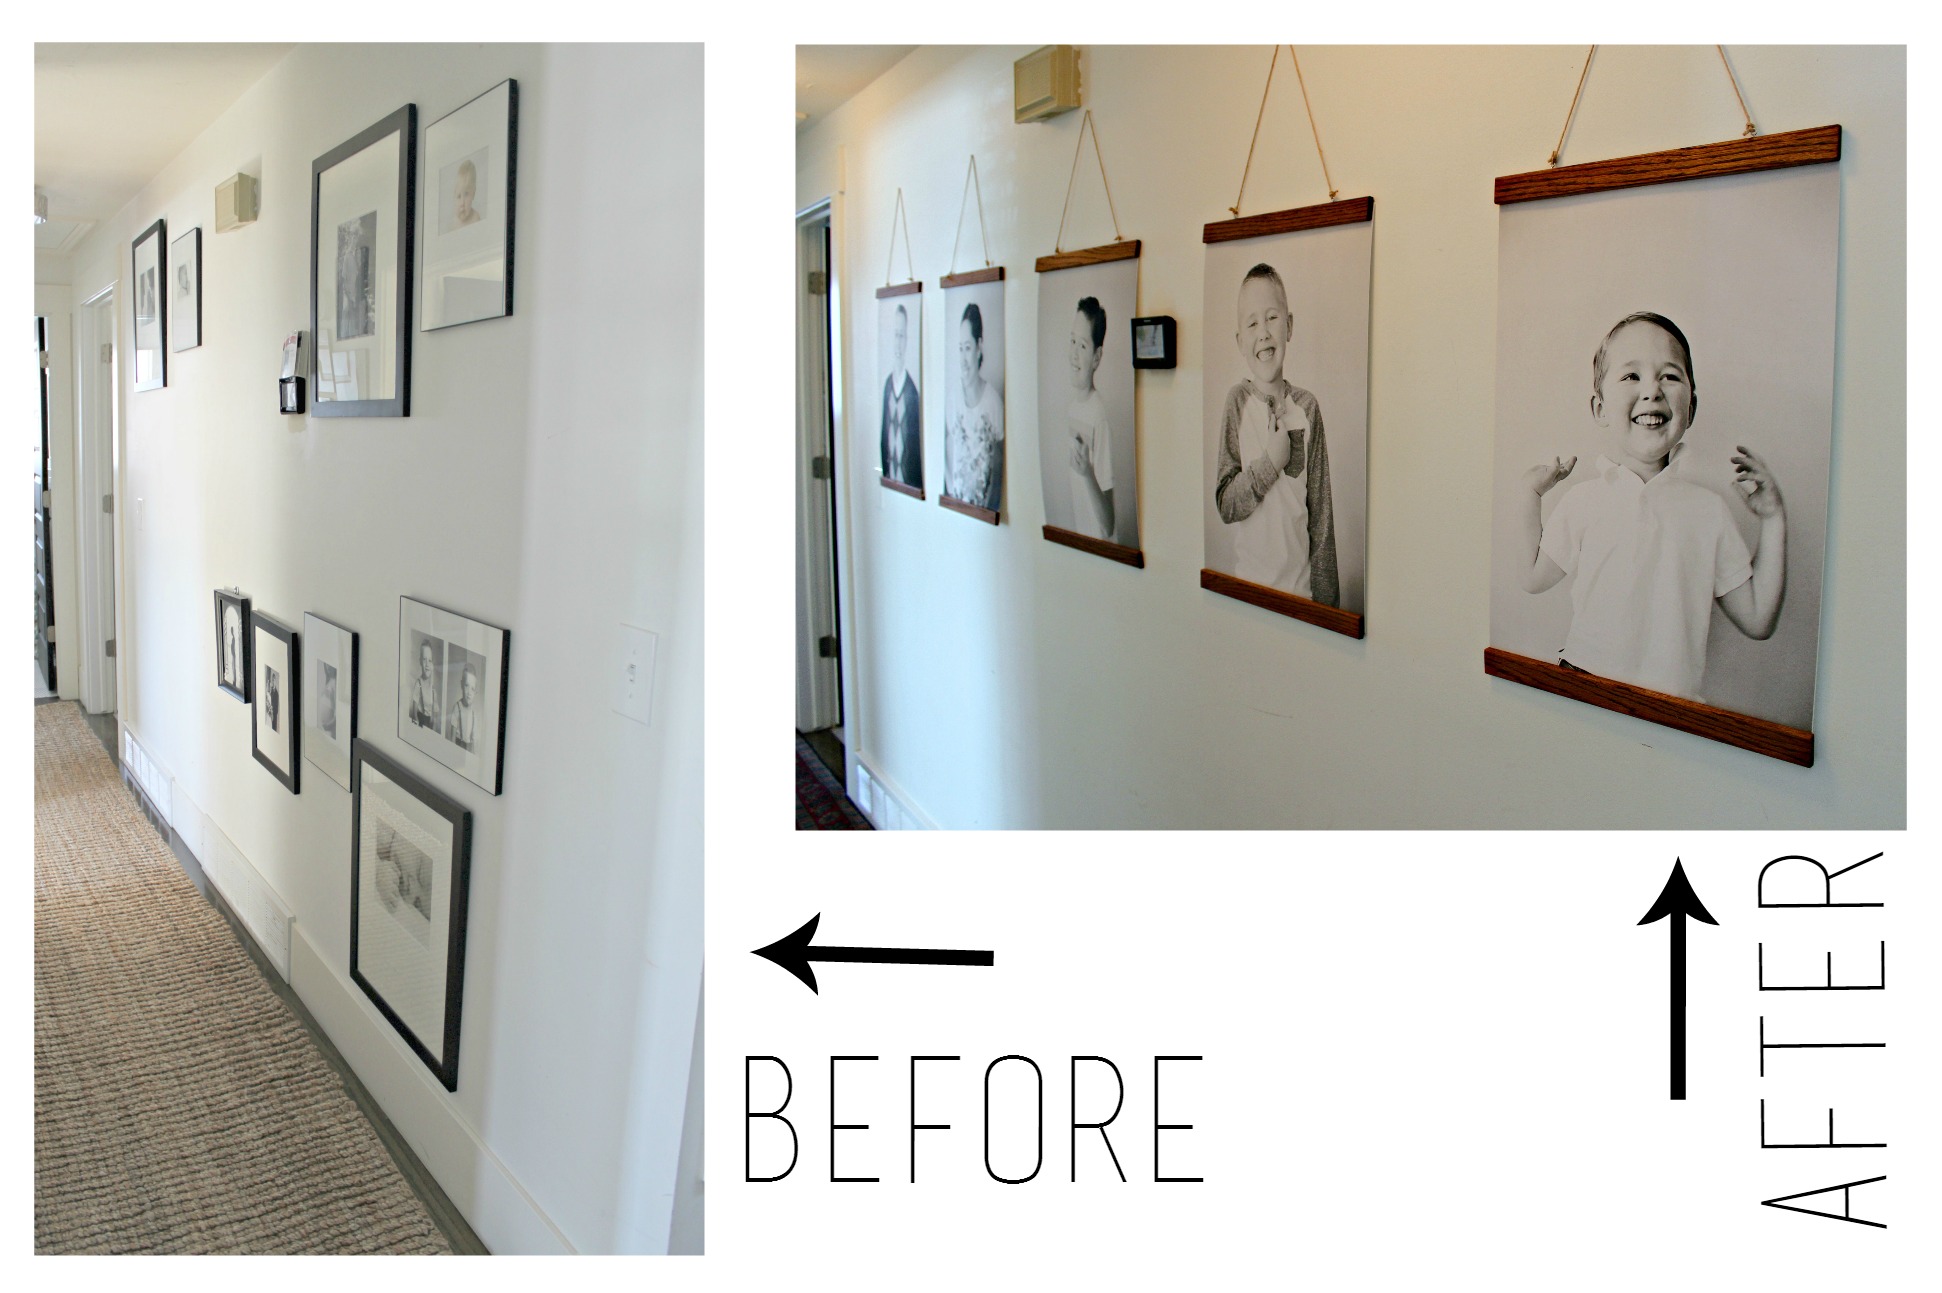
I love hanging family pictures on the wall. They bring personality and uniqueness to a home. Instead of using traditional frames with glass again that will end up getting broken with three rowdy boys, I opted for something a little different…
I first needed some updated photos of my family. I’m a wanna-be professional photographer. The majority of pictures I take are with my phone. I do have a DSLR Cannon Camera as well as tons of books and how to use it but I still shoot the majority of the time on automatic. I find that when I’m trying to grab my camera to capture a “moment” I”m not worried about fooling around with lighting, settings, etc.
Last week I staged a very informal, organic photo shoot with my family. No fancy outfits, no prep, just them, a white wall and my camera on automatic. In fact, whatever they were wearing is what they got snapped in.

My seceret weapon to making my pictures look somewhat decent is free online photo editing programs like PicMonkey or my favorite free phone photo app Aviary.
![]()
Julia did a something very similar if you’re a fan of Photoshop.
I could have had them printed at a professional photography lab but remember, I’m a moody decorator. Instead I went a really inexpensive route and had them printed at Staples on the Engineered Printing Paper (which I did here once before). For $1.99 each they printed them 24 x 48. That way if I get tired of them in a short time (or my 4 rowdy men find a way to ruin them) I won’t feel guilty having not spent a whole lot of money.
![]()
The prints come on thin paper that is typically meant for things like blue prints. To give them more stiffness and substantiality I used spray adhesive to attach them to a piece of poster board cut the same size.
Hanging wood poster frames are nothing new but I recently fell in love with them for visual uniqueness and affordability they give to a piece of art.
I was really inspired by these here, here and here.
Next, I picked up some window trim at my local hardware store for around $1.00/ft. There are a lot of other inexpensive options out there. After I put my projects together I kicked myself realizing the trim was almost the same dimensions as a large paint stir stick which is free…duh. (See my paint stir stick house numbers project). Next time. I cut my trim down then used a Walnut shade to stain them with a rag.
![]()
To attach the trim to my picture I flipped the trim over (wrong side up), then the picture (also wrong side up) and aligned the picture on top of the trim securing with a hand held staple gun.
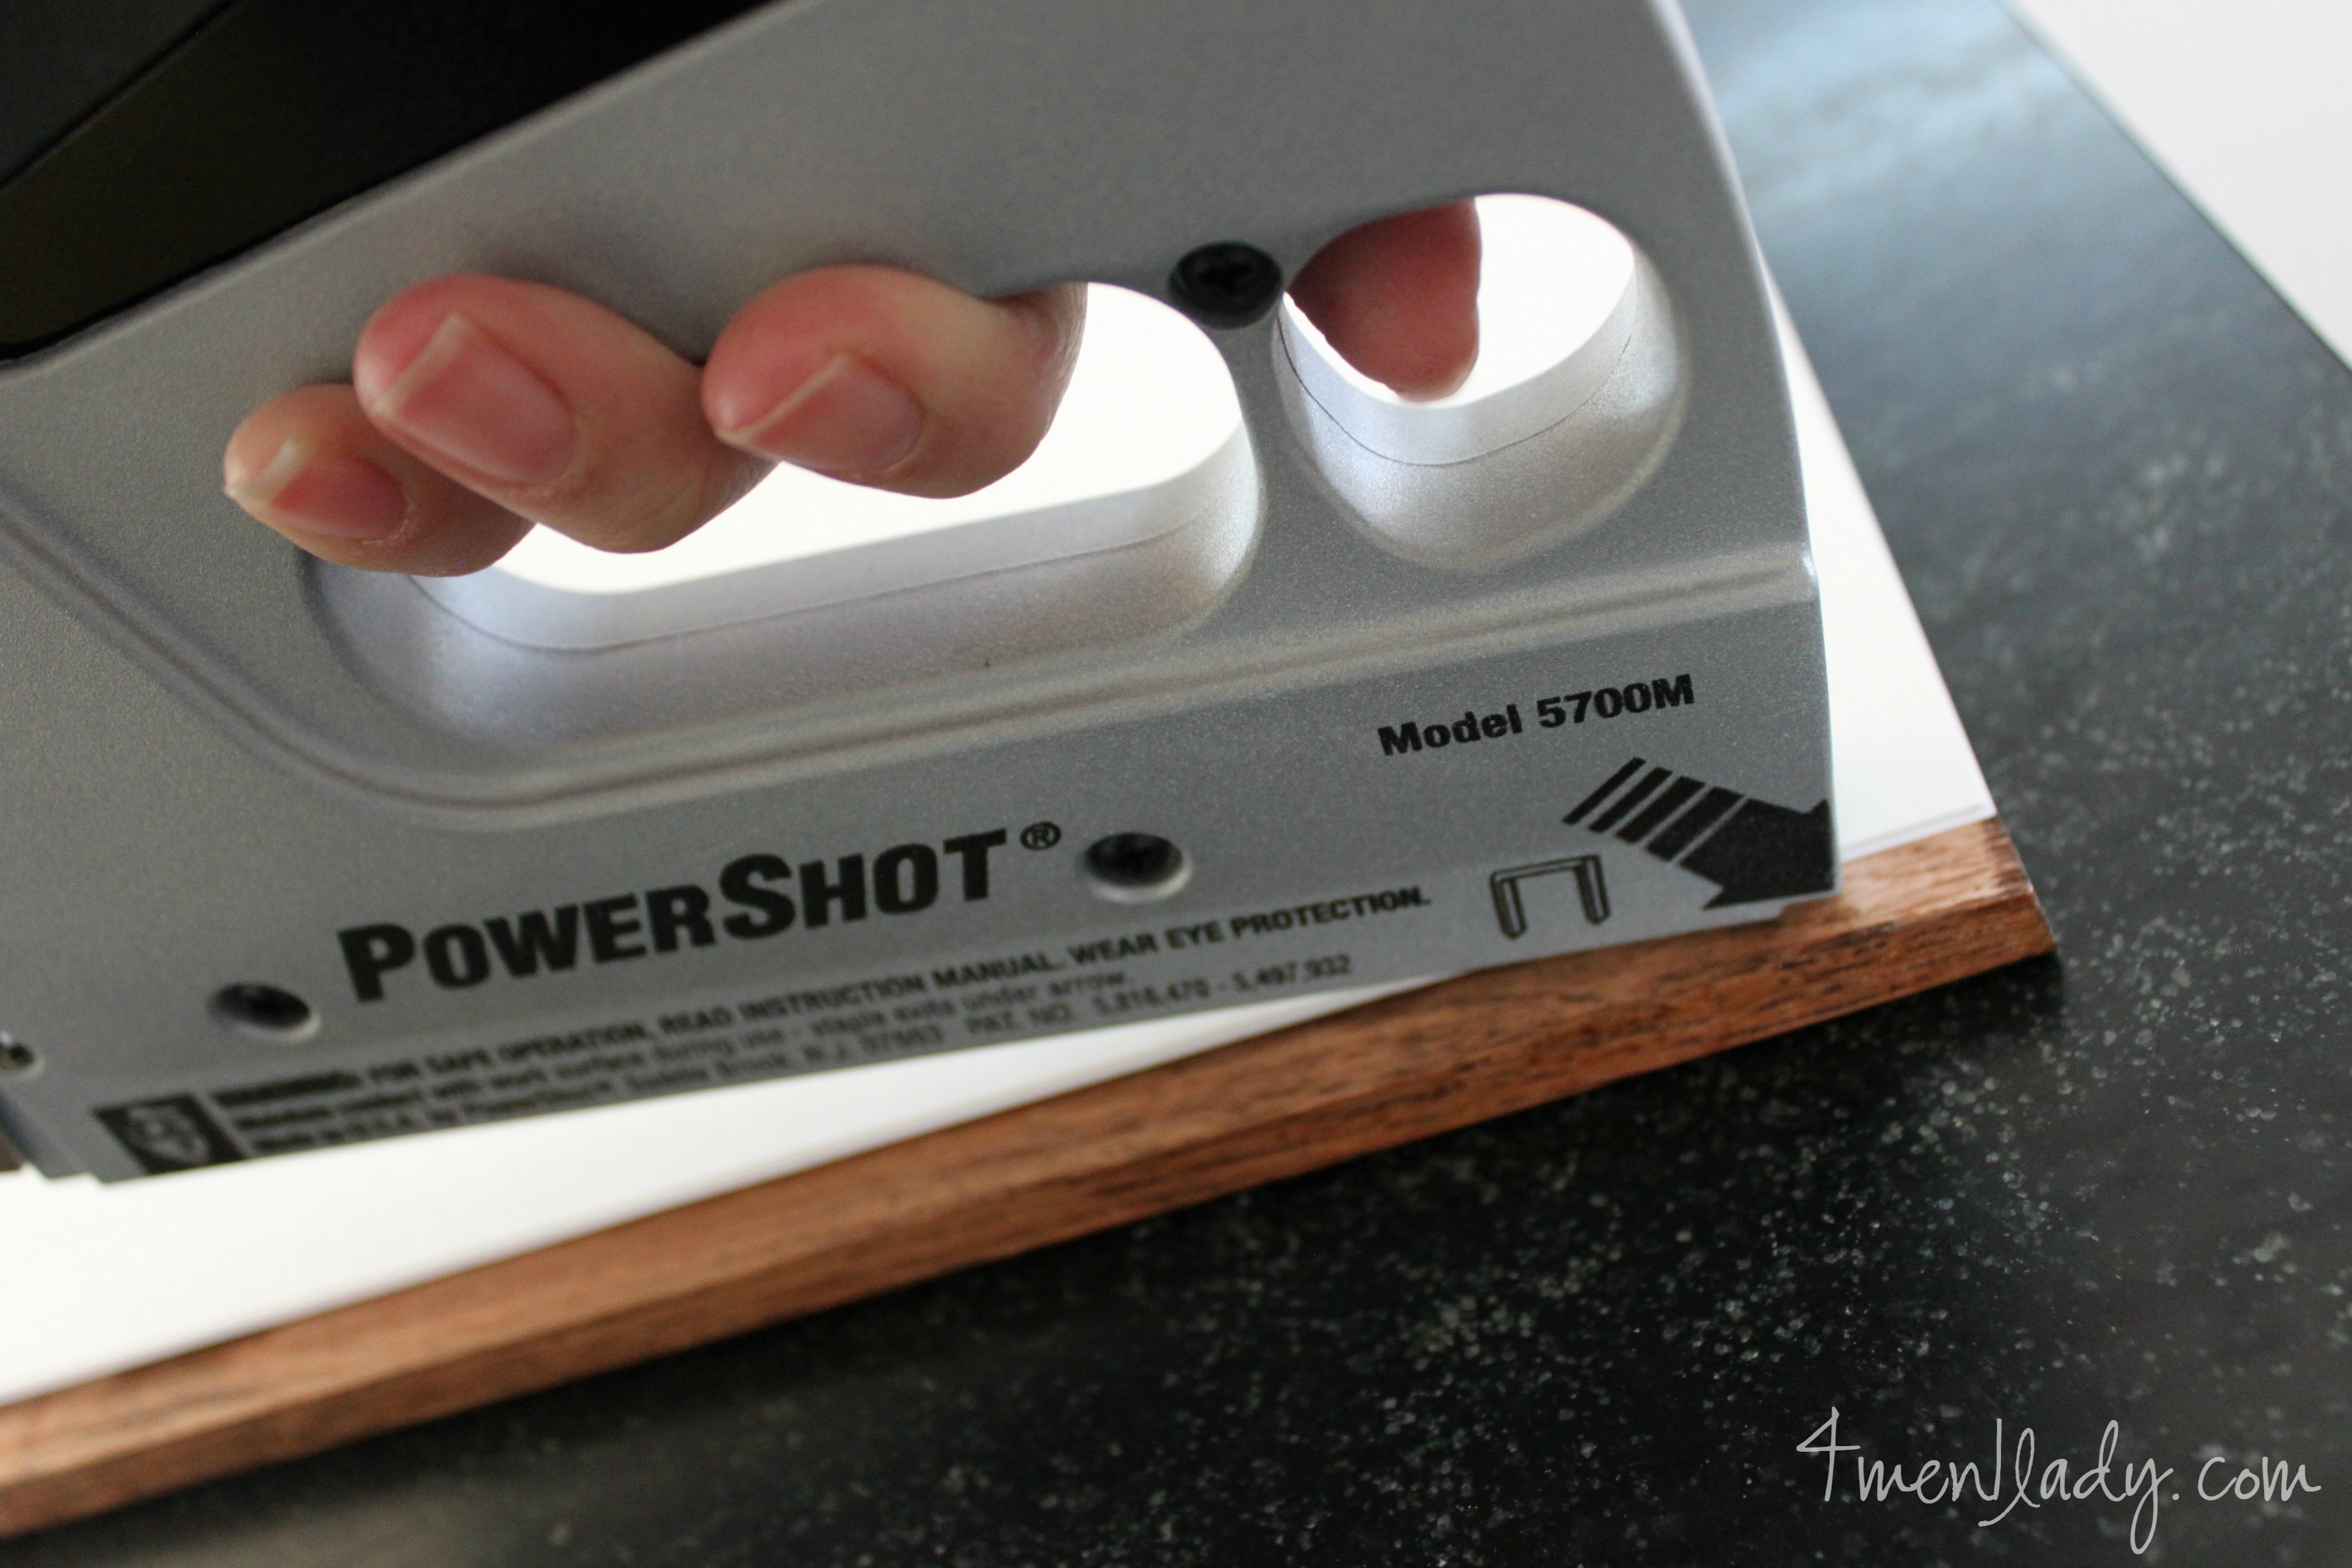
I attached trim to the top and bottom of my picture, only the front side of the picture. Next I attached two eye hooks to the top of my trim pieces and tied everyday twine to them which holds the piece up.
![]()
I never pictured three little men in my life pre-children but boy, I’m smitten.
![]()
![]()
![]()
You can’t beat $6.00 for a custom photo shoot, print and framing.
There’s so much to love about this project but one of the things I like best is the price doesn’t guilt me in to feeling like I can’t be a moody decorator when I’m ready to change it out in the not too distant future.
I used the same inexpensive framing idea to hang this piece by Light and Ink above my mantel.
![]()
I followed the same process to put together this piece however, I used trim pieces on both the front and back, top and bottom of print to give it just a little more polished of a look.
![]()
I sandwiched the print between two trim pieces then attached a wood screw to secure the trim and print together.
![]()
Had I framed this print it would have cost me a pretty penny because it is an unusual size and it would have had to be custom.
For under $10.00 I was to just use trim, a 6 screws, a couple of eye hook screws and some twine.
Tune-in to see what mood strikes me to change my mantel to next.
Late addition: The sweet Lisa from Light & Ink is offering our readers a limited time 15% discount to her store. Enter “justforyou” at checkout. Thanks Lisa!


 Hey there! I’m Michelle; I’m an Passionate DIY’er and in constant pursuit of how to bring beauty to my house full of men (3 boys + 1 hubby). Stick around and see what I’ve got up my hard-working sleaves!
Love this!!!
Thanks girl! 🙂
Wow – ideas like this are AWESOME! I barely found an idea for framing a 40 x 60 print, but I like this idea even better! I agree that it’s too expensive to custom frame artwork that you might get tired of, or you might choose to frame differently in the future. I LOVE ART and I love learning about new ways to display it! THANK YOU!!!!
Custom framing often times costs more than the actual print or art I want to frame. :/ Glad you love it as much as I do! Thanks Mary.
Michelle
How did you get the pic from Aviary into a file that Staples could read? Like did you convert to pdf? How did you set the dimensions to print that large? Thanks for any tips you could share, these looks great!
That’s a good question…I didn’t even pay attention. Once I edited it I just saved it to my phone and emailed it to myself so I could put it on my computer then again uploaded it to Staples. Hope that makes sense. 🙂
Hands down…the bestest idea ever! I’m soooo going to do this. And to think I just hung about 20 pictures, in frames, in the hall. This will inspire me to go bigger! Thank you for sharing. Woo hoo!
If you don’t have rowdy boys you should be safe with the 20 hallway pictures. 🙂 Thanks for your compliment Lola! xoxo, Michelle
When you framed the Light and Ink stump, did the screws go through the print? I love this idea but don’t want holes in my pictures. Thanks so much!!
When using this framing effect you’ll definitely want to back your print with something to make it more stiff and more substantial so the wood piece at the bottom won’t be so heavy that it rips the piece. I backed mine with poster board. Make you poster board one inch longer at the top and bottom so when you screw the wood together it goes through the poster board and not the print. Hope that helps! 🙂 Michelle
Love this! So casual, yet elegant!
Thanks Priscilla. Perfect definition…casual elegance. I like it! 🙂
what actual effects did you use on aviary? Love the pics!
Metropolis. 🙂
Ok, you have me sold!! We have some large bare expanses of walls in our guest room that are begging for some art. I’ve been on the hunt for some DIY inexpensive (yet classy looking!) pieces to use as placeholders until we can fill out our collection (which happens ohhhhh so slowly). I think I’ll work on this today!
Yay! You’ll have to send some pics my way when you’re done…I’d love to see how they turn out!
This is such an effective and inexpensive DIY. The casual photos look great!
Genius!
Very kewel. WOW ~ ~ your oldest son and you = twins!! 🙂
He! He! Thanks girl. 🙂
Oh. My. Stinking. LANDS!!!! I’m not at all crafty (Stuff like GLITTER and HOT GLUE make me need to sit down and breathe deeply into a paper bag.), but I think I could pull these off. I have a wall at home, and I keep looking at it, thinking, “WHAT could I put there?!” Bingo! I think I could do some deep-breathing and get through a crafty project like this, because I’m in love with it! Well-played… well-played.
You are too cute!!! Yes, fill your walls with these babies. Super easy, super affordable! Send pics when you’re dome. I want to see how they turned out Jedi Mama! 🙂 xoxo, Michelle
Absolutely! Just as soon as we survive Stomach Flu Infestation ’15 at our house!! We’re a “sharing” kind of family, so we’ve all taken our turn at it, so crafting projects have to take a backseat right now to me walking around my house, asking the husband, “Are you SURE you don’t smell puke any more? Because I might still smell some, lingering in the air! What will company say?”
Amazing!!! I have been thinking about printing like this at Staples lately! I LOVE your framing idea! So clever!!!
They are so affordable you almost can’t not try it! Thanks Amanda!
No joke, I have not one picture, mirror or other décor pieces on my walls. I want to hang pictures and prints, but I’m a college student (meaning broke.) This is a great idea to get some artwork/ prints up on my walls without spending an arm and a leg! Thanks for the inspiration!
On the staples page for “designing” the print it says not suitable for B & W photographs. I am wondering if that is just to deter or so people aren’t disappointed if the paper is so delicate and it rips. Thoughts?
Yes, that’s true. The quality isn’t great and the paper is really thin. If you know this ahead of time you won’t be disappointed. But I was delighted for the purposes I was using it for and a couple years later they still look great hung down my long hallway.
I really want to do this but I’m confused about the engineering prints. When printing on engineeejnf prints from staples it says no photos. How did you do this with no photos? Please help! Despite for some adorable art around the house. Thanks!
They say no photos because it isn’t photo quality and people get disappointing. As long as you know that going in I would say go for it.