Today’s post comes from 4men1lady’s contributor Kimberly Dekker of Days Of Dawn. She recently did a makeover on her apartment dining room. It’s amazing how a few small and inexpensive changes add up to a dramatic space. Take it away Kimberly!
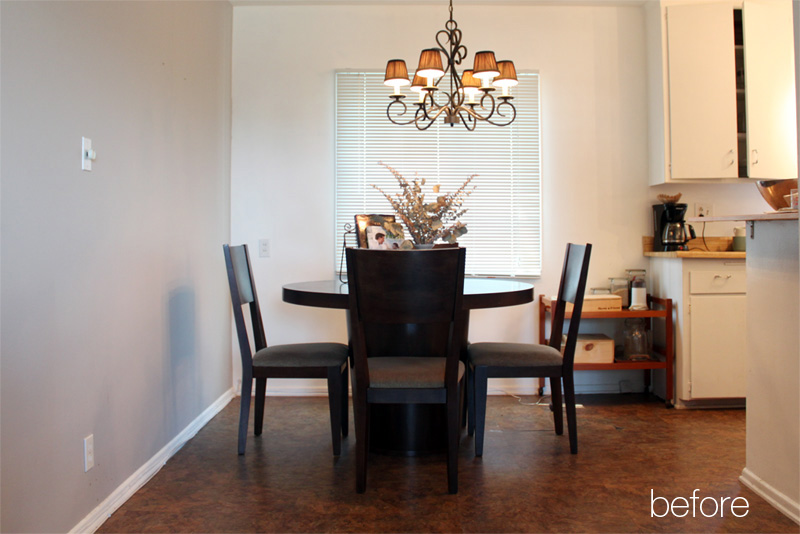
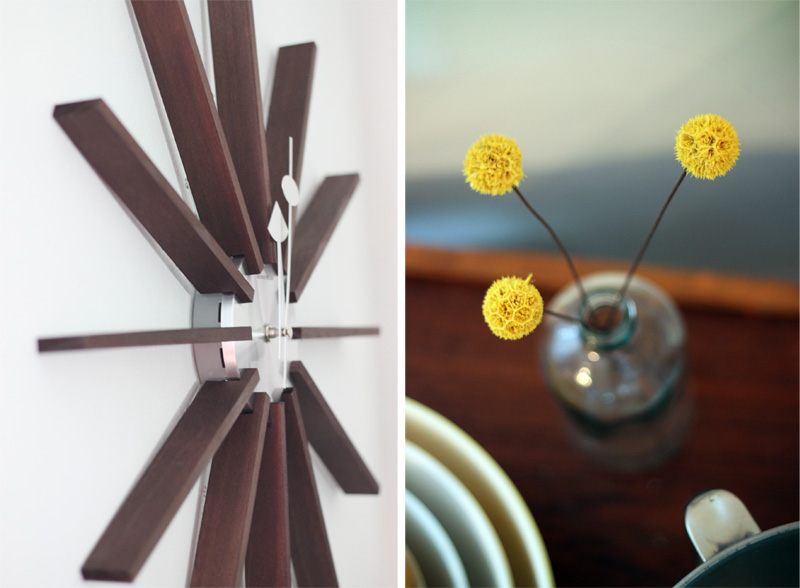
There are many ups and downs to apartment living. One of the “not-so-fun” parts of renting an apartment is not having many options to upgrade a space, such as our tiny little breakfast nook. While expanding the room or changing out the cheap (and ugly) linoleum floors might not be options, I finally decided to do what I could with the space and give it a “face lift” after an entire year of living with it as it was. I have never felt inspired by the space, nor have I found the time to freshen it up until now. I also didn’t have a very big budget for the project, so I had to be as frugal as possible, to include a couple DIY projects along the way!

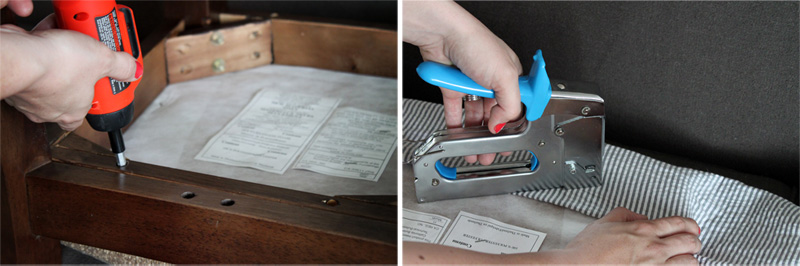
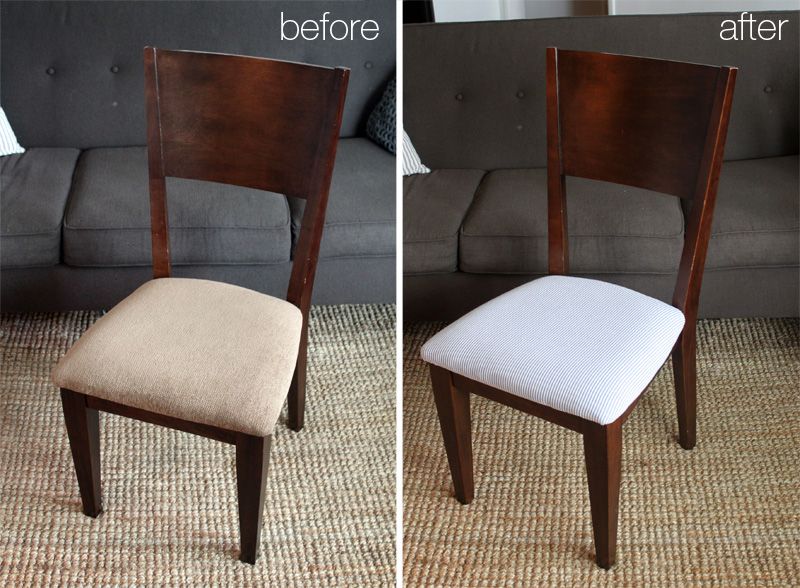
I have been wanting to re-cover my dining table chairs for years! Since they weren’t terrible to begin with, I never made time for them and always assumed the project would be a LOT harder than it was. With the help of a screwdriver, scissors, and a staple gun I easily replaced the worn and bland fabric with this fun and durable striped fabric! I think it brings a lot of life to the room and compliments the bold rug nicely!
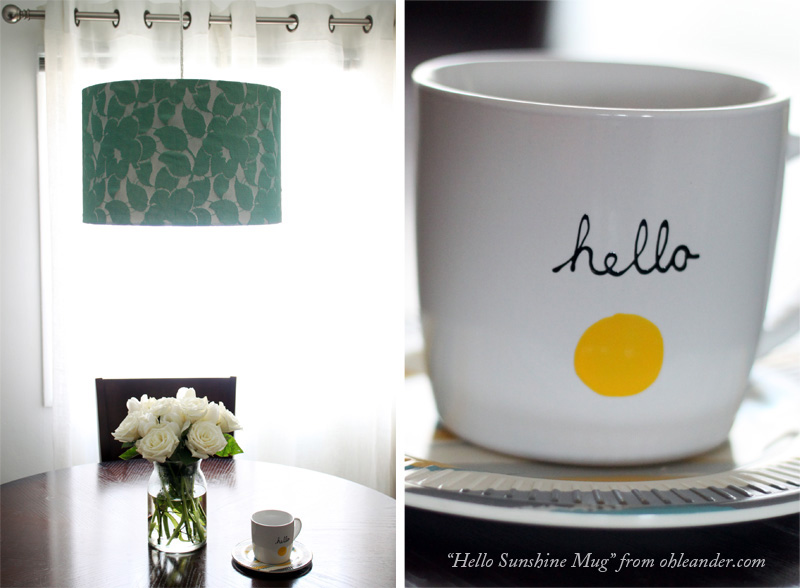
Now let’s talk about the “elephant in the room” or should I say, the light fixture that was in there before! It felt very outdated and dark, and I couldn’t wait to replace it! When I began shopping for a new fixture, I really loved pendant lighting. I felt like since the space was so small, it needed something minimal and less bulky. I am especially drawn to drum shades, but pretty much every one I found that I liked was more than I was willing to spend. I decided to do it myself!
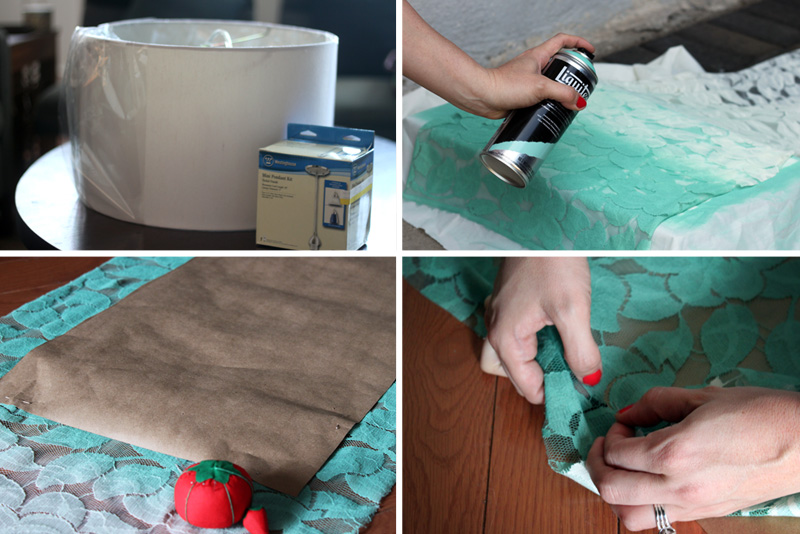
I purchased a mini pendant light kit and a drum shade for a table lamp on clearance. It was plain white, and I knew I wanted to add some color and pattern to it, so I decided to cover it with fabric! I chose a pretty lace fabric (also plain white) and decided to spray paint the lace to get the pop of color I wanted! After it dried, I used some craft paper to cut a pattern of the drum shade, so the lace would be cut-to-size. Then, with a little fabric glue, just attached the lace to the inner rim of the shade and VOILA! A brand new light fixture for less than $30.


Since I am not very “handy” and am no electrician, I am very blessed with a husband that not only knows his way around a breaker box, but was willing to spend the time to hook up to the new light kit and remove the old one.

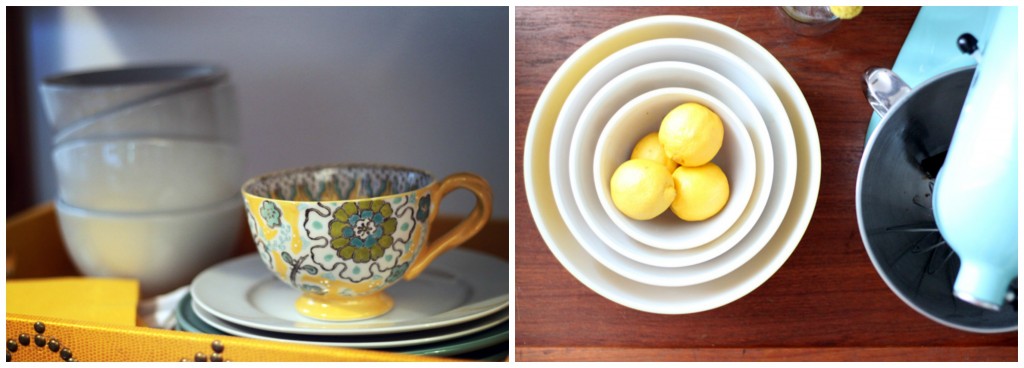
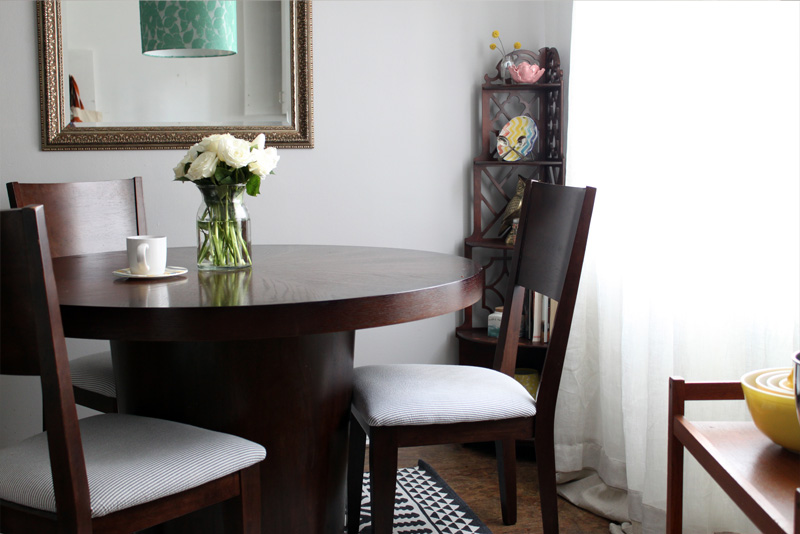
Although the room is still small, I feel like with just a few simple changes, it feels so much bigger, brighter and a lot more inviting!
Fab makeover Kimberly! I’m LOVING the new lamp shade chandelier! To see more of Kimberly’s projects check out her blog at Days of Dawn.


 Hey there! I’m Michelle; I’m an Passionate DIY’er and in constant pursuit of how to bring beauty to my house full of men (3 boys + 1 hubby). Stick around and see what I’ve got up my hard-working sleaves!
Amazing what a few small changes can do! I especially love the new chandelier. It’s a great creative solution!
-Sarah
I know, right! That chandelier is so genius! Kimberly did a fab job!
Beautiful! What a perfect example to people that you don’t have to spend weeks and weeks and lots of money to present a big reveal that would intimidate half the blogosphere out of redoing a room for themselves. Just simple subtle but beautiful changes really makes your dining area look like one in a magazine! Good job Kimberly!
Agreed! Kudos, Kimberly!
Just a quick question – did you say you put the lace on the INSIDE of the shade? Or is it on the outside tucked into the lip? Thank you!
Using a dab of fabric glue the lace was attached to the inside of the shade. 🙂
Hi there! Sorry… I guess I wasn’t very clear. I wrapped the lace around the OUTSIDE of the drum, and used fabric glue to attach the edges that wrapped around into the INSIDE of the drum. 🙂
Wow, what a great change. It really inspire others to do it. Thank you! Reminders – little changes equals great transformations.
I love that color palette, and I’m really impressed you kept the table as a central fixture. Good job!
Loving that rug! Can you tell me where it’s from??
Can you tell me where the rug is from?
The changes in your dining area have given it a brand new look! Spray painting the lace before using it is genius! I am going to pin this.
Have a good week.
Cindy
Kimberly did a great job didn’t she!
Wondering where you purchased the light pendant kit from? Thanks