This is a sponsored post by the Home Depot written by me. All thoughts and opinions are 100% my own.
Thank you everyone for your sweet comments on our bedroom reveal.
We really are enjoying being able to retreat to our bedroom instead of avoid it.
There can be lot of hurdles when it comes to pulling a room design together, namely, time and money, but in the end it’s so worth it.
If you’re a stay-at-homer, you spend the majority of your life living within the walls or your home.
Might as well make the rooms pretty, organized and efficient.
We now love our space instead of despise it.
In our bedroom reveal you may have noticed that our door was black.
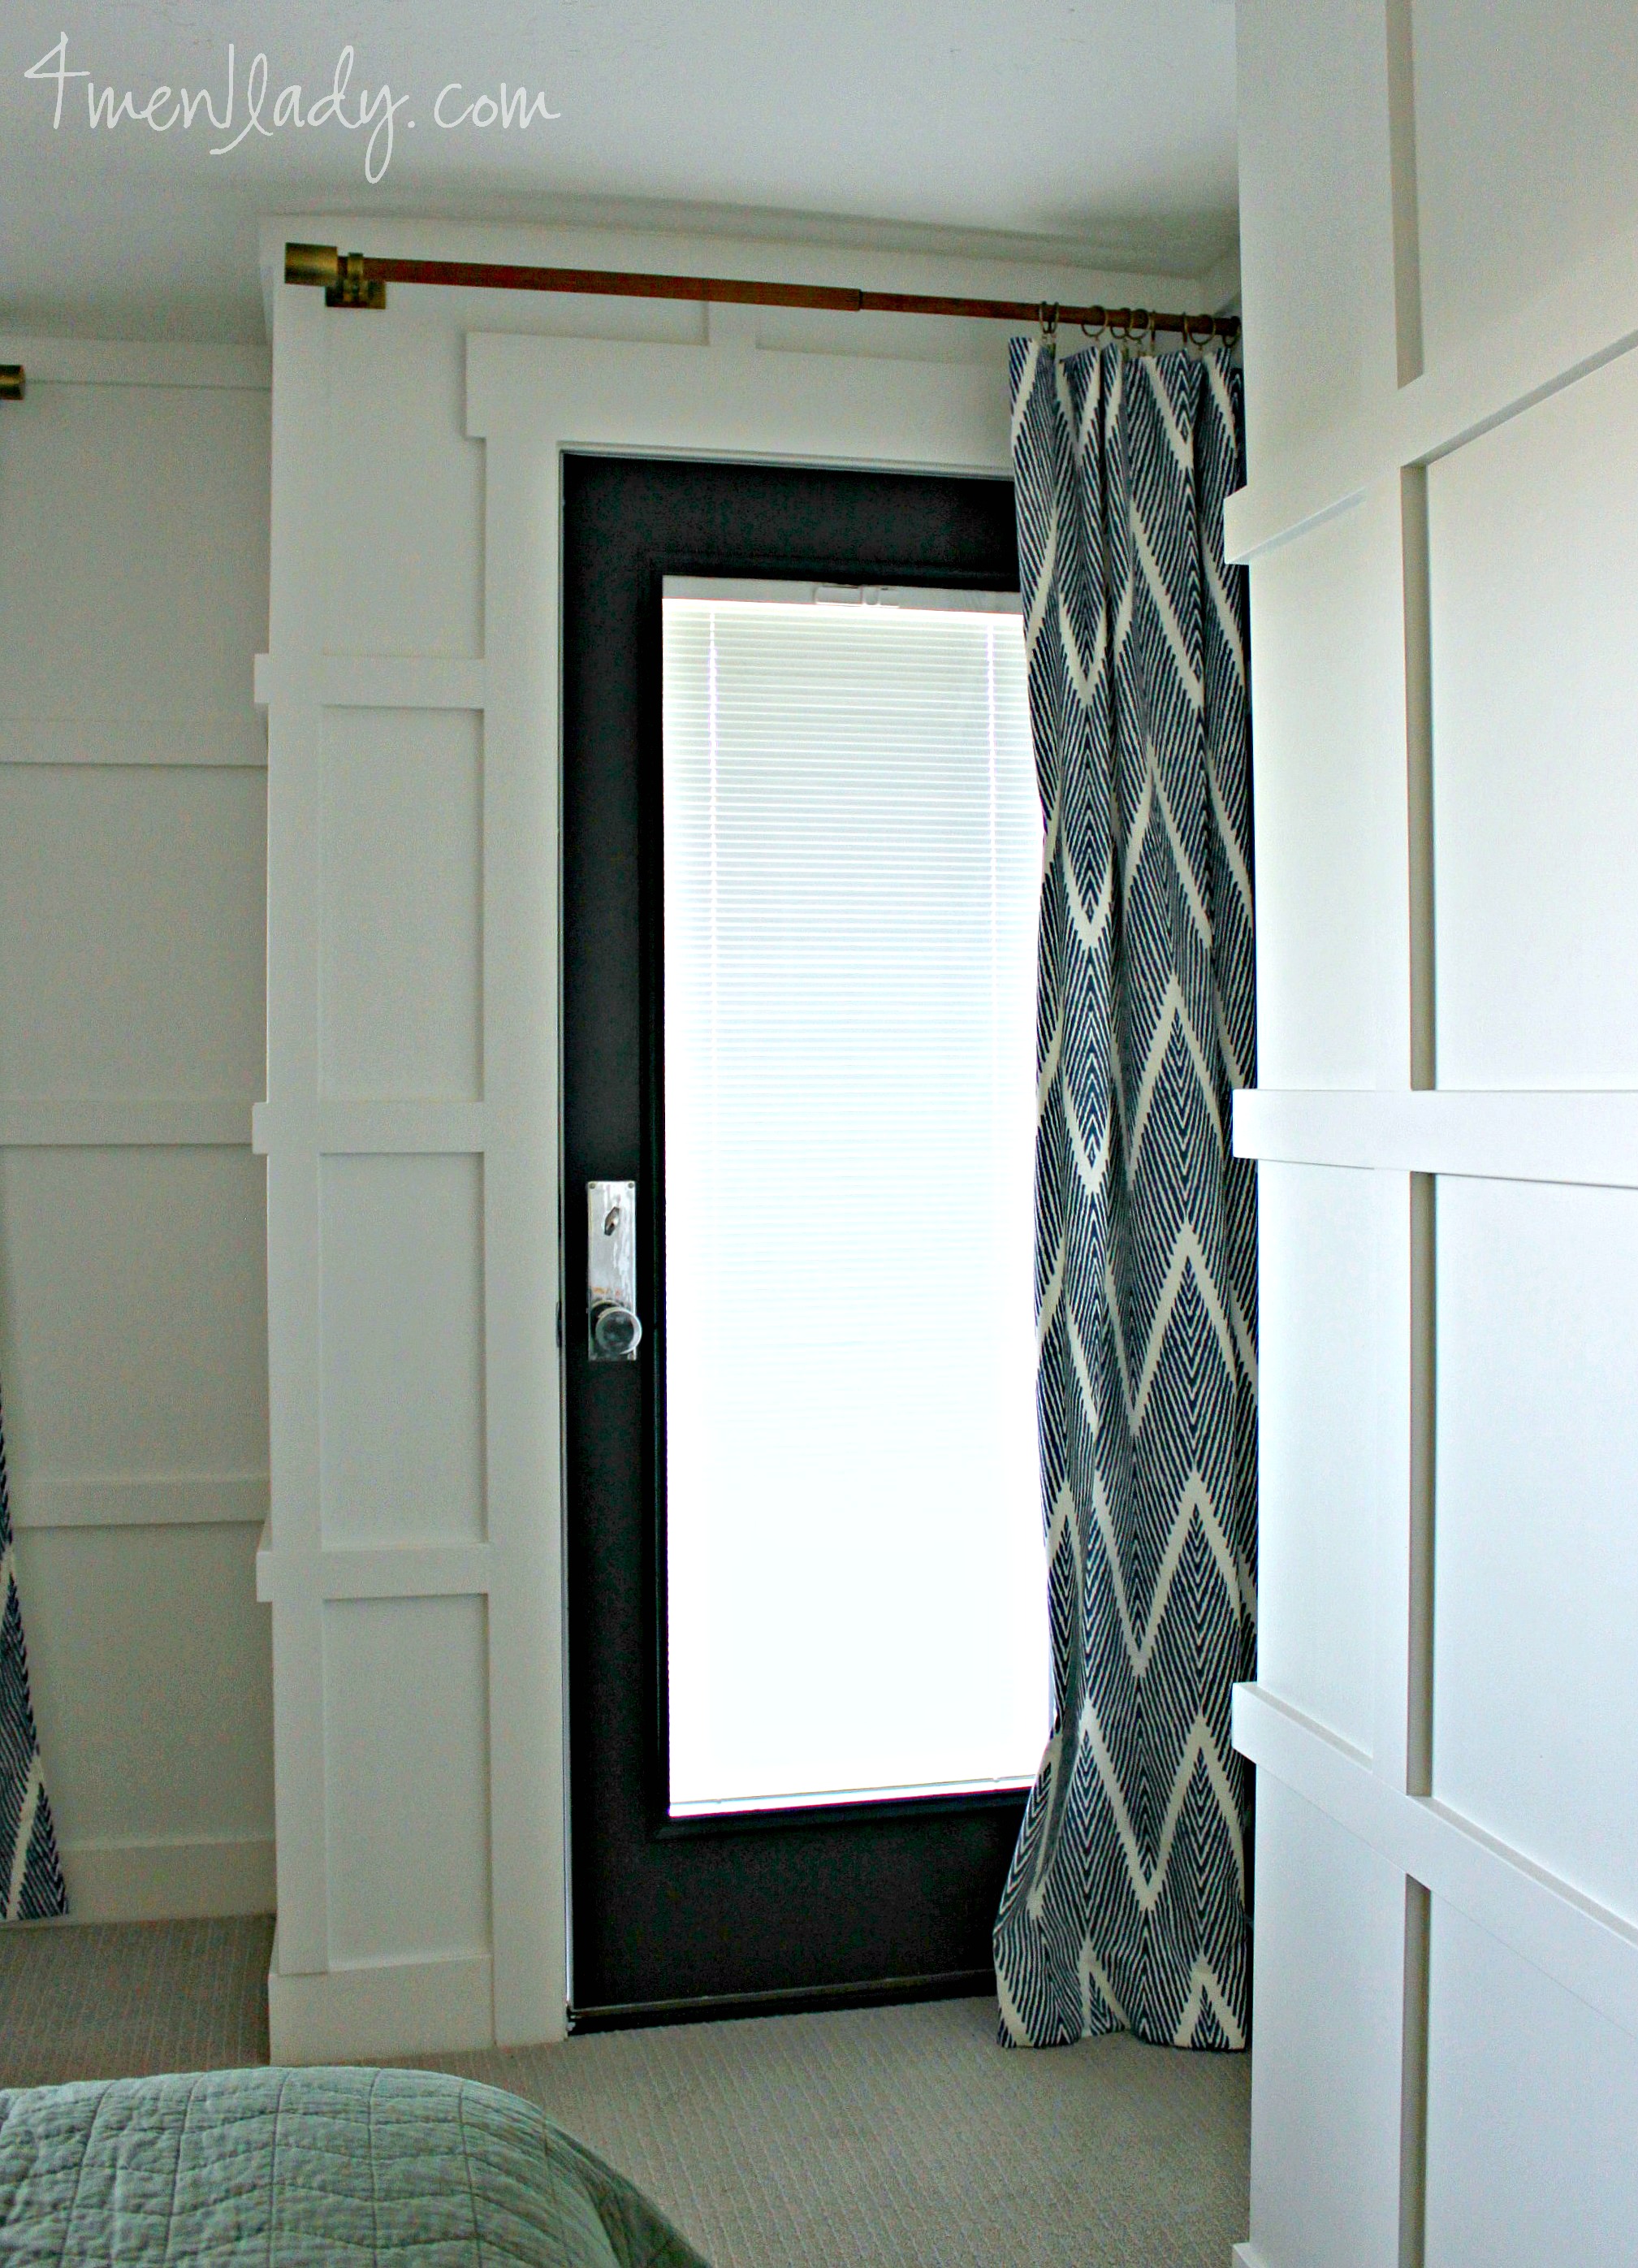
It didn’t use to look like that. When we first moved in we had a new Jeldwen door installed that we ordered through the Home Depot. It’s a beautiful door and well designed with the blinds built right in between the two panes of glass so there’s no jangling of the shades when the door shuts. It came pre-primed which we left in that state for about 3 years while we raised boys and neglected this room.

To get the door and rest of the room ready to paint we first had to do a thorough cleaning. The Home Depot was awesome to gift us with a big Swiffer box filled with a Swiffer Duster and Swiffer Sweeper. I actually already use these Swiffer products as a part of my cleaning regimen so sharing my experience with them was easy-peasy.
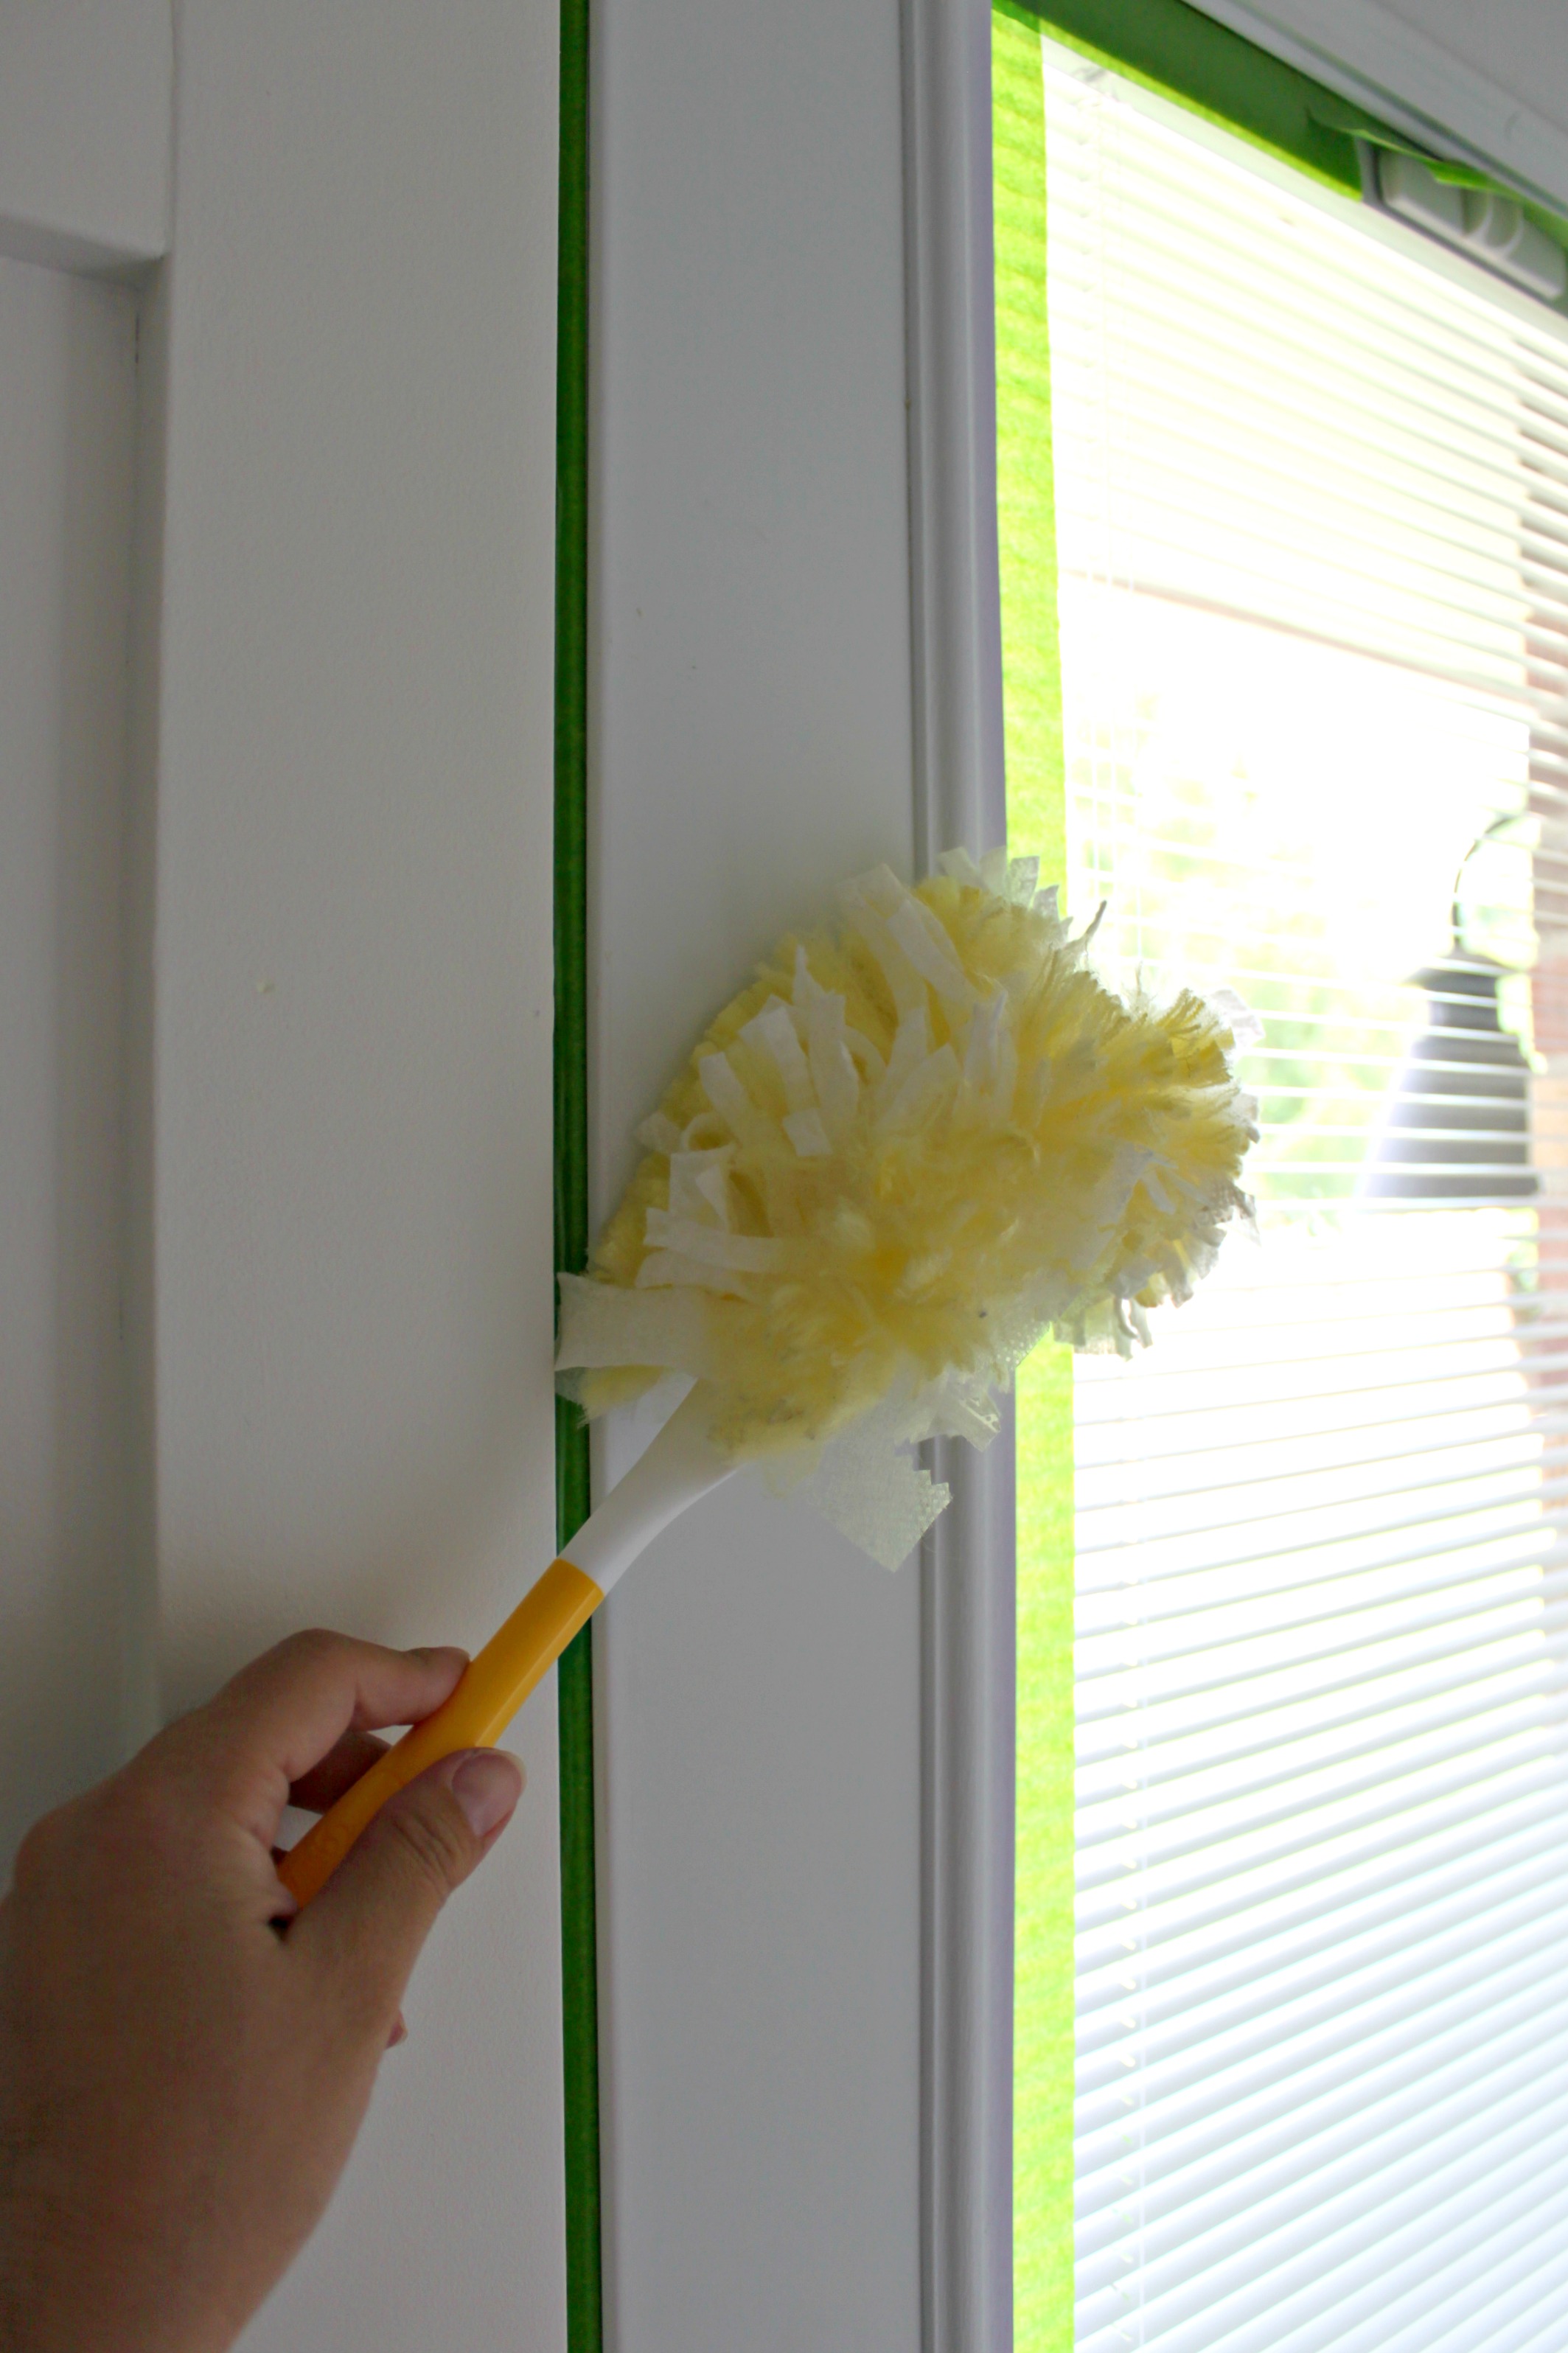
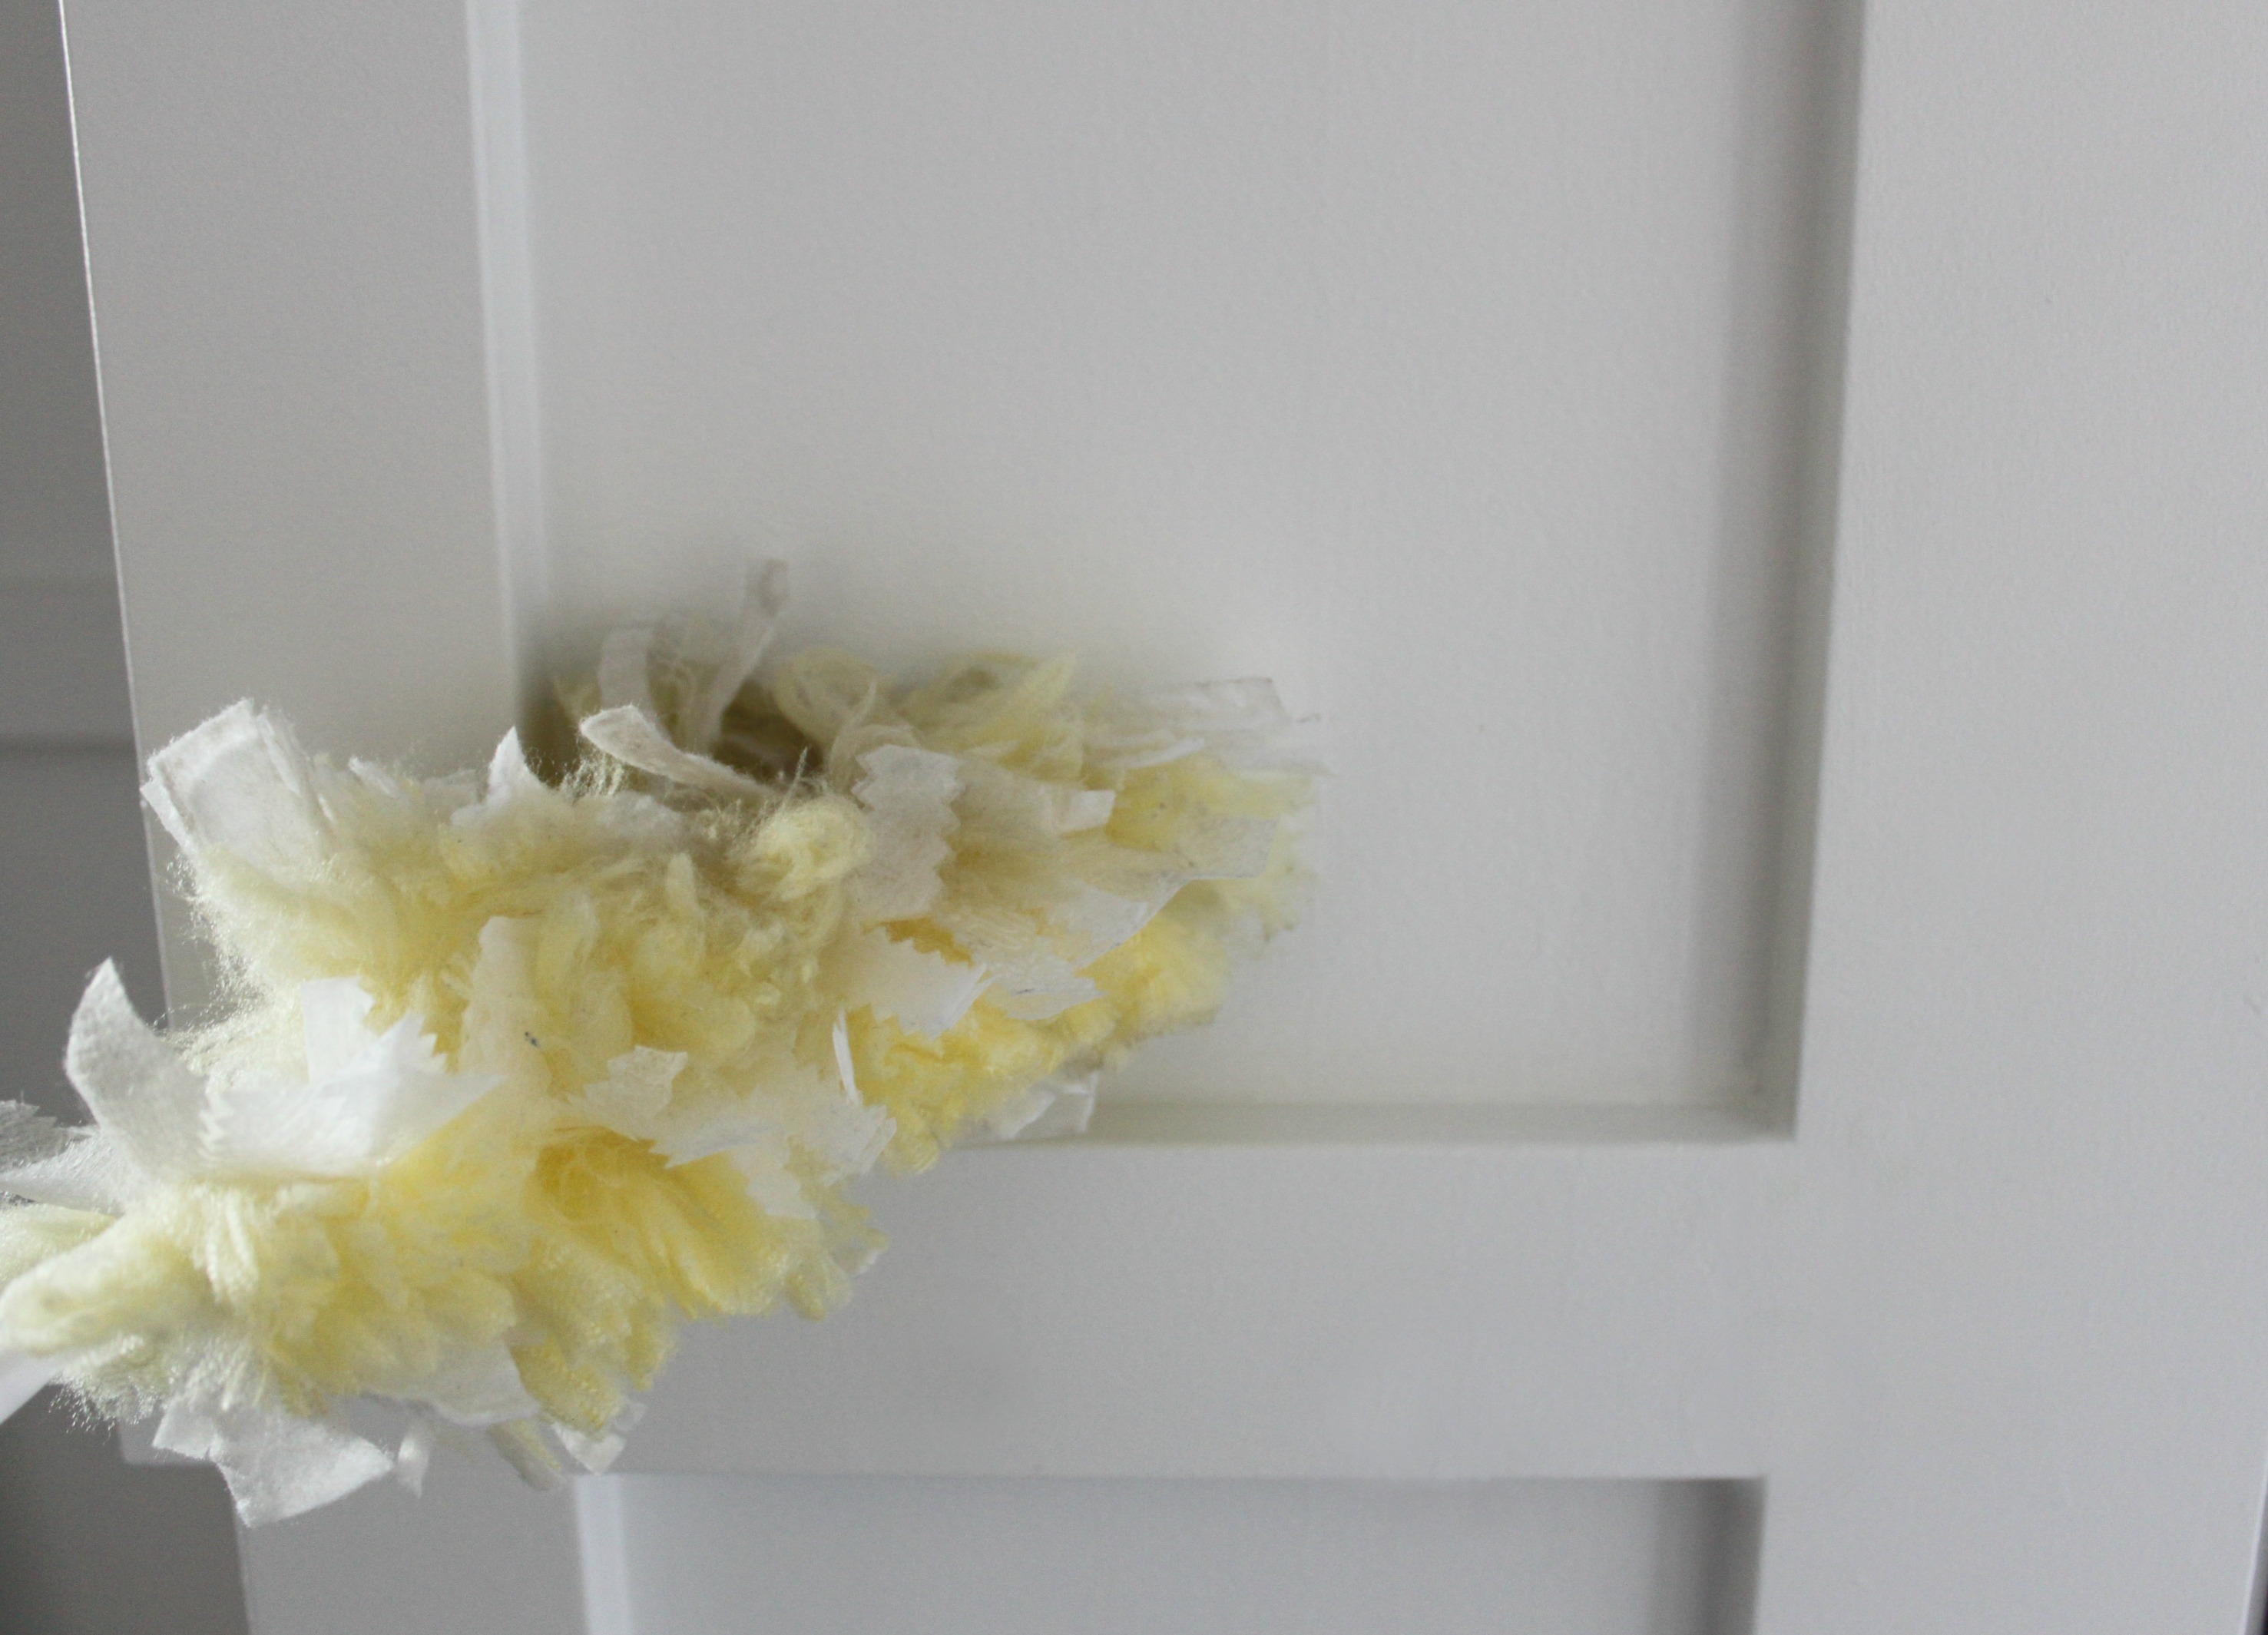
The first thing I do before any painting project is dust the area I’m going to be painting. You would be shocked at how dusty walls get. You wouldn’t think a vertical surface could collect so much dust but those of you who have a wall painted a really dark color, you know what I’m talking about. In the right light you can see just how much dust collects on your walls. The Swiffer Duster is the perfect tool because the fibers trap and keep the dust in the duster instead of letting them fly all over the room.
This sounds a little odd but in addition to using our Swiffer Sweeper on our floors we also use it on our walls, windows and mirrors.
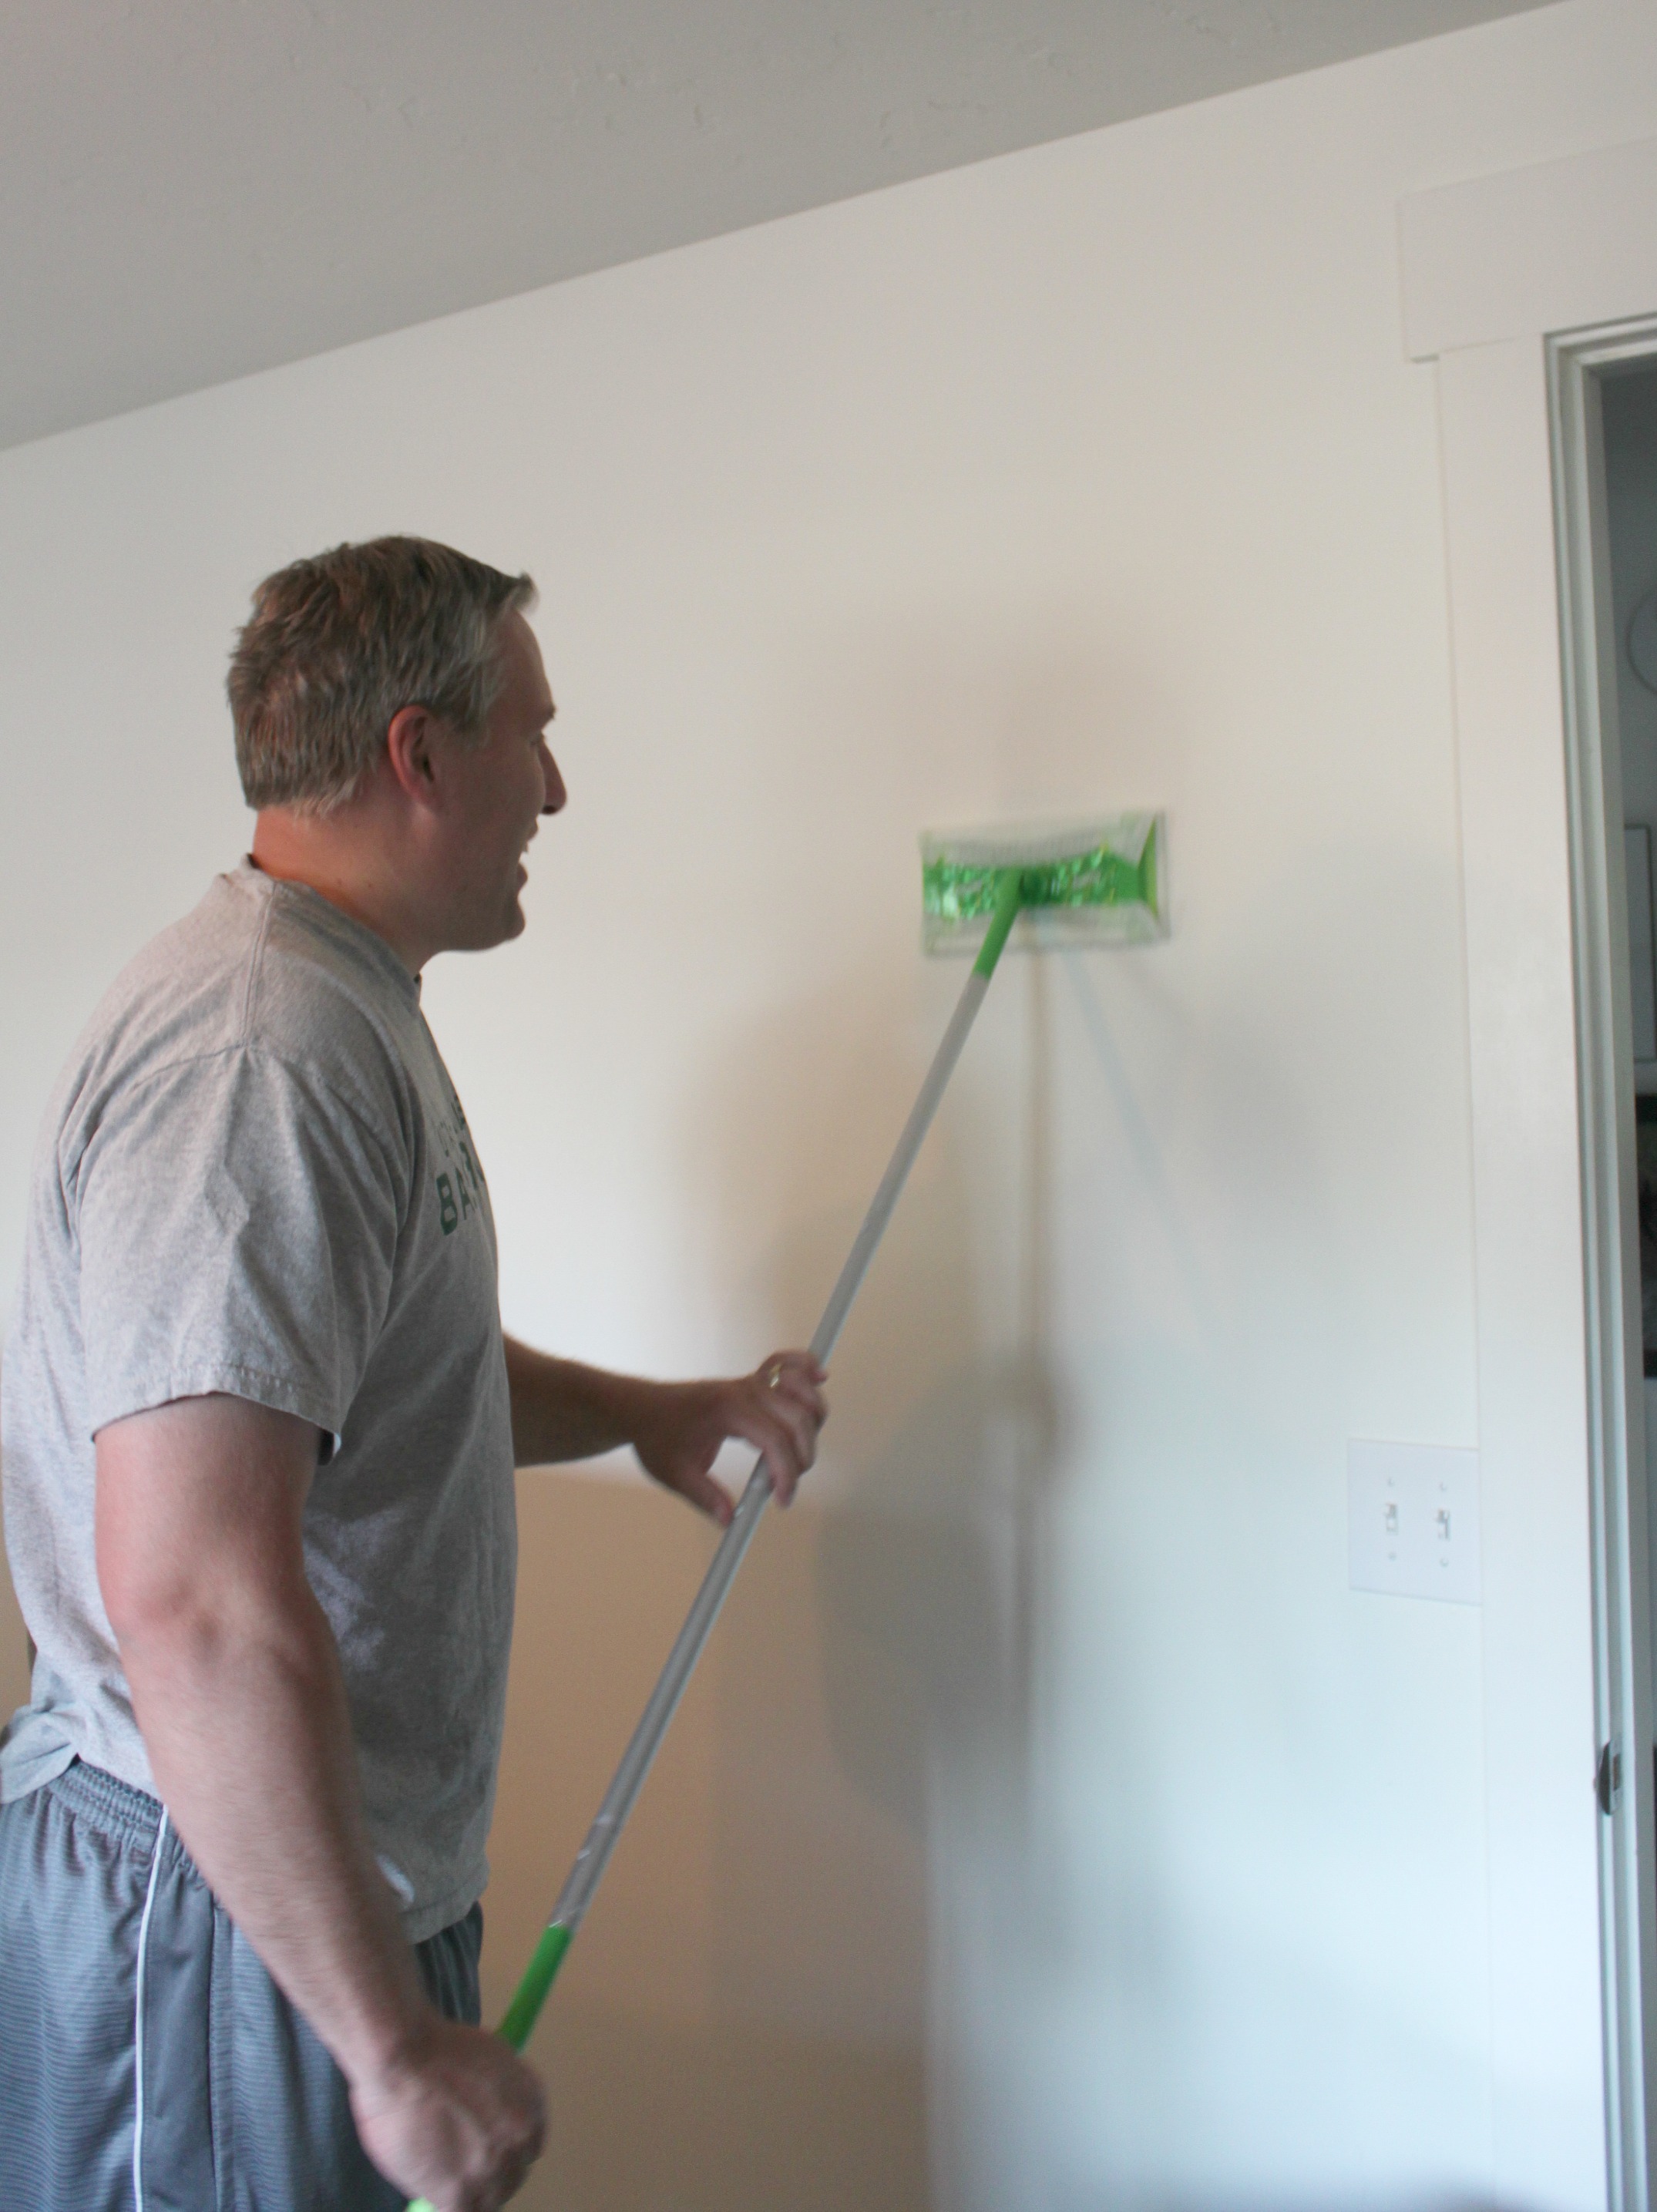
The long handle makes for quick work and easy reaching for large surfaces. My secret tip for getting windows and mirrors sparkly clean is first using my Sweeper on them then you have less dust and streaking to try and remove.
I also dust the surrounding areas near the project I will be painting. It’s the worst when you’re wall is all wet with paint then a door opens and blows dust right on to your surface.
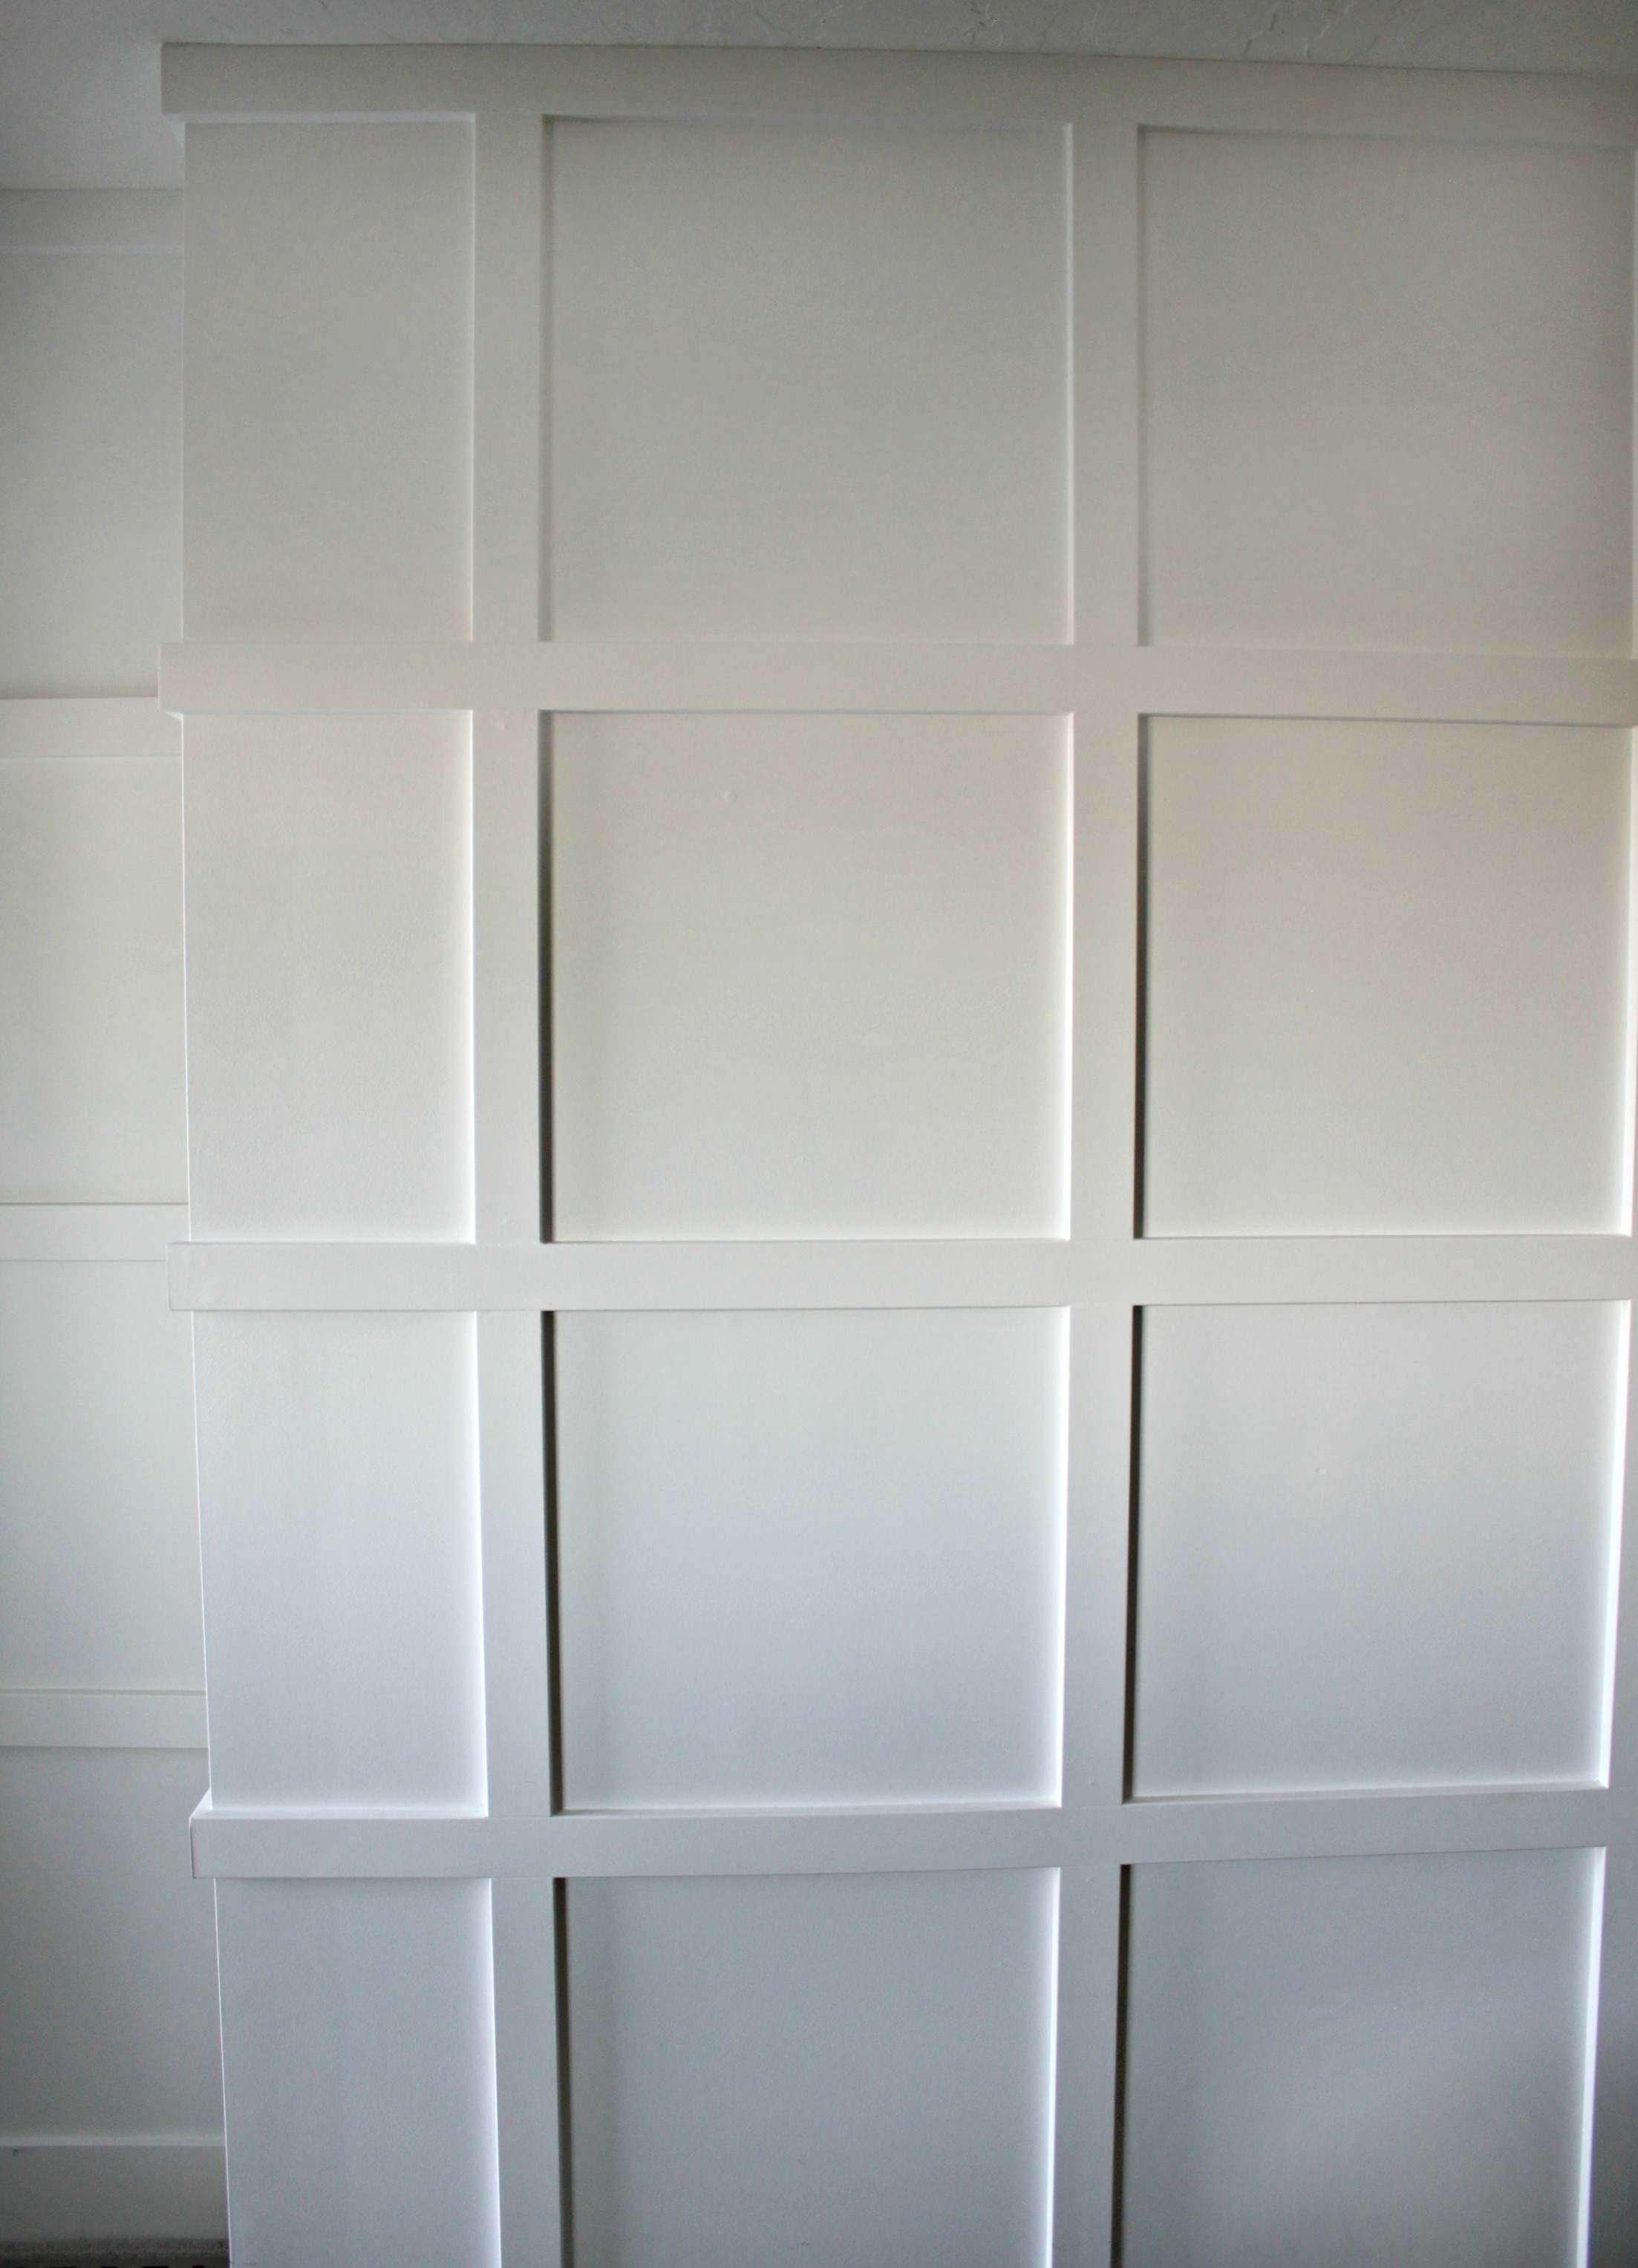
While I love the look of our new trim molding on three walls, from a cleaning standpoint, it takes bit of upkeep.
Each one of these ledges is a surface for dust to collect. It takes me about 6 minutes to go around my entire room and simply wipe each ledge on the walls with my Swiffer Duster then they’re all clean.
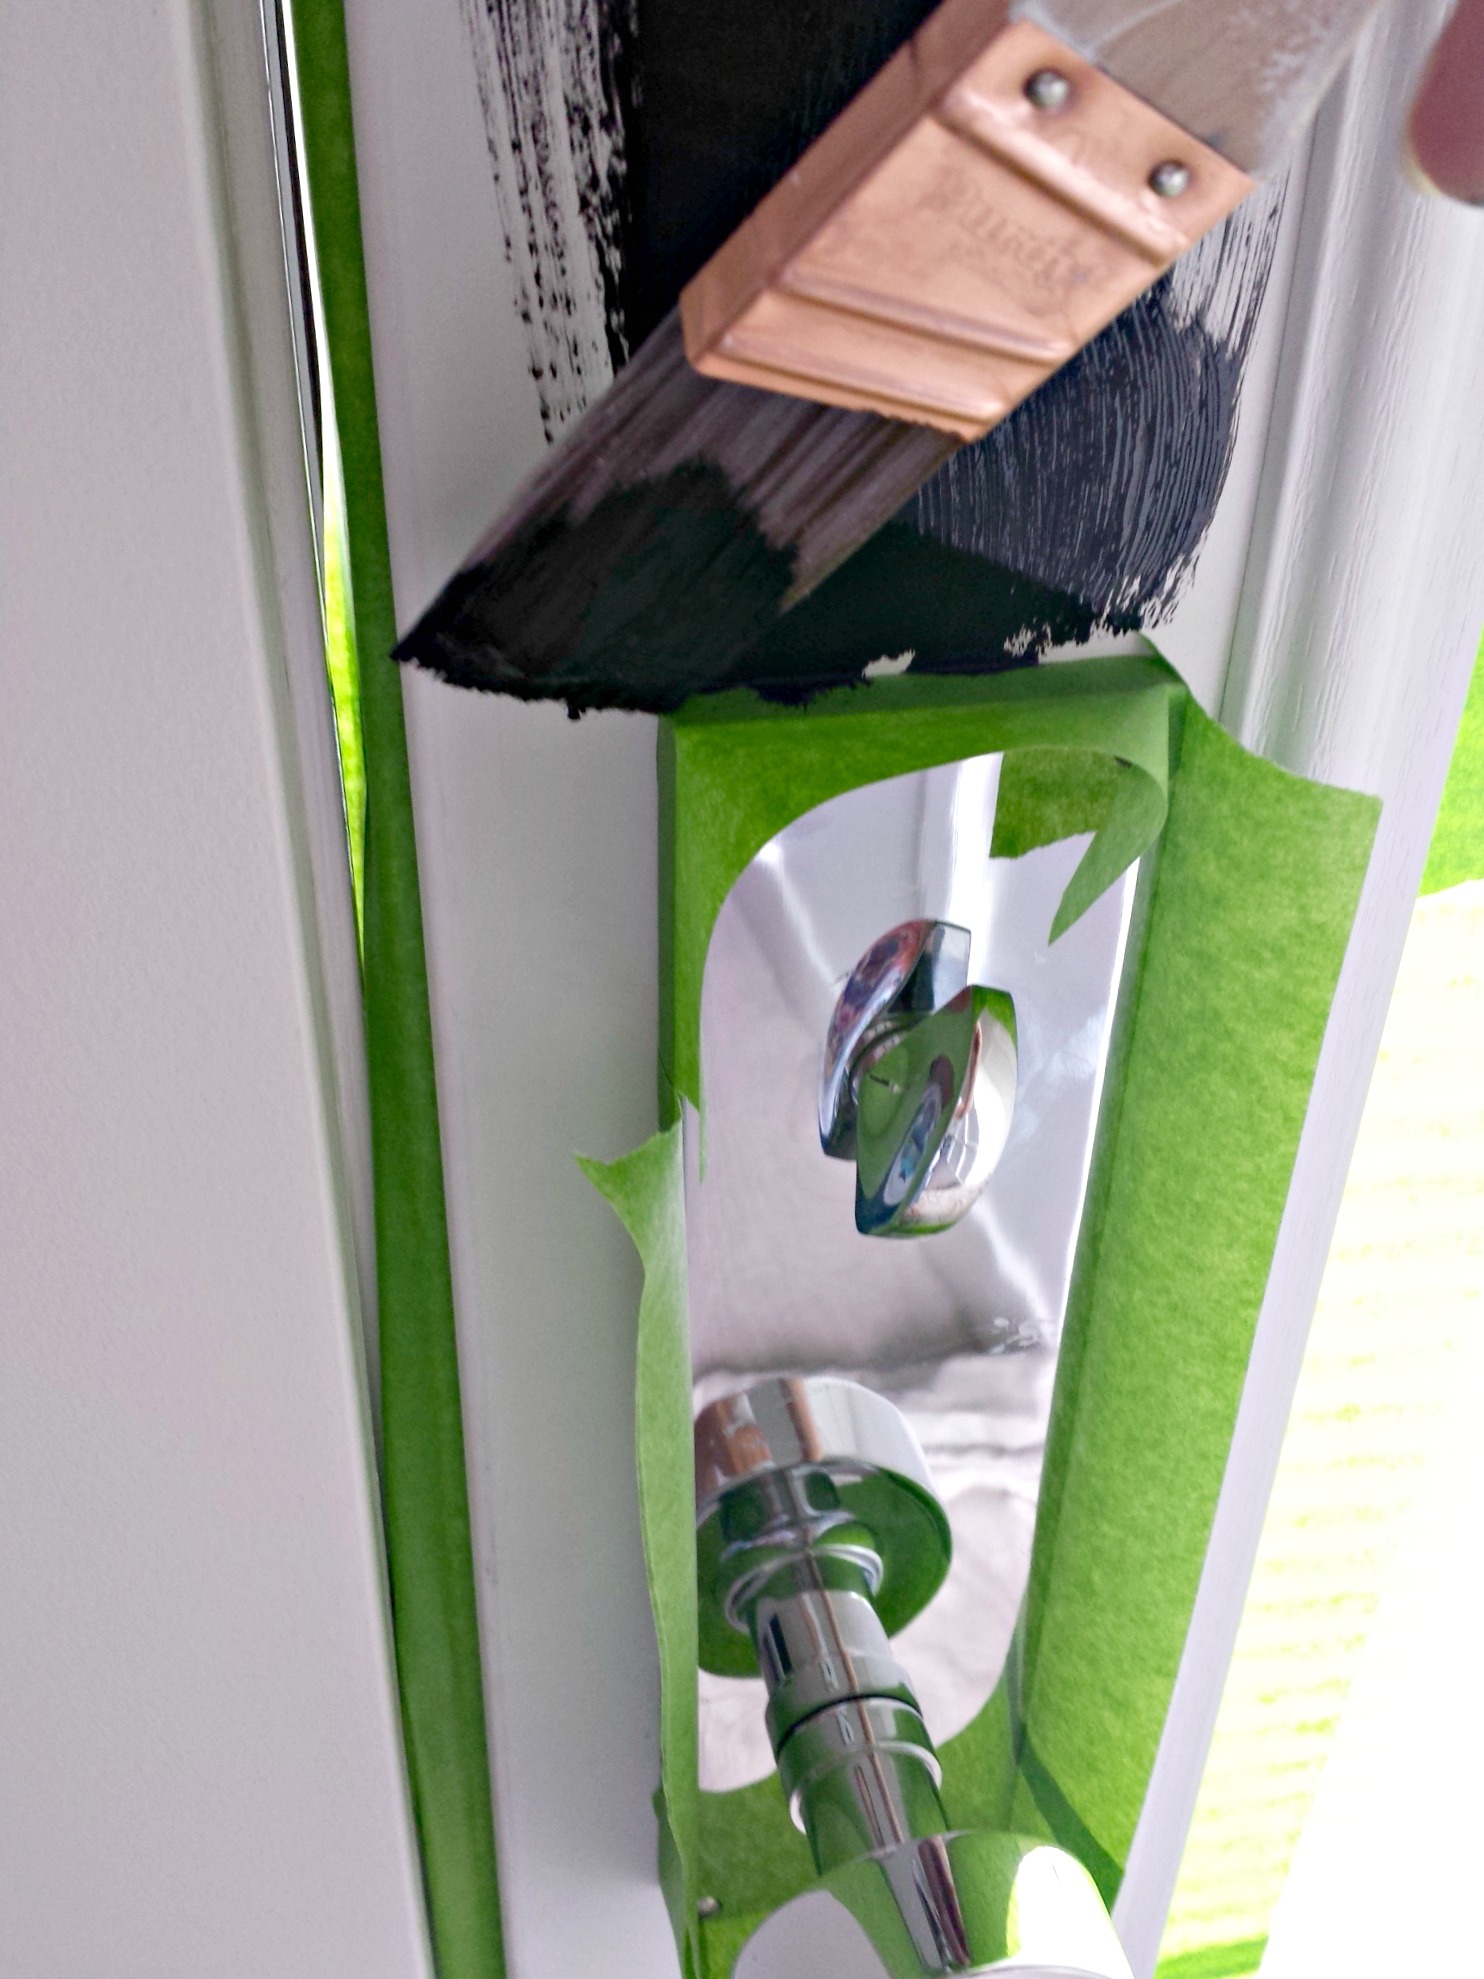
After taping I used a brush and roller to paint the door a glossy black. I don’t normally love paint strokes so I was extra careful to go over any brush strokes with the roller. Also, make sure to removed tape when the paint is almost dry (as in still just a tad bit tacky). That way you won’t be removing any paint off your surface that may have adhered to the tape in the drying process.
The final result:
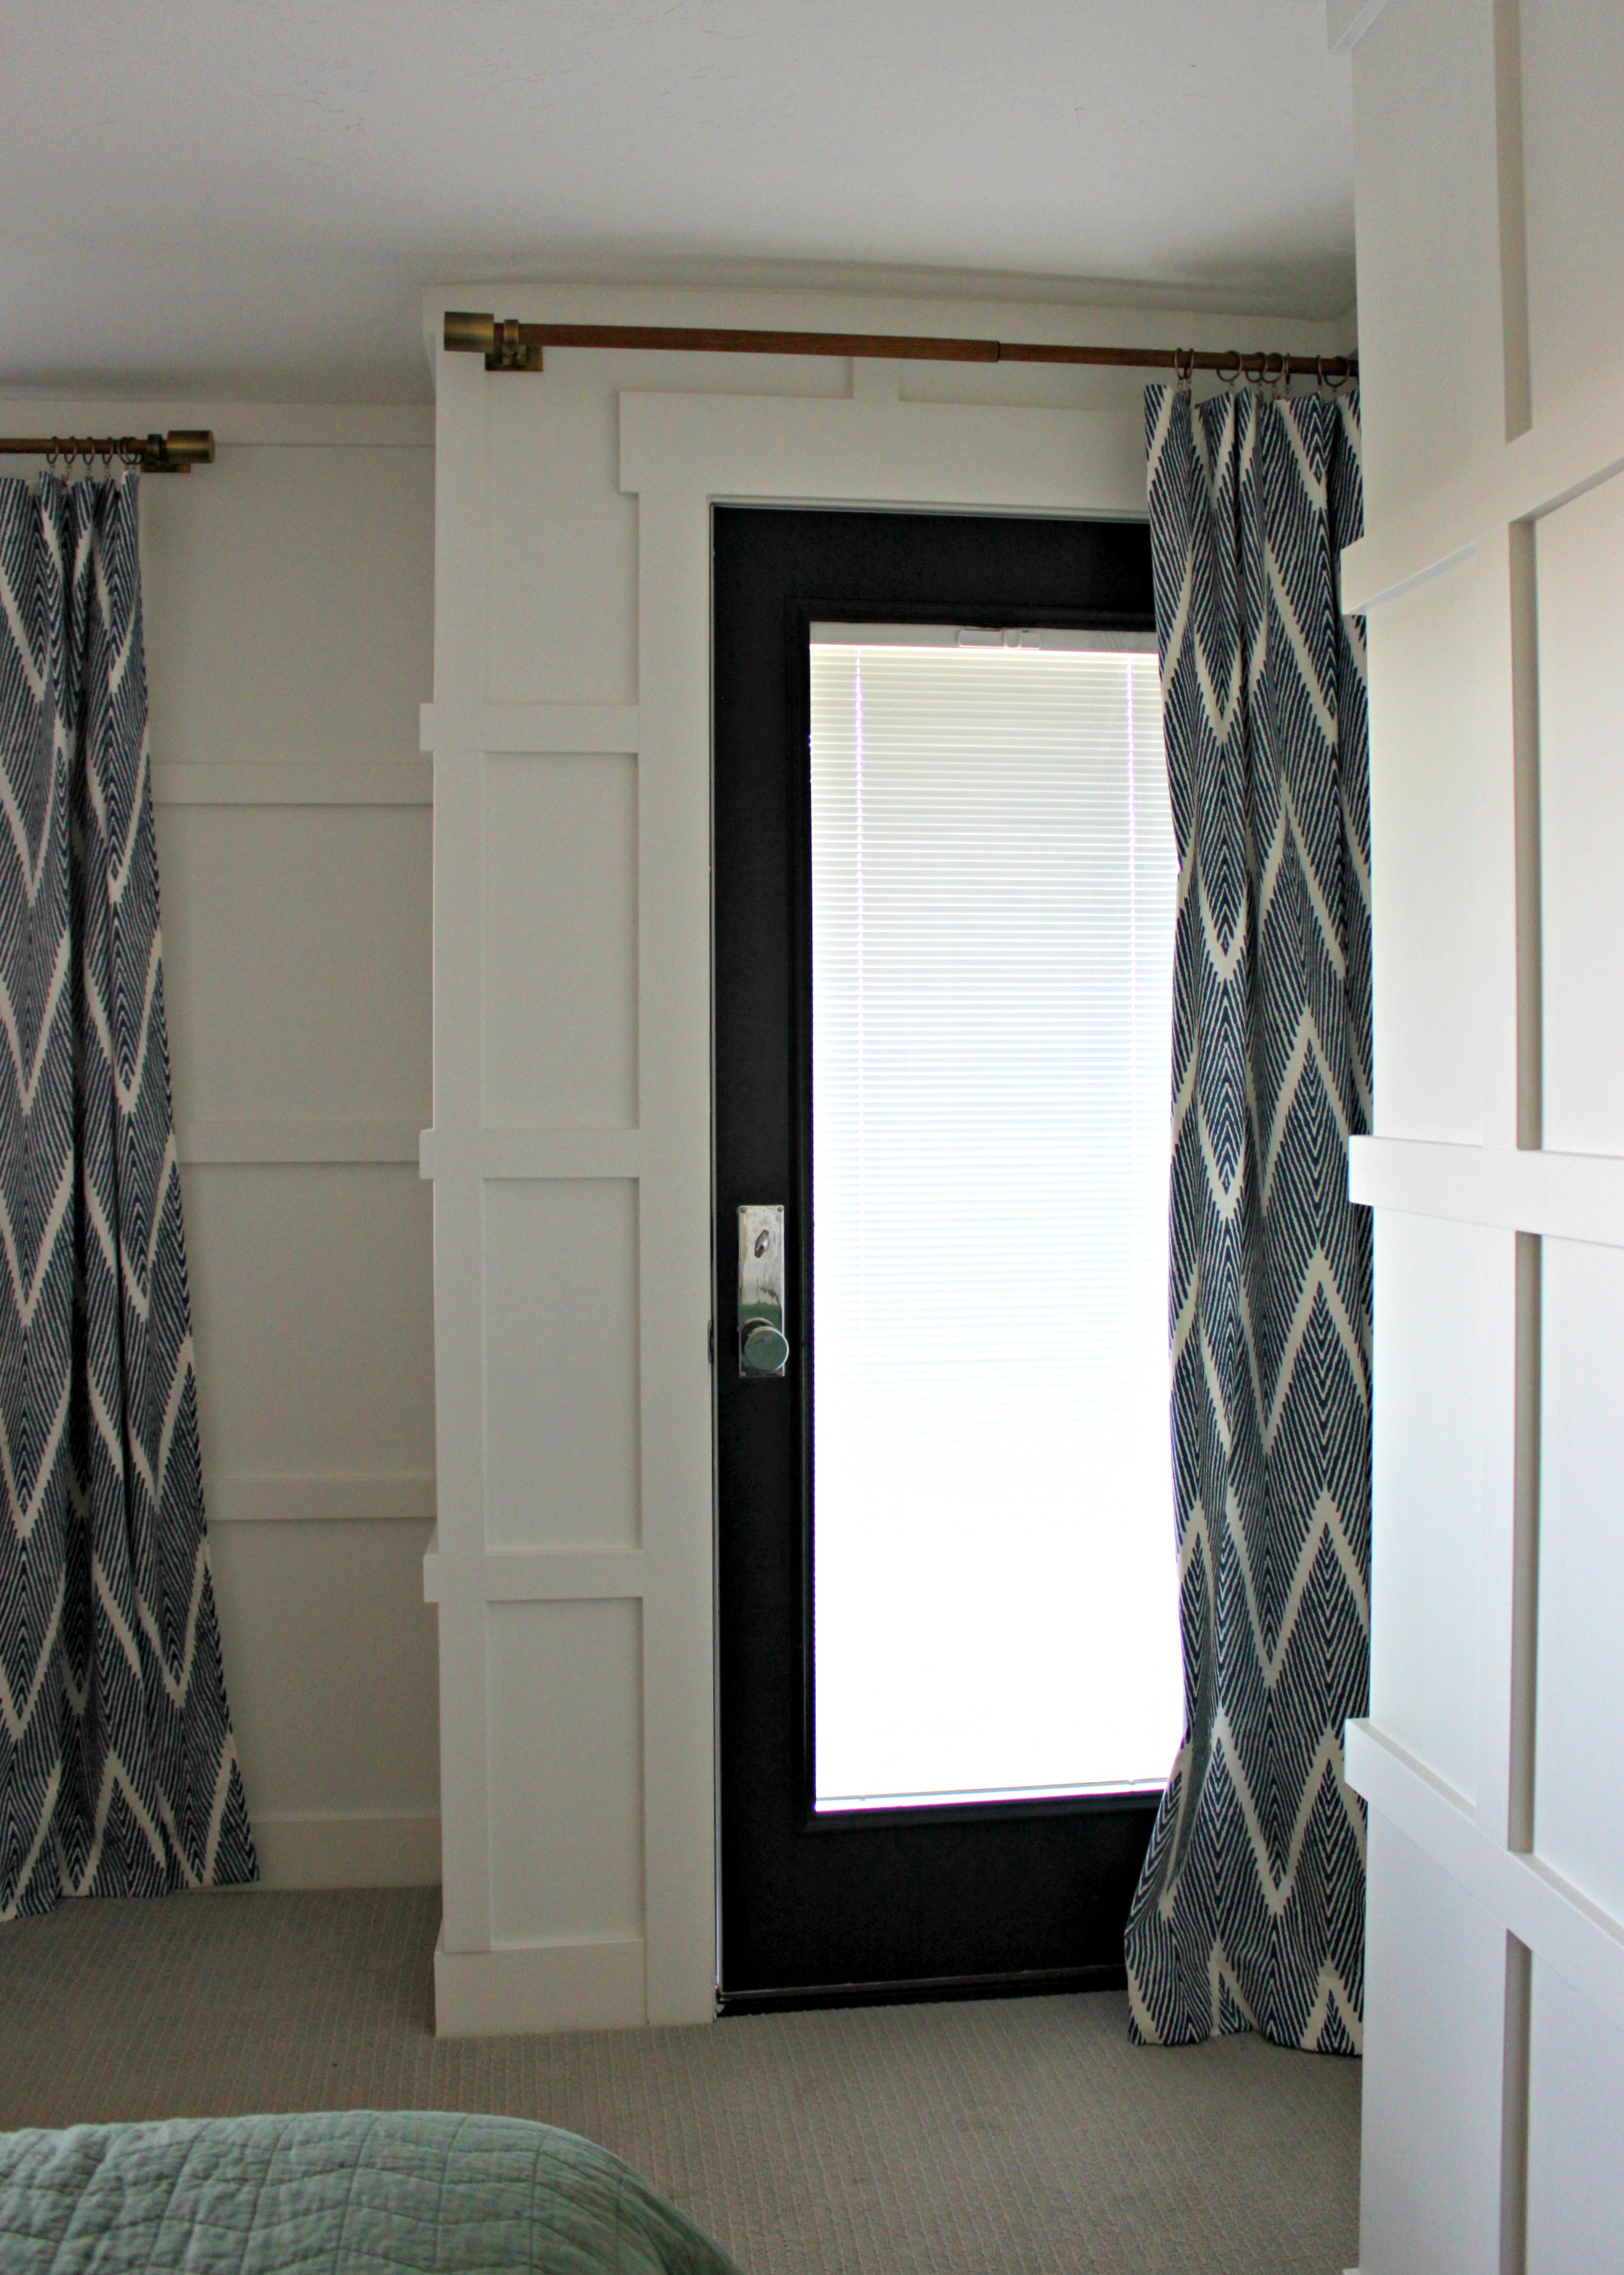
Now our door stands out and has presence rather than something that was lost in translation.
We also added some custom curtains to not only give that corner more visual interest but also add pretty and functional light control.
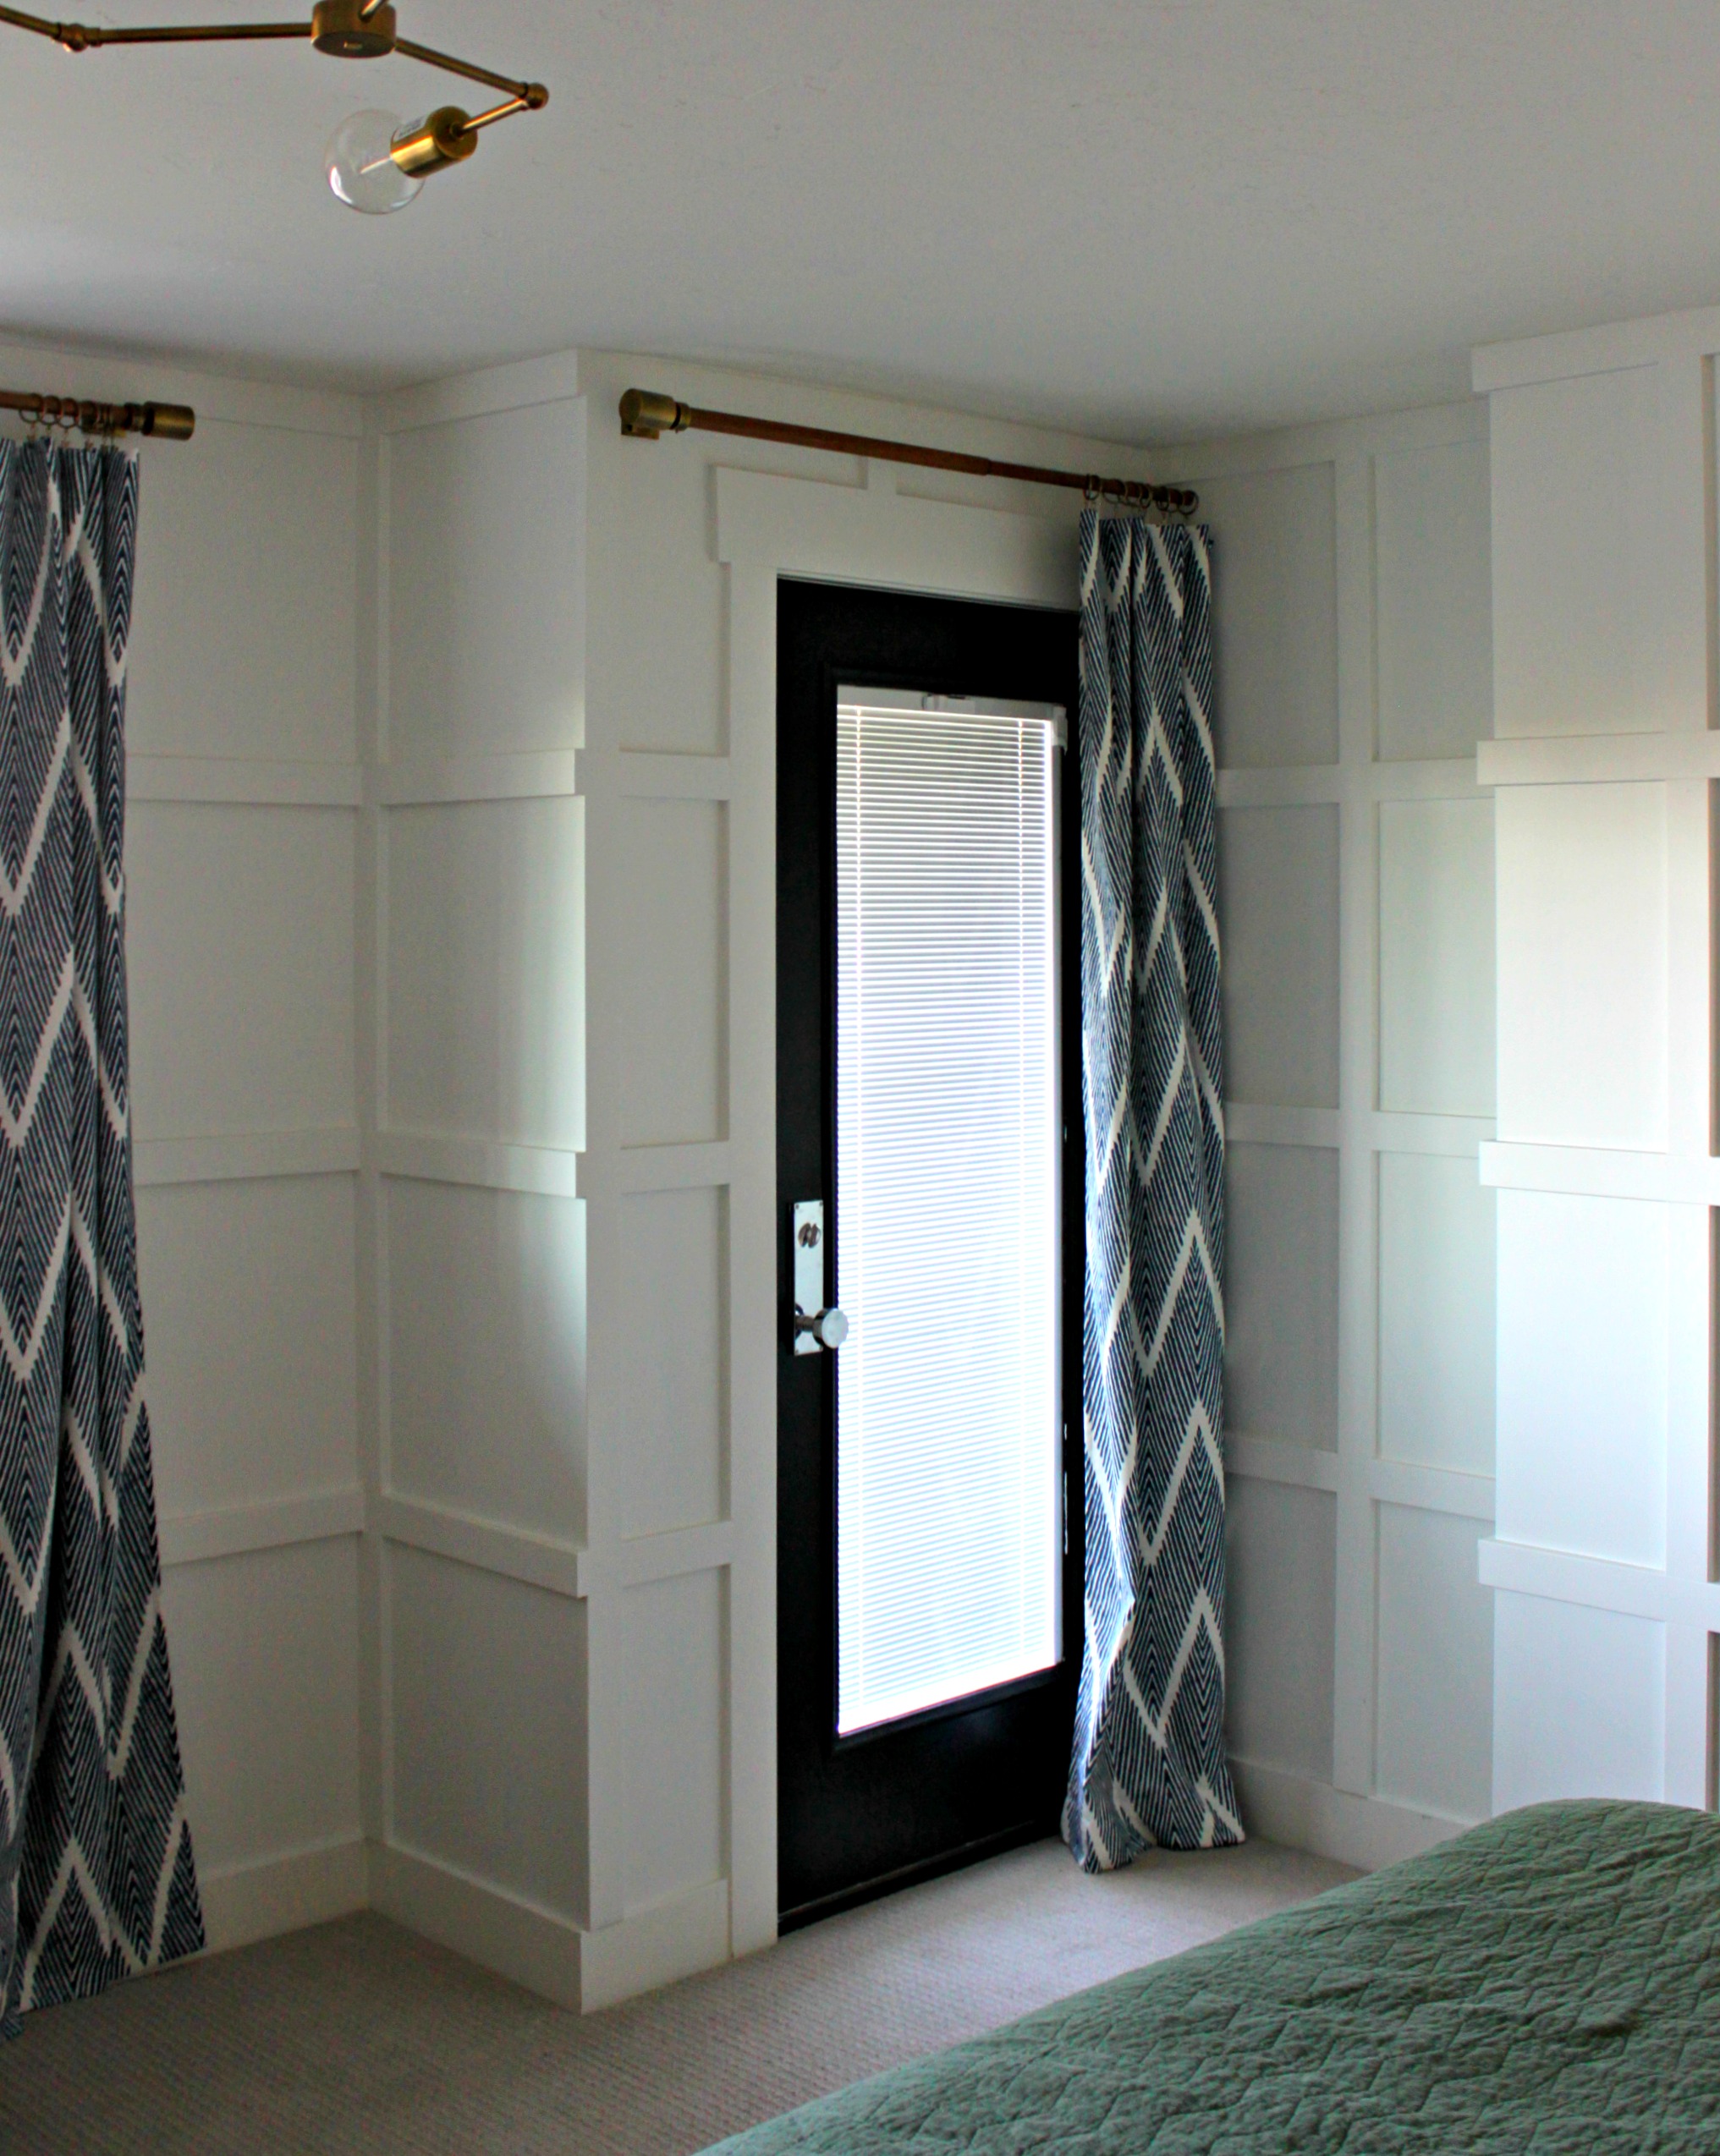
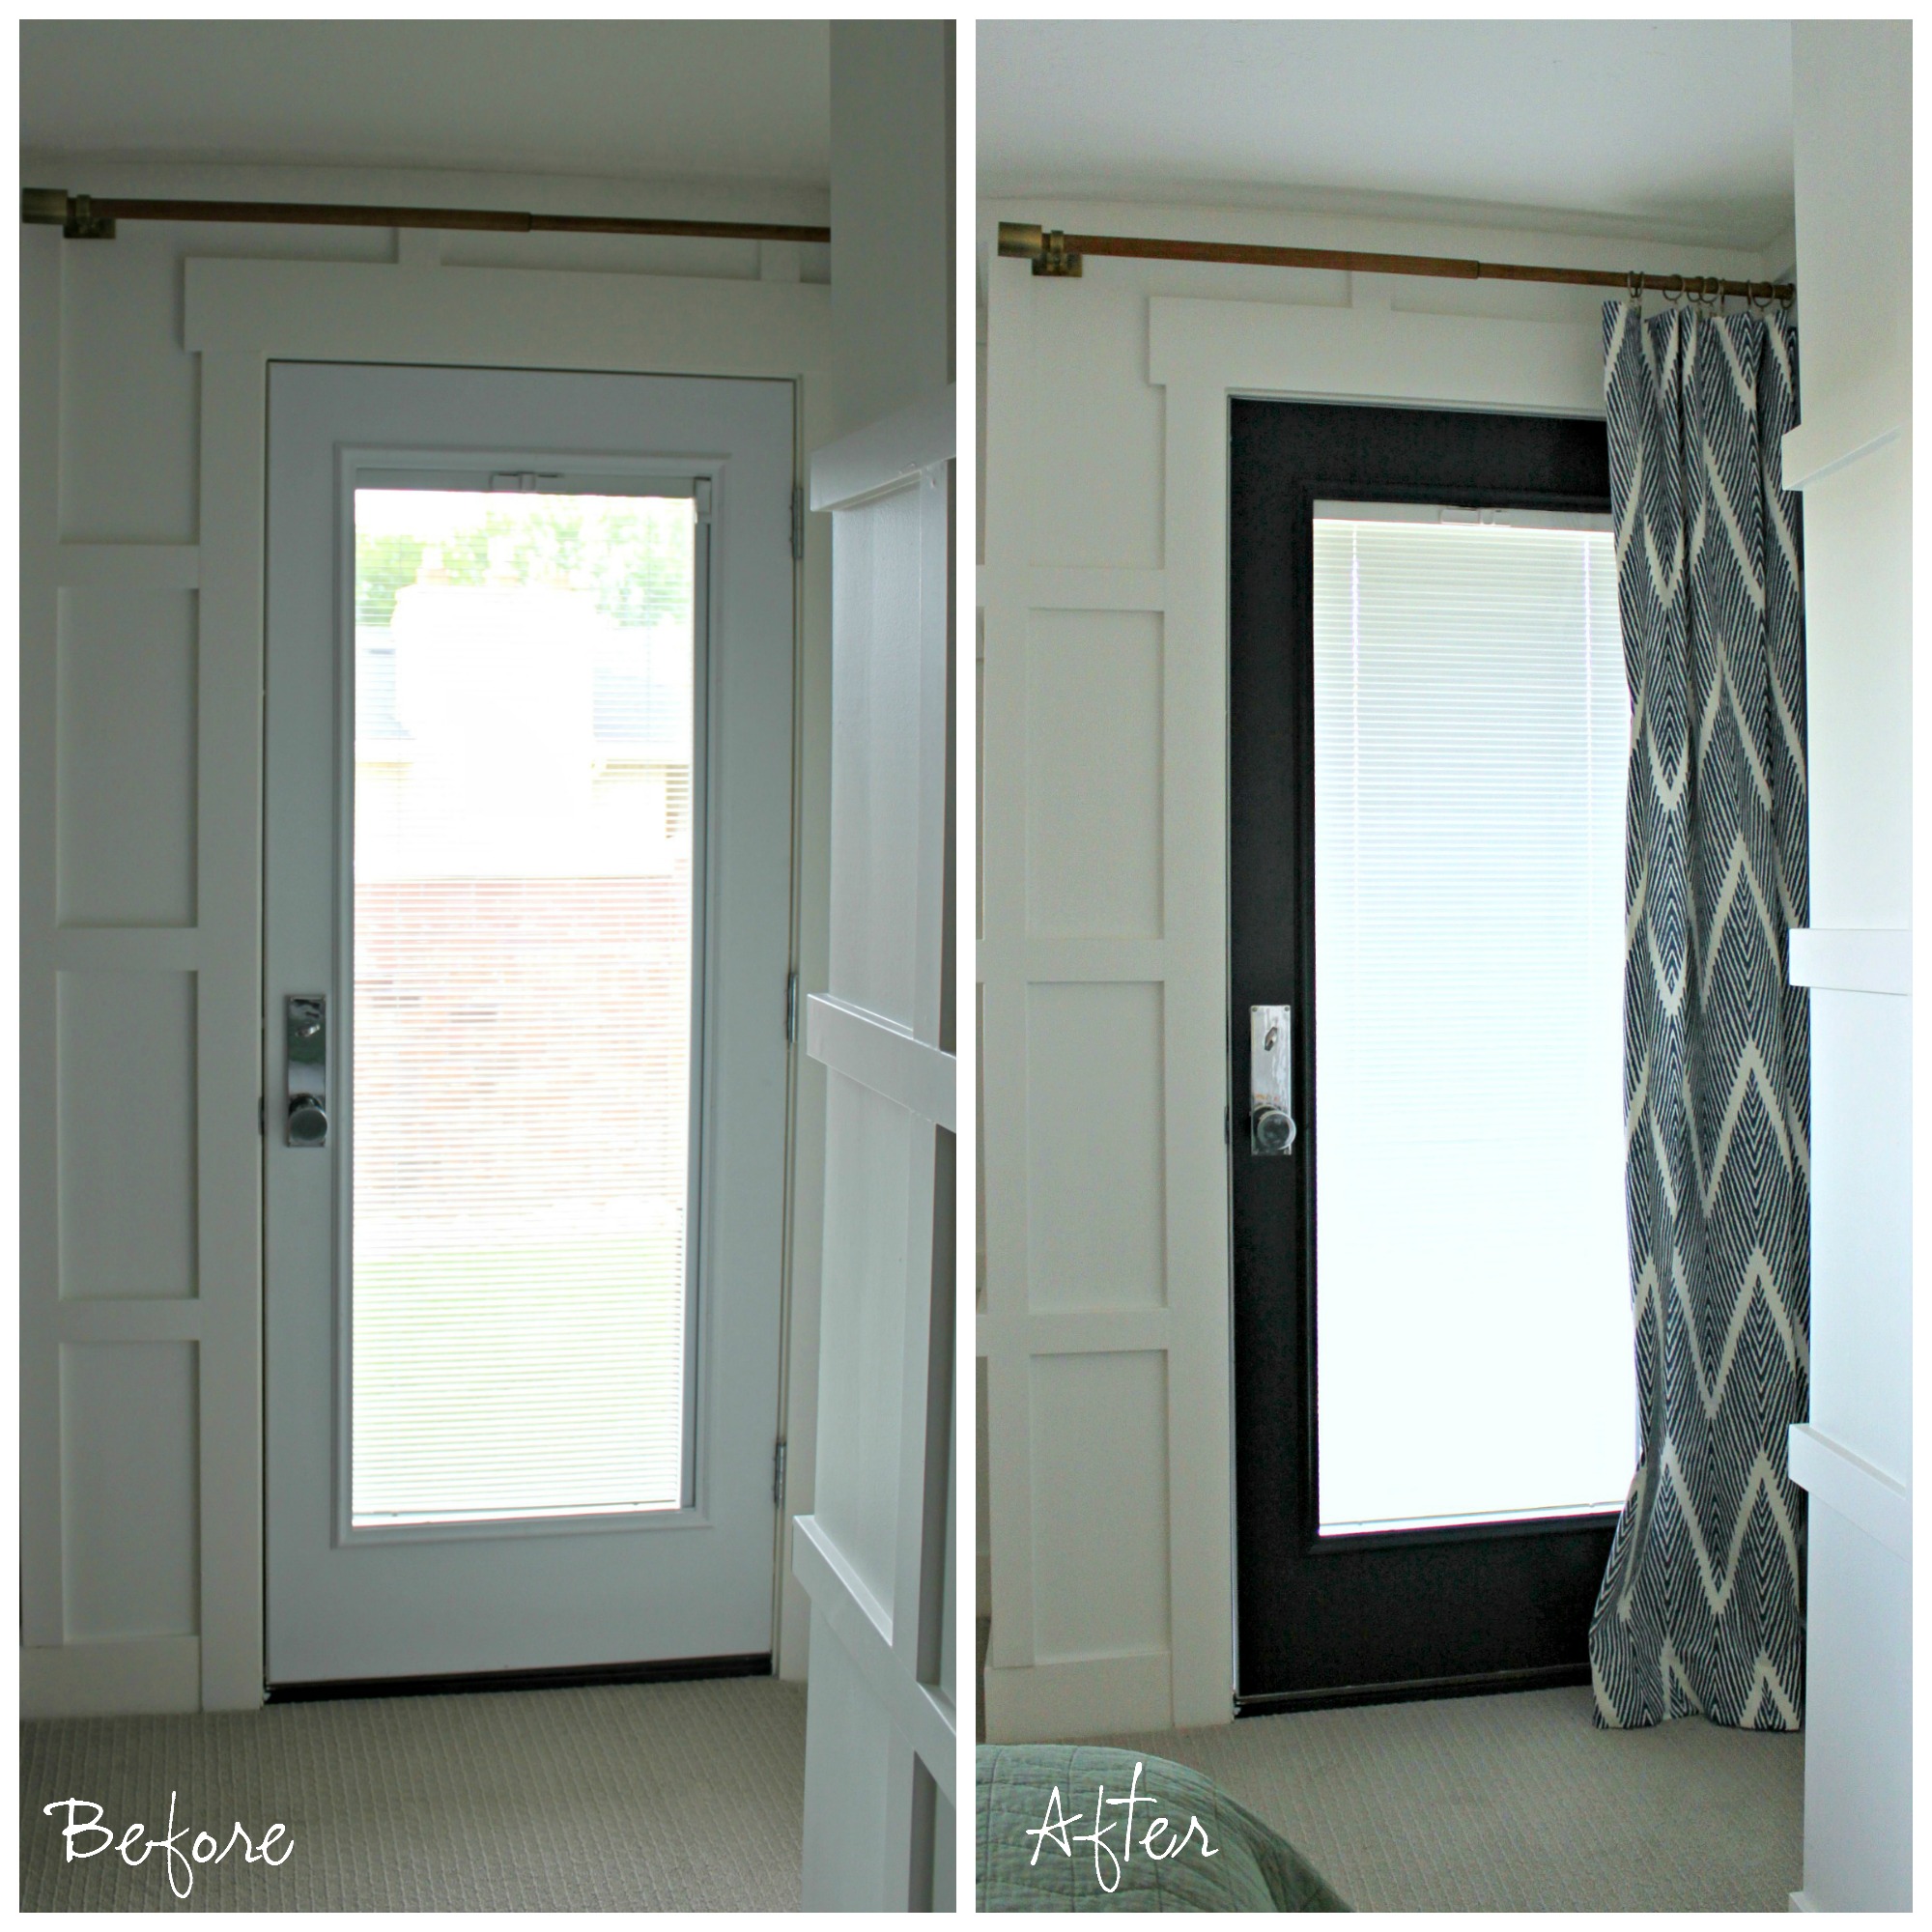
I’m so happy with the result and surprised at how much I stare at my new door. Amazing what a huge difference a simple coat of paint makes.
To read more about this and other projects hop on over to Find It At the Home Depot.
See full bedroom reveal here.


 Hey there! I’m Michelle; I’m an Passionate DIY’er and in constant pursuit of how to bring beauty to my house full of men (3 boys + 1 hubby). Stick around and see what I’ve got up my hard-working sleaves!
Love the black door. I just painted my entry door black on the interior and I’m thinking of doing all my interior doors now. Love the curtains, too. I’m heading over to the bedroom reveal post now to check out all the gorgeousness.
Thank you Eileen!